Wednesday, January 30, 2013
New Pumpkin Pie
Boy, have I got a lot to catch up on. The holidays are always crazy for me and then I was out of town just after for another two weeks! But all is well and I'm back, ready to share what went down over the last two months.
First, I made a new pumpkin pie recipe from a highly repinned Pintrest note... You know, I can't decide about Pintrest. There's pretty pictures, yes, but then I see people that try a recipe or craft and bemoan how misleading or awful it turned out! You go in thinking these are reliable, tested ideas! Alas it's just people promoting their own stuff a lot of the time so I guess I have to train my eye to recognize what's legit and what's not.
This one turned out to be a Cook's Illustrated adaptation and while it was okay, I dunno. The cream and milk diluted the pumpkin a bit and I like a looooot of pumpkin in my pie. My family liked it but, meh. For Christmas I went back to good ol' Libby's and it was way better, IMHO.
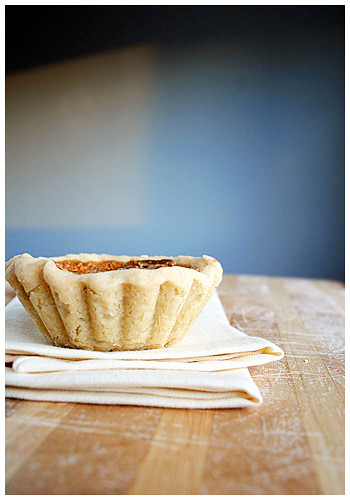
This recipe actually made too much for my pretty deep dish pie plate so I made a mini one extra - which I enjoyed by myself days later. mwha. Mini pie!
Pumpkin Pie
Cook's Illustrated, 2008
1 recipe for single pie crust (I used Williams-Sonoma's Basic Pie Dough)
1 cup heavy cream
1 cup whole milk
3 eggs plus 2 egg yolks
1 teaspoon vanilla extract
1 (15-ounce) can pumpkin
1 cup drained candied yams (from 15-ounce can)
3/4 cup granulated sugar
1/4 cup maple syrup
2 teaspoons grated fresh ginger
1/2 teaspoon ground cinnamon
1/4 teaspoon ground nutmeg
1 teaspoon salt
1. Prepare the crust and refrigerate for at least 1 hour.
2. Adjust the oven rack to the lowest position, place a rimmed baking sheet on the rack, and heat the oven to 400 degrees F. Remove the dough from the refrigerator and roll it out on a lightly floured work surface to a 12-inch circle about 1/8 inch thick. Roll dough loosely around rolling pin and unroll into pie plate, leaving at least 1-inch overhang on each side. Working around circumference, ease dough into plate by gently lifting edge of dough with one hand while pressing into plate bottom with other hand. Refrigerate 15 minutes.
3. Trim overhang to ½ inch beyond lip of pie plate. Fold overhang under itself; folded edge should be flush with edge of pie plate. using thumb and forefinger, flute edge of dough. Use a fork to prick the dough all over the bottom and sides of the pie plate. Refrigerate dough-lined plate until firm, about 15 minutes.
4. Remove pie pan from refrigerator, line crust with aluminum foil or parchment paper, and fill with pie weights or dried beans, filling the whole way up to the rim of the pie plate. Bake on rimmed baking sheet 15 minutes. Remove foil/parchment and weights, rotate plate, and bake 5 to 15 additional minutes until crust is golden brown and crisp. Remove pie plate and baking sheet from oven.
5. While the pie shell is baking, whisk cream, milk, eggs, yolks and vanilla together in a medium bowl. Combine the pumpkin, yams, sugar, maple syrup, ginger, cinnamon, nutmeg and salt in a large heavy-bottomed saucepan; bring to a sputtering simmer over medium heat, 5 to 7 minutes. Continue to simmer pumpkin mixture, stirring constantly and mashing yams against sides of pot, until thick and shiny, 10 to 15 minutes.
6. Remove the pan from heat and whisk in the cream mixture until fully incorporated. Strain the mixture through a fine-mesh strainer set over a medium bowl, using the back of a ladle or spatula to press solids through strainer. Rewhisk mixture and transfer to warm prebaked pie shell. Return pie plate with baking sheet to oven and bake pie for 10 minutes. Reduce heat to 300 degrees and continue baking until edges of pie are set and the center looks firm but jiggles slightly (instant-read thermometer inserted in center registers 175 degrees), 20 to 35 minutes longer. Transfer pie to wire rack and cool to room temperature, 2 to 3 hours. Serve with whipped cream.
Monday, January 17, 2011
Chocolate Pie for keeps

I'm not sure if I've mentioned this (I have) but I live in Alaska. It's cold. And dark. And every winter, I fight for every bit of sun I can when taking pictures. But when you get off work at 3pm and it looks like that up there at 3:30 in the afternoon, it's hard to stay enthusiastic about taking pics. Some years are better than others, though. This year, I had some time off over the holidays and I took FULL advantage.

My mom wanted to make something different for Christmas dessert because every year we have pecan pie, pumpkin pie, flan and magic cookie bars. She went with a pumpkin flan in lieu of separate pie and custard and I took the opportunity to try a chocolate pie. The pictures don't do it justice because this pie was awesome! Thicker than pudding but as smooth, and rich chocolate but not overwhelming. It's got just as many glowing reviews from Epicurious so you know it's not just me!
It was a little time intensive and took planning but it was totally worth it in the end. Keeper!

CHOCOLATE CREAM PIE
Source: Gourmet, via Epicurious
For crust:
1 1/3 cups chocolate wafer crumbs (from about 26 cookies such as Nabisco Famous Chocolate Wafers)
5 tablespoons unsalted butter, melted
1/4 cup sugar
For filling:
2/3 cup sugar
1/4 cup cornstarch
1/2 teaspoon salt
4 large egg yolks
3 cups whole milk
5 oz fine-quality bittersweet chocolate (not unsweetened), melted
2 oz unsweetened chocolate, melted
2 tablespoons unsalted butter, softened
1 teaspoon vanilla
For topping:
3/4 cup chilled heavy cream
1 tablespoon sugar
Make crust:
Put oven rack in middle position and preheat oven to 350°F.
Stir together crumbs, butter, and sugar and press on bottom and up side of a 9-inch pie plate (1-quart capacity). Bake until crisp, about 15 minutes, and cool on a rack.
Make filling:
Whisk together sugar, cornstarch, salt, and yolks in a 3-quart heavy saucepan until combined well, then add milk in a stream, whisking. Bring to a boil over moderate heat, whisking, then reduce heat and simmer, whisking, 1 minute (filling will be thick).
Force filling through a fine-mesh sieve into a bowl, then whisk in chocolates, butter, and vanilla. Cover surface of filling with a buttered round of wax paper and cool completely, about 2 hours.
Spoon filling into crust and chill pie, loosely covered, at least 6 hours.
Make topping:
Just before serving, beat cream with sugar in a bowl using an electric mixer until it just holds stiff peaks, then spoon on top of pie.
Cooks' note: Pie (without topping) can be chilled up to 1 day.
Thursday, June 10, 2010
Pies for your hands!
 If y'all don't know by now, I'm here to tell you: I LOVE STRAWBERRIES. And I have some kind of physical compulsion to buy them when they're so beautiful and fresh in the store. So I get home and have a couple containers of strawberries and say, 'Now what?'
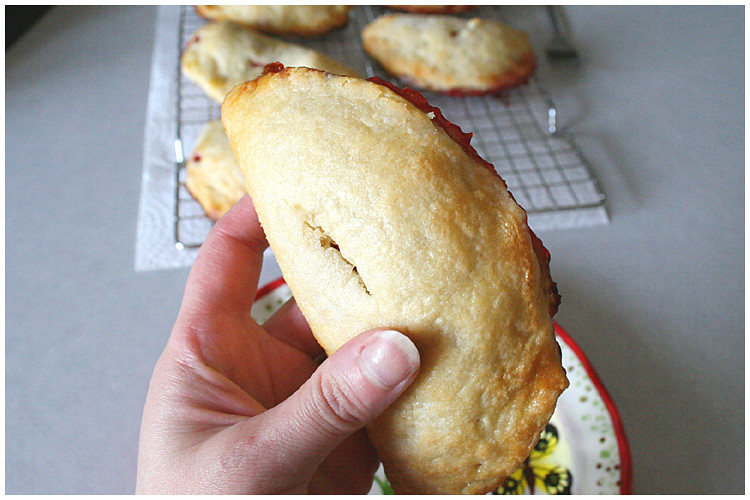
 This time, the 'what' was hand pies. I'm in constant search of an awesome pie crust and I think my search may be over. I found the strawberry hand pie recipe from Good Things Catered but their dough recipe called for buttermilk which I did not have. So I found one from Epicurious and holy cow. It came out damn near perfect. Flaky and buttery! I don't even care about the filling as long as the crust is good!! To be honest, it's my favorite part of pie. Add a scoop of vanilla ice cream and it would've been perfect! I can't wait to make it in a whole sized pie and see if it comes out as good.
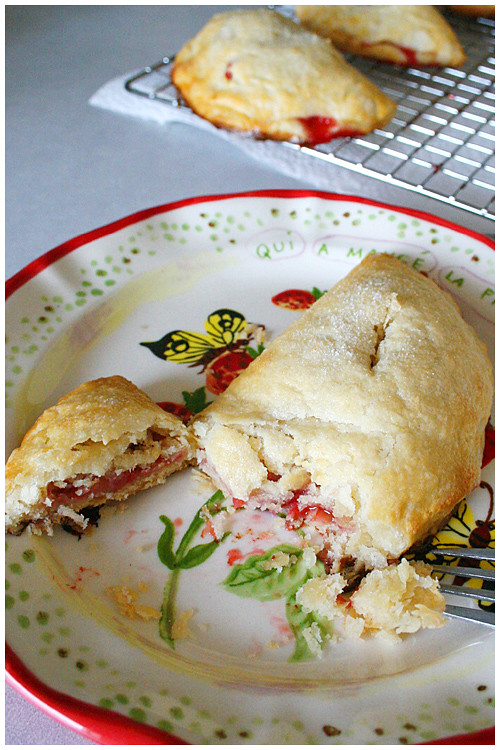 The recipe from Good Things Catered calls for 3 cups of strawberries and that was a little too much for the pie dough that I had. I cut that by a cup but kept the sugar content because my strawberries were actually a tad tart. I wish I would've tasted before I baked; I would have added more sugar. So TASTE YOUR BERRIES and then judge how much sweetness needs to be added. Mine needed a bit more.
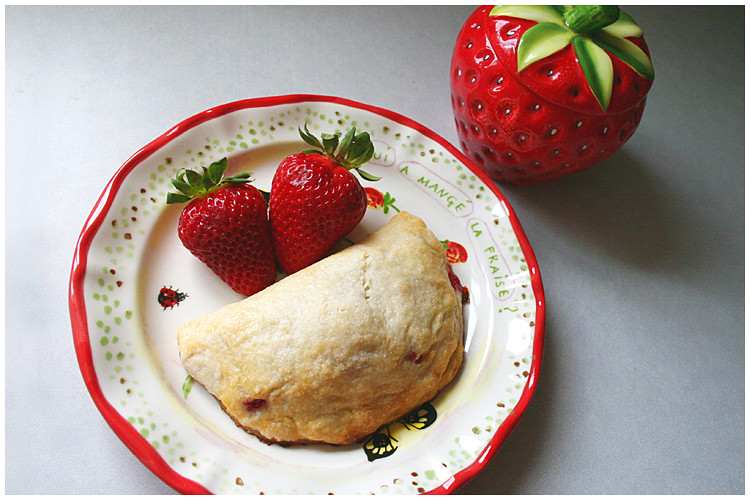
But overall, this was a smashing success, mostly because I CONQUERED PIE CRUST. And they're so darn cute! Lookit the widdle hand pies!
 PASTRY DOUGH
Adapted from: Epicurious (Original recipe for full pies here.)
2 1/2 cups all-purpose flour
1 1/2 sticks (3/4 cup) cold unsalted butter, cut into 1/2-inch cubes
1/4 cup cold vegetable shortening (preferably trans-fat-free)
1/2 teaspoon salt
5 to 7 tablespoons ice water
Freeze cubed butter and shortening until frozen; 15-30 minutes. Combine flour and salt in food processor to mix. Add butter and shortening and pulse until mixture resembles coarse meal with some small (roughly pea-size) butter lumps. Drizzle 5-7 tablespoons of ice water over mixture while lightly pulsing until just incorporated. Do not overwork dough, or pastry will be tough. (Personal note: I usually process until it forms a ball and this time, I decided not to. I used 6 tablespoons of water and the mixture did not pull together. Instead, it was clumpy but when I pressed with my fingers, it held. There were dots of butter visible in dough.)
Turn dough out onto a powdered sugar-dusted work surface and form together. Cut pie dough in half and form into two disks. Wrap both portions in plastic wrap and freeze. Pastry dough can be chilled up to 2 days ahead.
STRAWBERRY HAND PIES
2 cups fresh strawberries, hulled and quartered (or cubed; make small pieces)
2 Tbsp granulated sugar
2 tsp fresh lemon juice
2 large eggs, lightly beaten
Turbinado sugar for sprinkling
Preheat oven to 400 degrees and line baking sheets with parchment.
Let frozen pie dough disk defrost, 30 minutes to an hour. Dough should be very cold and hard to roll out. Roll onto a powered sugar-dusted work surface to about 1/8 in thickness, moving and turning over constantly to avoid sticking. Using round pastry cutter (or trace knife around small plate), cut out about 5-6 inch rounds.
Place round onto baking sheet and place about 2-3 Tbsp strawberry mixture into center.
Brush the top of the pie with egg mixture and sprinkle with sugar. Use a small knife to make a 1 inch slit in the top of the pie for steam to escape. Repeat with remaining pastry dough.
Monday, February 1, 2010
Chocolate and failure
I would be lying if I said I hadn't baked since those little pumpkin pies, way back in October. I've baked plenty. The holidays always bring out the excitement in me so I made my annual peanut butter blossoms, sweet potatoes for Thanksgiving and a bread pudding for my dad visiting. So baking was going on, I simply didn't have the time (or natural lighting of daylight to take pictures thanks to living in this eternal night wasteland called Alaska; DEAR MIDNIGHT SUN SUMMER, WHERE ARE YOU). But I digress. There's been baking but no posting. Which brings me to now.
I got another idea in my head that I couldn't shake. A pie. A chocolate pie. And Julie & Julia was no help; just as Keri Russell's pie maker in Waitress whipped up a dark chocolate pie, so too did Amy Adams in that flick and both immediately inspired me to want one of my own. But this idea was very specific; it was of a dense but soft, almost cheesecake-consistency but not. Something you could cut into but would melt in your mouth with a not too overpowering taste. Almost a flourless chocolate cake but not so strong. Anyway, I went on the hunt.
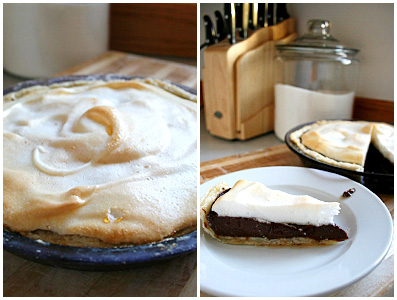
The first chocolate pie I found was a "grandma's" recipe so I thought, hey, that might work. I don't understand why they're not just called chocolate PUDDING pie because that's what they are. Or is that assumed? I don't know; I've never had someone else's chocolate pie. I imagined something dark and rich and solid and that certainly wasn't. Also, the crust called for oil as the fat and after reading The Best Recipe book, it explains that oil makes for a hard crust because it holds no water that can evaporate during the cooking process and release air that makes crusts usually pocketed and flaky. Yeah, I'm never using oil in pie crust again.

The next I tried was from a friend from work who I often discuss cooking techniques with. She has a wealth of experience and she's an awesome source of help. She gave me a Fudge Pie recipe and I thought, Ooo, that sounds promising! Thick like fudge! I made it and it wasn't quite as thick as fudge. My version was definitely thicker than the pudding pie and it tasted lovely but it was still pretty soft (more like a soft cheese consistency) and not exactly what I was searching for.
Then I started rifling through my mom's old newspaper cut-out recipes and booklets. I found a Fudge Brownie Pie in an old Eagle Brand recipe booklet and figured a thicker, brownie consistency might be just what I'm looking for. Yeah, no. It tasted like a brownie in a completely unnecessary pie crust. Disappointment continued.
Upon talking it over more with my mom, I began to realize I was really in search of one thing: a silk pie. And not a FRENCH silk pie because those seemed to be more airy and light and with whipped cream and such. But a silk pie like the kind we used to get all the time from one business that pulled up stakes and moved out of town: the Alaska Silk Pie Company. Yeah, they're not in Alaska anymore and they charge around $40 to send about a 6" pie here. But their pies are heavenly. That can't be denied.

So I went looking for silk pie recipes. The thing about silk pies is they're not baked and raw eggs are used. On their cooking channel special, the creator of the Alaska silk pies said she used 'pasteurized eggs'. Well, the only thing we could come up with was Egg Beaters. (I've since discovered techniques for home pasteurizing that are intriguing...) I found a seemingly simple French Silk pie recipe I figured I could weigh down with less beating and went to using Egg Beaters. It curdled up on me about 2/3 of the way through. I freaked out and called Mom for advice. She said throw it in the blender and that did the trick perfectly: it went back to a nice, smooth consistency. It called for refrigeration but when I uncoiled the spring form pan, it barely held together and it was, unfortunately a true French Silk filling; it was meant for a pie crust and meant to be soft. The other thing that bothers me a little is the fact that Egg Beaters is mostly egg whites which have a higher water content than whole eggs. Did that have something to do with the consistency? Perhaps.
So here I am. Four failures in and nothing to show for the quest. My mom caved and ordered an Alaska silk pie just to have a reminder and it was just as good as we remember. I'm afraid I'm going to have to try again because it was just so lovely.
As for posting, I will attempt to keep up here too; even when my kitchen is a den of failure. This blog is to chronicle ALL my adventures. Especially the losses so I won't make the same mistakes. NEVER FORGET.
Saturday, October 31, 2009
Happy Halloween!
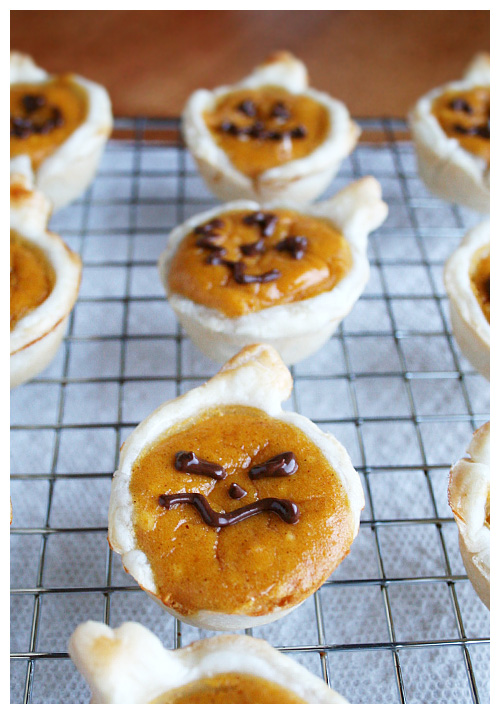
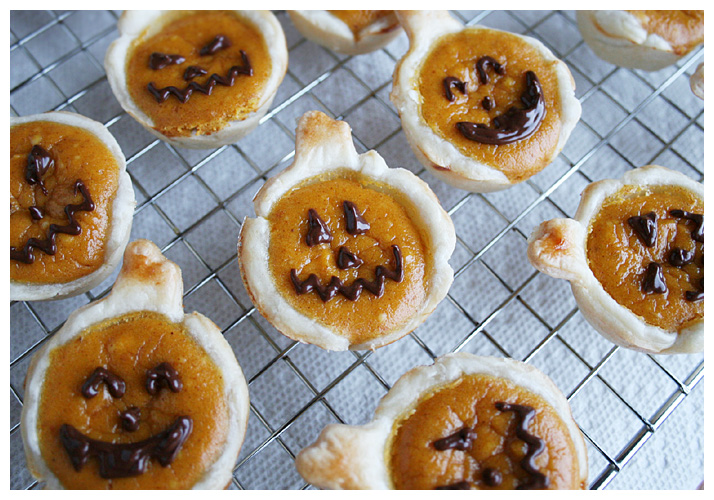
 I think these are kind of perfect in every way. Cute, Halloween-y, pumpkin, bite size; the list of their attributes goes on and on! I found them posted on Facebook by a friend and was shocked to find I'd never heard of Bakerella before. Her blog is AMAZING. It's such a treat to find a baker that is both creative and imaginative in their recipes. I want to thank Bakerella for sharing such darling ideas with the world!
I took these little cuties to work for the Halloween bake sale and they went like hot cakes! I was a little sad to see them go so fast, to be honest; I would've made more if I had known two pie crusts (a top and bottom) made only 24 little pies and that they tasted so yummy. And 24 seemed like a lot until I took them in and they disappeared! Needless to say, they were well received!
This is a definite keeper recipe!!
MINI PUMPKIN PIES
Source: Bakerella
2 refrigerated ready-to roll pie crusts
8 oz. cream cheese, room temperature
1/2 cup sugar
1 cup canned pumpkin
2 eggs + 1 egg white
1 teaspoon vanilla
1 teaspoon pumpkin pie spice
Pumpkin-shaped cookie cutter
Optional
1/2 cup chocolate morsels
vegetable oil
re-sealable plastic bags
Preheat oven to 350 degrees.
Use cookie cutter to cut 12 pumpkin shapes from each pie crust. You will need to roll the dough thinner than it comes out of the box.
Press dough shapes into a 24 cup mini muffin tray. (Make 12 at a time, alternating cups to make sure pie crusts don’t overlap each other.)
Brush egg whites from one egg to the top edges of each pie. Mix cream cheese, sugar, canned pumpkin, remaining 2 eggs, vanilla and pumpkin pie spice together until thoroughly combined. Spoon mixture into each pumpkin-shaped pie crust. Bake for 12-15 minutes.
Remove pies to cool and repeat with second pie crust. Place the muffin tray in the freezer to cool it quickly for re-use.
Makes 24 pies. Keep refrigerated.
To decorate, melt chocolate in a heat-proof bowl in the microwave on medium. Heat in 30 second intervals, stirring in between until melted. Add a little vegetable oil to make the chocolate more fluid. Transfer to a re-sealable plastic bag and cut the corner off. Drizzle or draw faces on pies.

Friday, December 5, 2008
Mini Pies!
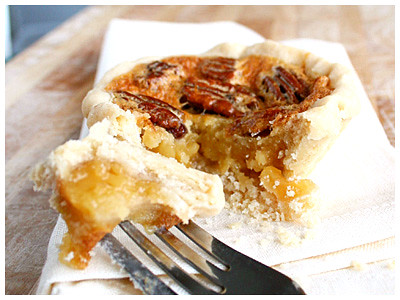
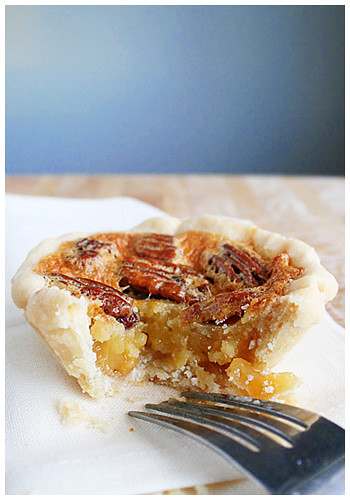
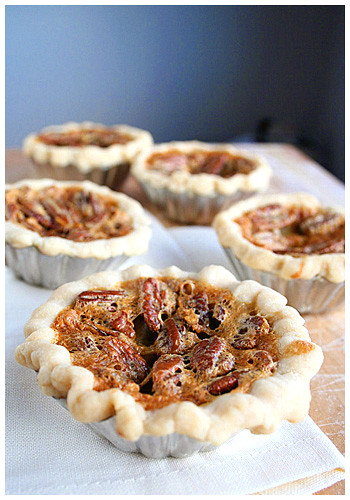 As I mentioned in the last post, I made a chocolate pecan pie for work and didn't get to taste it. Then my mother made the same pie for Thanksgiving and I had a small piece (because there were three pies to sample!). So the week after Thanksgiving, I realized I didn't get my pecan pie fix like I shoulda. I didn't want to make a whole pie for myself. C'mon give me some credit; I do have some control. However I needed it so the solution was clearly MINI pie.
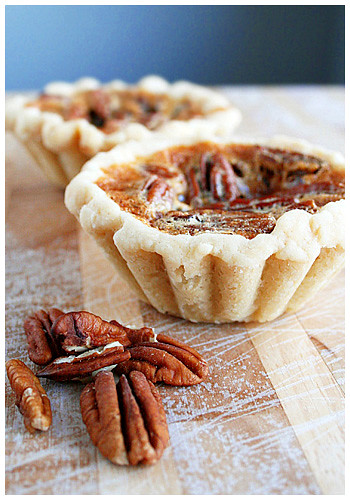 I used the same Pecan Pie recipe from the last post (without the chocolate) and simply split the filling recipe in half. I used the equivalent to one pie crust and it made five mini tart/pies. The only adjustment I had to make was to the baking time: I lowered the temperature to around 320 degrees and it ended up baking 40 minutes or so. The toothpick test will let you know when they're done!
Sunday, November 30, 2008
Invisible cakes and pies
 Okay, here's the thing: I HAVE been baking over this past month. However. It's been for work parties and such so I haven't been able to take proper pictures and cut them open, etc. Unless I cut a piece out and took it to work that way. 'Happy Birthday! Oh BTW, I already had a piece. That's cool, right?'
So I've made a pumpkin cake with cream cheese icing which was pretty all right. I'd make it again (and might so I can post about it and someone other than my coworkers can taste it). I also made a pumpkin pie for Thanksgiving that was an experiment that I didn't love. It involved a crumb topping that didn't work out. I won't make that again.
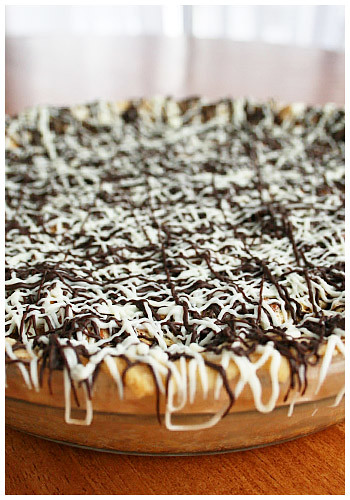
Then I made a chocolate pecan pie which is a Thanksgiving tradition in my family. It's very rich and very sweet but we love it; we have it every year. It might look like a lot but trust me, if your tastes run decadent, this pie is definitely for you.
 SOUTHERN CHOCOLATE PECAN PIE
1/2 cup sugar
1/4 cup butter (melted)
1 cup light corn syrup
1/4 tsp salt
1 tsp vanilla
3 eggs
1/2 cup chocolate chips (plus more for drizzling on top)
1 to 1/2 cups pecans
1 9-inch deep dish pie shell (unbaked)
1. Preheat oven to 350 degrees F.
2. Mix sugar and butter well in mixing bowl. Add syrup, salt and vanilla. Mix again. Add eggs one at a time and mix after each.
3. Spread chocolate chips over bottom of unbaked pie crust. Spread pecans over chocolate chips. Pour mixture on top of both chocolate and pecans.
4. Bake until top is brown and pie set (about 45-55 minutes). Toothpick stuck in center of pie should come out almost dry.
5. When pie is completely cool, drizzle melted white and dark chocolate on top (easiest way is to slowly microwave in a Ziplock freezer bag and cut small hole in bottom corner of baggie).
Sunday, August 19, 2007
"I Like PIE."
 Sometimes you make things because you bought the ingredients on impulse and you've really got to use them before they go bad. Sometimes it's a bag of limes. This would be one of those times. I really wanted to try the Key Lime Bars from Cook's Illustrated but didn't have all ingredients. I might make it to the store for those but I only had stuff for PIE. And what's more fun than PIE, I ask you. Or, at least, saying "PIE".
I was informed, afterwards, that you can put a bit of green food coloring in the filling to make it, you know. Green. Since it's not. It's yellow-ish. It tastes like lime, sure, but I have to admit, there's a little disappointment. I know for future reference.
Being a relative beginner to cooking, I was pleased with how easy this was. Whip up some filling, plop it into a crust then throw some cream in the standing mixer and voila. There was a lot of cooling time in between each step so it took a while in that regard but the actual prep was easy. It's not as tart as I expected but I suspect that's because I didn't use real Key Limes. It's mild and quite nice but I think in the future, I'd use the real deal to get that punch of flavor.

KEY LIME PIE
Source: The Best Recipe, Cook's Illustrated
LIME FILLING
4 teaspoons grated zest plus 1/2 cup strained juice from 3 to 4 limes
4 large egg yolks
1 14-ounce can sweetened condensed milk
GRAHAM CRACKER CRUST
11 full-size graham crackers, processed to fine crumbs (1 1/4 cups)
3 tablespoons granulated sugar
5 tablespoons unsalted butter, melted
WHIPPED CREAM TOPPING
3/4 cup heavy cream, chilled
1/4 cup confectioners' sugar
1/2 lime, sliced paper thing and dipped in sugar (optional)
1. FOR THE FILLING: Whisk zest and yolks in medium bowl until tinted light green, about 2 minutes. Beat in milk, then juice; set aside at room temperature to thicken.
2. FOR THE CRUST: Adjust oven rack to center position and heat oven to 325 degrees. Mix crumbs and sugar in medium bowl. Add butter; stir with fork until well blended. Scrape mixture into 9-inch pie pan; press crumbs over bottom and up sides of pan to form even crust. Bake until lightly browned and fragrant, about 15 minutes. Transfer to wire rack; cool to room temperature, about 20 minutes.
3. Pour lime filling into crust; bake until center is set, yet wiggly when jiggled, 15 to 17 minutes. Return pie to wire rack; cool to room temperature. Refrigerate until well chilled, at least 3 hours. (Can be covered with lightly oiled or oil-sprayed plastic wrap laid directly on filling and refrigerated up to 1 day.)
4. FOR THE WHIPPED CREAM: Up to 2 hours before serving, whip cream in medium bowl to very soft peaks. Adding confectioners' sugar 1 tablespoon at a time, continue whipping to just-stiff peaks. Decoratively pipe whipped cream over filling or spread evenly with rubber spatula. Garnish with optional sugared lime slices and serve.


