skip to main |
skip to sidebar

There's little that's more disappointing than failure. Especially when you pour time and effort into something that results in a complete waste of both. This is what happened with my first attempt at mini tarts.
My first mistake, probably, was believing I could splice a couple recipes together without having adequate knowledge of the procedure in the first place. Without specific instructions on how thick to roll the dough, I did it TOO thick. The mini crusts weren't weighed down with beans or pie weights and they came out thick, pale and barely cooked. The custard was a disaster: cooked too long and turning into a glob of rubbery goo. If ever there was a time to describe a baking attempt as a TOTAL failure, this was it.
And yet, as a perfectionist, I can't leave something done wrong. It has to be right. So, in classic cliché form (yes, I DID say to myself, "If at first you don't succeed..."), I tossed the failure in the garbage and started again with a new recipe and some determination. I'd learned a few things so maybe screwing up is necessary every now and then. I made the crust thinner, weighed it down (as the hasn't-failed-me-yet Ina instructed), baked it until I felt it was done. I was WAY more cautious with the custard, took it off the heat the moment it came together enough for me and added the last bit of butter and vanilla while still in the pan. It was so good, I was licking the spoon. And the bowl. ...and the pan a little after it cooled.
In the end, I guess my comically bad first attempt was a good learning experience because it made this success all the more satisfying. It felt much more like an accomplishment than it otherwise would have.
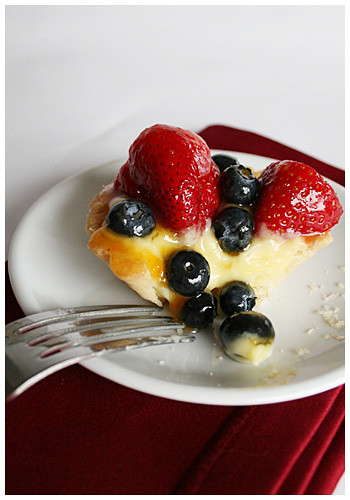
Oh and they taste really good. :)
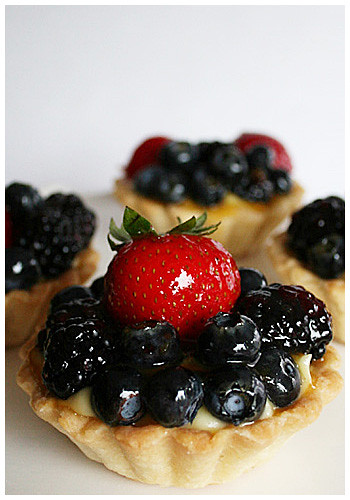
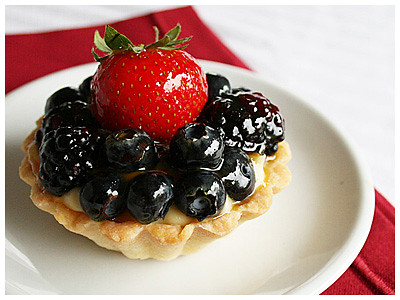
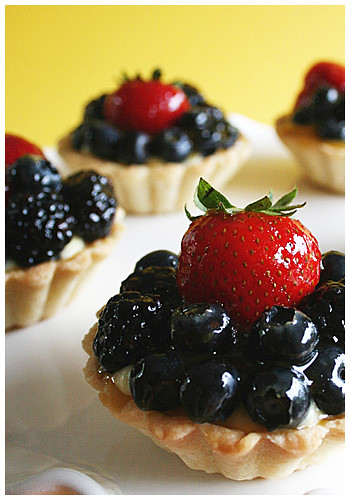
MINI BERRY TARTS
Adapted from Ina Garten
Tart Shells:
1 1/4 cups all-purpose flour
3 tablespoons sugar
1/2 teaspoon kosher salt
6 tablespoons (3/4 stick) cold unsalted butter, diced
2 tablespoons cold shortening (recommended: Crisco)
1/4 cup ice water
Pastry Cream:
5 extra-large egg yolks, room temperature
3/4 cup sugar
3 tablespoons cornstarch
1 1/2 cups scalded milk
1/2 teaspoon pure vanilla extract
1 tablespoon unsalted butter
1 tablespoon heavy cream
1–2 cups mixed berries (strawberries, blueberries, blackberries, raspberries)
1/3 cup apricot jelly
Combine the flour, sugar, and salt in a small bowl and place in the freezer for 30 minutes. Put the flour mixture in the bowl of a food processor fitted with a steel blade. Add the butter and shortening and pulse about 10 times, or until the butter is in the size of peas. Add the ice water and process until the dough comes together. Dump on a well-floured board and form into a disk. Wrap in plastic and chill for at least 30 minutes.
Meanwhile, preheat the oven to 375 degrees F.
Roll out the dough to roughly 1/4-inch thick and use round cutters (or small bowls) to cut shapes to fit into 5 (3-inch) tart pans (or your preferred size mini tins). Don't stretch the dough when placing it in the pans or it will shrink during baking. Cut off the excess by rolling the pin across the top of each pan. Line the tart shells with a piece of buttered aluminum foil, butter side down, and fill them with dried beans or rice. Bake for 10 minutes. Remove the beans and foil, prick the bottom of the shells all over with a fork, and bake for another 15 to 20 minutes until lightly browned. Set aside to cool.
In the bowl of an electric mixer fitted with the paddle attachment, beat the egg yolks and sugar on medium-high speed for 4 minutes, or until very thick. Reduce to low speed, and add the cornstarch.
With the mixer still on low, slowly pour the hot milk into the egg mixture. Pour the mixture into a medium saucepan and cook over low heat, stirring constantly with a wooden spoon, until the mixture thickens, 5 to 7 minutes. Don't be alarmed when the custard comes to a boil and appears to curdle; switch to a whisk and beat vigorously. Cook, whisking constantly, for another 2 minutes; the custard will come together and become very thick, like pudding. Stir in the vanilla, Cognac, butter, and heavy cream. Pour the custard through a sieve into a bowl. Place plastic wrap directly on the custard and refrigerate until cold.
Before serving, fill the tart shells with the pastry cream. Arrange the berries decoratively on top of the cream. Melt the apricot jelly with 1 teaspoon of water and brush the top of the tarts.
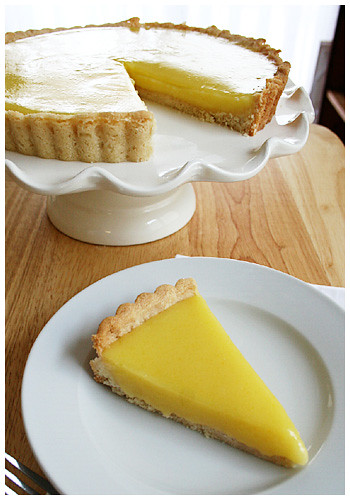 You know when something doesn't turn out exactly as you wanted so then it's this complete disappointment? To you and you alone? Yeah. I mean, I don't know what I was expecting but it wasn't this really, REALLY tart (I mean, strong?), powerful lemon tart. I mean, seriously intense. And the recipe calls for no whipped cream whatsoever so this is how it's supposed to be eaten. I would make whipped cream were I to serve it to human people.
 As you can see from the second picture, the crust came out thicker than I expected too but I discovered that was damn near necessary to counter the strong lemon flavor. And I think I have a misconception about tart dough: it is not, in fact, PIE dough. It's supposed to be denser and not flakey and flimsy. A tart must stand on it's own; it doesn't have a pie plate to hold all those lovely, crumbly flakes of crust together. It was pretty good in the end and I enjoyed it with the lemon.
 One thing about the curd, though, which I wish the recipe would've mentioned but didn't: when you add the lemon juice to the egg mixture, the entire thing looks awful and curdled! Even after I put it on the stove and began stirring my hand off, the stuff just looked like curdled eggs! I was sure I was ruined. And yet, I stirred and stirred until FINALLY the mix began to turn and eventually became the silky smooth consistency. So when the mix looks curdled, don't worry! It's not!
But seriously. Serve this with a dollop of whipped cream. Or a big glass of milk.
LEMON CURD TART
Source: Ina Garten
For the tart shell:
12 tablespoons (1 1/2 sticks) unsalted butter, plus more for greasing, at room temperature
1/2 cup sugar
1/2 teaspoon pure vanilla extract
1 3/4 cups all-purpose flour
Pinch salt
For the lemon curd:
4 lemons, at room temperature
1 1/2 cups sugar
1/4 pound (1 stick) unsalted butter, at room temperature
4 extra-large eggs, at room temperature
1/8 teaspoon salt
For the tart shell:
Mix the butter and sugar together in the bowl of an electric mixer fitted with a paddle attachment until they are just combined. Add the vanilla. In a medium bowl, sift together the flour and salt, then add them to the butter-and-sugar mixture. Mix on low speed until the dough starts to come together. Dump onto a surface dusted with flour and shape into a flat disk. Press the dough into a 10-inch-round or 9-inch-square false-bottom tart pan, making sure that the finished edge is flat. Chill until firm.
Meanwhile, preheat the oven to 350 degrees F.
Butter 1 side of a square of aluminum foil to fit inside the chilled tart and place it, buttered side down, on the pastry. Fill with beans or rice. Bake for 20 minutes. Remove the foil and beans, prick the tart all over with the tines of a fork, and bake again for 20 to 25 minutes more, or until lightly browned. Allow to cool to room temperature.
For the lemon curd:
Remove the zest of the lemons with a vegetable peeler or zester, being careful to avoid the white pith. Squeeze the lemons to make 1/2 cup of juice and set the juice aside. Put the zest in a food processor fitted with a steel blade. Add the sugar and process for 2 to 3 minutes, until the zest is very finely minced. In the bowl of an electric mixer fitted with a paddle attachment, cream the butter with the sugar and lemon zest. Add the eggs, 1 at a time, and then add the lemon juice and salt. Mix until combined.
Pour the mixture into a 2-quart saucepan and cook over low heat, stirring constantly, until thickened, about 10 minutes. The lemon curd will thicken at about 175 degrees F, or just below a simmer. Remove from the heat.
Fill the tart shell with warm lemon curd and allow to set at room temperature.

 When I started this blog almost a year ago, I didn't set out to make only desserts. They just turned out to be the most fun (to eat) and the prettiest! Baked goods can't help being so awesome.
There's also something I love about baking that I think might make me a Non-Cook: it's almost a science. There are measurements, exact times and procedures. Cooking regular food (read: not dessert) is all about throwing stuff in a pan and tossing some salt and pepper and going by taste. There's a certain amount of freedom that both fascinates and terrifies me but there's also that other thing: huge room for error. I almost always fall on the side of error. I admire people (like my mom) who can just throw stuff together and know what'll work or how long to steam vegetables or whatever. I am not that person (yet). It's something I know only comes with practice and I'm working on it.
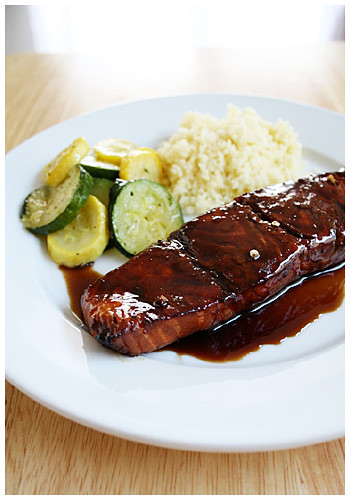
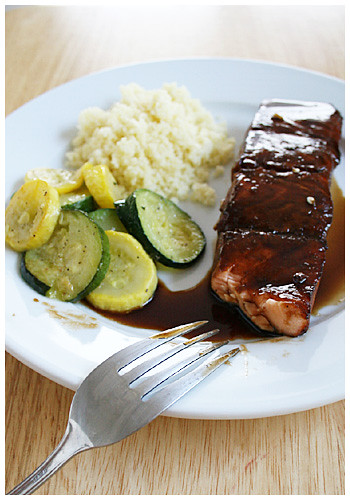
In the spirit of expanding my horizons, I attempted to make a MEAL. Salmon seemed like the easiest beginning: not only is it hard to mess up but because it's always good, I had frozen fillets handy. I had to adapt a recipe a coworker had raved about but it was minor things like using my oven instead of a grill. I came up with a couple sides dishes out of nowhere (because how does one construct a meal, anyway? Does zucchini go with salmon??).
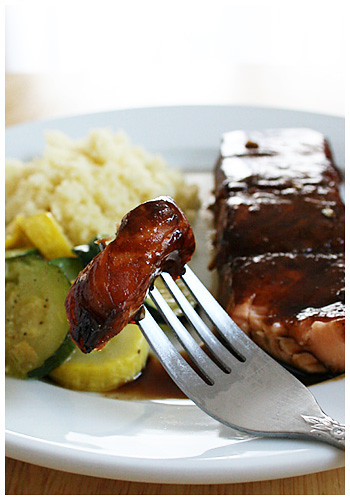 It all came out pretty good, if I do say so myself. The original recipe called for 1/4 tsp crushed Habanero peppers which I laughed at. BUT I bought a little pepper and took about five seeds and stirred that into the glaze (couldn't taste them, thank God). But then, I licked my index finger. ...The one that'd just been touching the pepper. It was like INSTANT FIRE on my tongue. I stuck my head under the sink. Good God.
So this is my toned down, adapted version (which I can personally attest was not too sweet or spicy and quite lovely). The original is here for you brave, grill-having, spice-loving souls.
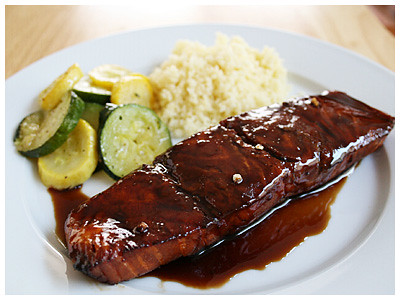
TERIYAKI SALMON WITH HONEY GLAZE
Adapted from Karan Dersham of Dersham’s Outlook Lodge
For a 2-3 pound salmon fillet
Marinade
1 cup soy sauce
I cup golden brown sugar
1 tbsp. minced fresh garlic
1 tsp. course ground pepper
set aside 1 tbsp. of this marinade for the glaze
Glaze
1 1/2 tbsp. reserved marinade
1 1/2 tbsp. honey
Combine the marinating ingredients in a bowl and mix thoroughly. Reserve 1 1/2 tbsp of marinade for glaze later. Pour marinade into plastic baggie (or shallow ceramic or Pyrex pan) with salmon fillets and refrigerate for 1-2 hours, longer if fillet is thick.
Position oven rack to highest level and heat broiler to high. Place marinated fillets in a shallow baking dish (such as a pie plate) and broil 3-4 minutes on each side. Remove from highest rack and turn off broiler. Place fillets on a lower rack for an additional 2-3 minutes in the warm oven to ensure it cooks fully.
Plate fillets and brush or drizzle the honey glaze on top of each before serving.
SAUTEED ZUCCHINI AND SQUASH
1 zucchini
1 yellow squash
1 tbsp olive oil
2 tbsp butter
salt and pepper
Cut zucchini and squash into half-inch thick slices. Heat oil and butter until melted in a frying pan over medium. Toss zucchini and squash in pan, coating slices with butter. Add about 1 tsp of salt and pepper.
Lower heat to low and cover with lid, allowing one side to stay open, releasing steam. Cook for ten minutes (or until vegetables reach your preference of firmness), stirring every so often to evenly cook.
(Couscous: follow instructions on box! I used chicken broth instead of water to flavor it.)
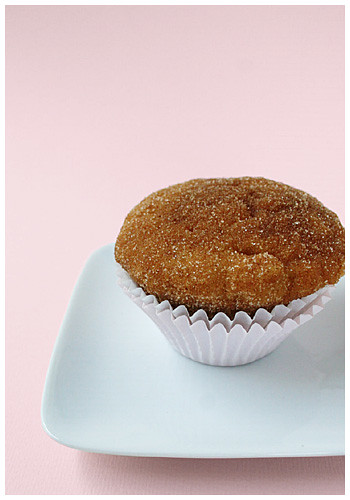
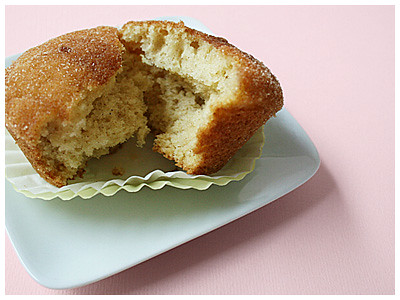
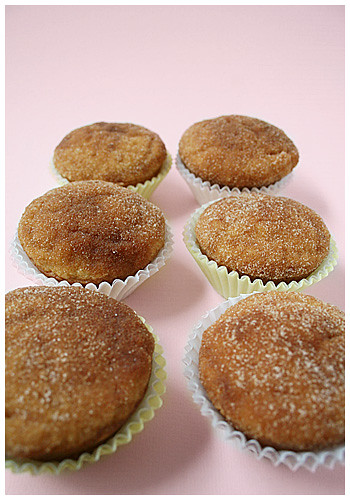 You know what's EASY to photograph? Muffins.
The sole motivation for this was simply to make something EASY. Nothing is easier than cake. Easier still is a cake without icing. Hence, the muffin.
I was even looking for something simple in terms of ingredients. No special anything here, folks: butter, sugar, cinnamon, etc. It's so straight-forward, you could make it in your sleep. (But, seriously, don't do that; you'll burn the house down and I couldn't live with the guilt.)
I got the recipe from Williams-Sonoma (again). They have such adorable pictures next to all their recipes! It's hard not to just sit and browse until something jumps out at you. So I found these little muffins that the site correctly asserts taste just like cinnamon sugar cake doughnuts (but without the frying). They're especially good slightly warmed with a big glass of milk. Mmm, simple pleasures...
CINNAMON-BUTTERMILK MUFFINS
Source: Williams-Sonoma
For the muffins:
7 Tbs. unsalted butter, at room temperature
2/3 cup sugar
1 egg
1 1/2 cups all-purpose flour
1 1/2 tsp. baking powder
1/2 tsp. baking soda
1/2 tsp. salt
1/2 tsp. freshly grated nutmeg
1/2 cup buttermilk
1 1/2 tsp. vanilla extract
For the topping:
2/3 cup sugar
1 Tbs. ground cinnamon
6 Tbs. (3/4 stick) unsalted butter, melted
Preheat an oven to 350°F. Grease 9 standard muffin cups with butter or butter-flavored nonstick cooking spray; fill the unused cups one-third full with water to prevent warping.
To make the muffins, in the bowl of an electric mixer fitted with the flat beater, combine the butter and sugar and beat on medium speed until light and fluffy. Add the egg and beat well until pale and smooth.
In another bowl, stir together the flour, baking powder, baking soda, salt and nutmeg. Add to the butter mixture in 2 additions, alternating with the buttermilk and vanilla. Stir just until evenly moistened. The batter will be slightly lumpy.
Spoon the batter into the prepared muffin cups, filling each three-fourths full. Bake until the muffins are golden, dry and springy to the touch and a toothpick inserted into the center of a muffin comes out clean, 20 to 25 minutes. Transfer the pan to a wire rack and let cool for 5 minutes. Unmold the muffins and let stand until cool enough to handle.
To make the topping, in a small, shallow bowl, stir together the sugar and cinnamon. Put the melted butter in another small bowl. Holding the bottom of a muffin, dip the top into the melted butter, turning to coat it evenly. Immediately dip the top in the cinnamon-sugar mixture, coating it evenly, then tap it to remove excess sugar. Transfer the muffin, right side up, to the rack. Repeat with the remaining muffins. Let cool completely before serving. Makes 9 muffins.
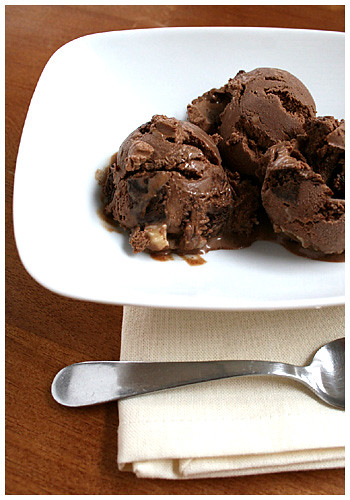 You know what's hard to photograph? Ice cream. Even after you prep and do everything in your power short of shooting it IN the freezer, it just gives up on you and starts to melt in mere minutes. With this particular ice cream, it was SECONDS. I even froze the stuff in the shape of scoops so there was no lag between the freezer and my shots but still. It started breaking down about twenty seconds in. Prissy friggin' food.Other than the prima donna act it gave me in front of the camera, this flavor really delivered. I got the chocolate base from Williams-Sonoma and had to modify it only superficially: I had no half-and-half so I substituted half milk and half cream (theoretically, half and half from scratch). They weren't kidding about it being rich. And after cooking the custard over the heat so there was no raw egg situation, I felt extremely comfortable licking the bowl of chocolate custard and dipping brownie in the creamy stuff as well. Mmmm. Chocolate 'splosion.When I envisioned this flavor, I was aiming for German Chocolate cake. Then after I got home from the store, I remembered there are pecans in the caramel coconut part. Oh well. It came out just fine. The only complaint I'd have against the stuff is that the caramel is very sweet and the ice cream is very rich. It makes for an intense flavor. But some people like very sweet/very rich a lot so it's just up to personal tastes, really.I was rather pleased with making the brownies and caramel sauce myself. It felt good to look at the final product and know I made every bit from scratch. This, from a novice cook, that is. I mean, watching the caramel come to a boil? Terrifying. I just knew it was going to burn the second I looked away. (So I never looked away.)
 I've encountered a few issues with ice cream, though.
#1. It doesn't give you immediate results. I'm used to baking something and having it ready to eat right then. This, you go through all the work and then? Put it away (to freeze completely). It's somewhat unsatisfying.#2. It's not portable. If the stuff melts only minutes out of the freezer, imagine a ten, fifteen or twenty minute car ride to someone's house! So people have to come to IT (again, with the prissy nature). It makes it difficult to get to family and friends.However, my love of creating personal flavors outweighs any faults the cooking process may have. I see pistachio and then banana on the horizon...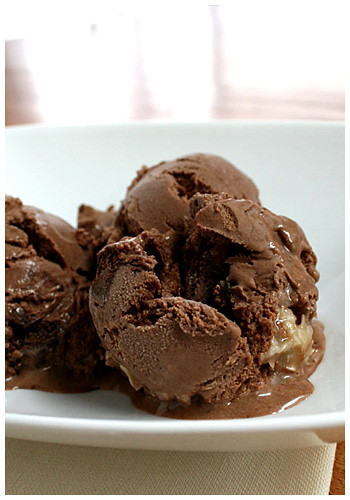 MMMMM... BROWNIESSource: cicada77 at AllRecipes.com1/2 cup white sugar2 tablespoons butter2 tablespoons water1 1/2 cups semisweet chocolate chips2 eggs1/2 teaspoon vanilla extract2/3 cup all-purpose flour1/4 teaspoon baking soda1/2 teaspoon saltPreheat the oven to 325 degrees F (165 degrees C). Grease an 8x8 inch square pan.In a medium saucepan, combine the sugar, butter and water. Cook over medium heat until boiling. Remove from heat and stir in chocolate chips until melted and smooth. Mix in the eggs and vanilla. Combine the flour, baking soda and salt; stir into the chocolate mixture. Spread evenly into the prepared pan.Bake for 25 to 30 minutes in the preheated oven, until brownies set up. Do not overbake! Cool in pan.After completely cool, cut out 1/4 of pan and freeze. When hard, cut into 1 inch cubes (roughly 1 cup of chunks) and refreeze until ready to use.
CARAMEL COCONUT SWIRLAdapted from Gourmet, Nov 19981/2 cup sugar1/3 cup light corn syrup1/4 cup water7 tablespoons heavy cream1/2 teaspoon vanilla
3/4 - 1 cup shredded coconut
In a 3-quart heavy saucepan boil sugar, corn syrup, water, and a pinch salt over moderate heat, stirring, until sugar is dissolved. Boil mixture, without stirring, gently swirling pan, until a deep golden caramel. Remove pan from heat and carefully pour cream and vanilla down side of pan (mixture will vigorously steam and caramel will harden). Simmer mixture, stirring, until caramel is dissolved. Remove pan from heat, add coconut and cool caramel. Caramel swirl may be made 1 week ahead and chilled, covered. Bring caramel swirl to room temperature before using. (If caramel swirl is too stiff to pour, heat slightly.)
CHOCOLATE ICE CREAMAdapted from Williams Sonoma1 1/2 cups heavy cream1 1/2 cups whole milk6 oz. bittersweet chocolate, finely chopped(about 1 1/3 cups)5 egg yolks1 cup sugarPinch of salt1 tsp. vanilla extractIn a saucepan over medium heat, warm the heavy cream and milk until bubbles form around the edges of the pan. Remove from the heat, add the chocolate and stir until smooth and blended.In a large bowl, whisk together the egg yolks, sugar and salt until blended. Slowly add the chocolate cream, whisking constantly until fully incorporated.Pour the mixture into a bowl on top of a double boiler. Set the pan over but not touching simmering water in the bottom pan. Cook, stirring constantly with a wooden spoon, until a finger drawn across the back of the spoon leaves a path, 10 to 12 minutes; do not allow the custard to boil. Pour the custard through a fine-mesh sieve set over a clean bowl and stir in the vanilla. Nestle the bowl in a larger one filled halfway with ice and water. Cool the custard, stirring occasionally, about 30 minutes.Transfer the custard to an ice cream maker and freeze according to the manufacturer's instructions. Just before ice cream is finished churning, add brownie chunks and stir in completely. Transfer one third ice cream to an airtight container and drizzle one third caramel swirl over it. Repeat layering with remaining ice cream and caramel swirl. Cover and freeze until firm, 3 to 4 hours, before serving. Makes about 1 quart.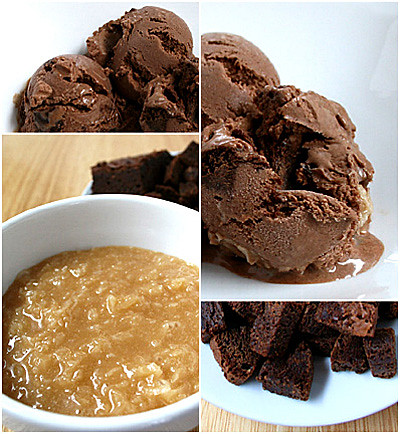
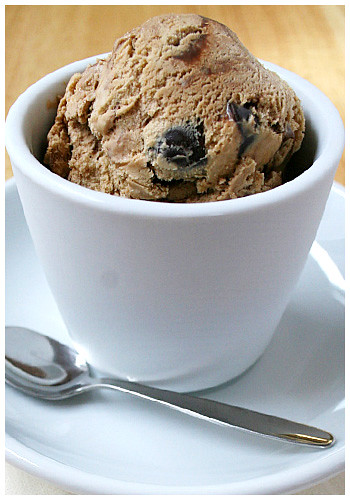
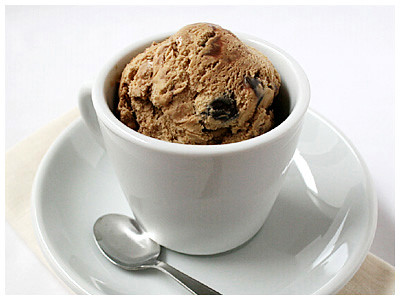
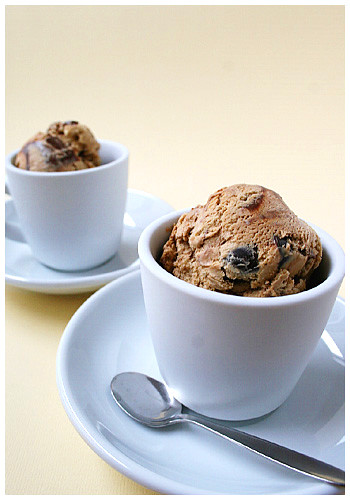 Continuing on with the ice cream experimenting, I next attempted my second favorite flavor: coffee ice cream with fudge swirl and chocolate covered almonds (AKA Starbucks' Java Chip). I guess I should disclose that the ice cream is the only thing I actually made: the almonds and chocolate fudge are store bought. Next time, I'll make my own chocolate. This was good, of course, but it wasn't MINE.
I ran into an issue with this recipe and the entire Ben & Jerry's ice cream book: they use raw eggs. I was nervous. Very very nervous. But after asking around (and the fact that these recipes are tried and true), I went for it and it's fine.
Another issue that haunted me was the swirl... The recipe calls to "fold" it in as the very last stage however, it also says to chill the chocolate so it's not exactly pliable. It was a big clump so I kept cutting and folding and soon it became mostly-mocha ice cream. I've heard some people layering the ice cream and fudge in the storage container itself so when you scoop in, distinct stripes of chocolate you get! Will try that next time...
COFFEE ALMOND SWIRL
Adapted from Ben & Jerry's
2 large eggs
3/4 cup plus 2 tablespoons sugar
2 cups heavy or whipping cream
1 cup milk
3 tablespoons espresso powder
3/4 cup chocolate covered almonds (halved)
1 cup cold fudge sauce
1. Whisk the eggs in a mixing bowl until light and fluffy, 1 to 2 minutes. Whisk the sugar, a little at a time, then continue whisking until completely blended, about 1 minute more. Add the cream, milk and 2 tablespoons of the coffee and whisk to blend.
2. Transfer the mixture to an ice cream maker and freeze following the manufacturer's instructions.
3. After the ice cream stiffens (about 2 minutes before it is done), add the remaining 1 tablespoon of coffee and 3/4 cup almonds, then continue freezing until ice cream is ready. Remove the dasher and fold in fudge sauce with a spatula.


