Showing posts with label vanilla. Show all posts

Tuesday, July 31, 2012

Fancy Cake For Practice


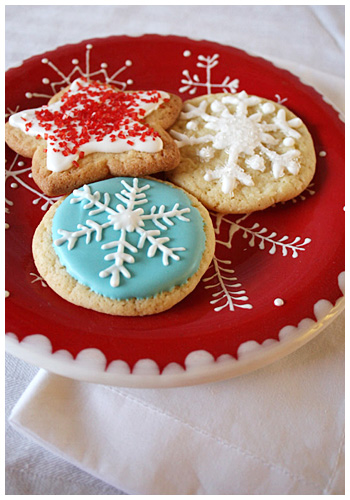
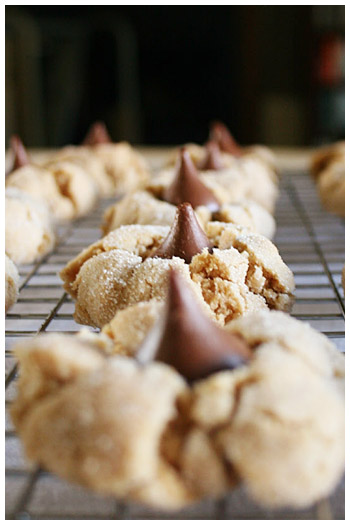
After making so many cookies, I got very comfortable with royal icing and the piping bags and the whole routine of it.  I was asked to make a cake (or three) for my office and realized I was way out of practice in just CAKES: my first love. So I set out to make a tester just to get back in the groove.

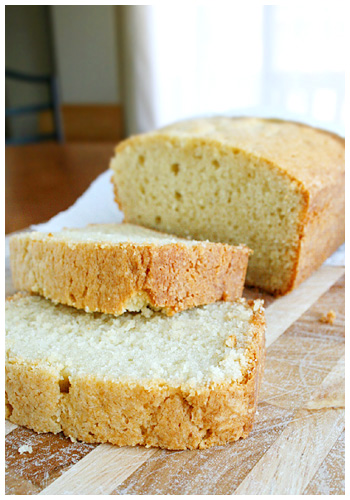
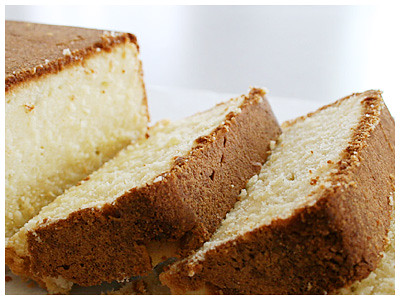
I chose the Joy of Cooking's basic white cake because I'm always eager to try staples that have withstood the test of time.  I was also very eager to try out a few new bits and bobs as recommended by the cake queen, Rose Levy Beranbaum.  That lady is amazing. I'm talking so meticulous and exact, I read The Cake Bible with my jaw gaping. How to open and close the oven door?? (She says GENTLY so as not to force too much of the heated air out).  In awe of her.  SO. I got to try out, 1. Evenbake Cake Strips and Baker's Joy flour spray.  I used the spray on both layers (and a parchment round on the bottom just to be safe) then the cake strip on #1 and no cake strip on #2.  Take a look:


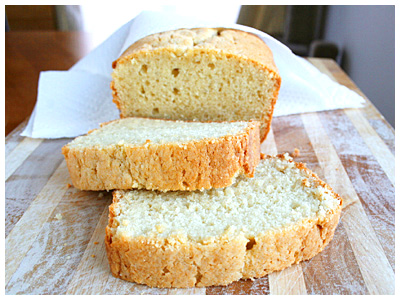
IT WORKS! So beautifully!  Look how even and golden #1 - the cake stripped layer - is! And the other, same cooking time AND in the back of my oven which is traditionally cooler, is darker and has a round center.  I will never EVER bake without cake strips again. Wonderful!  (And the layers slipped right out of the pans with the flour spray so a win on both new experiments!)


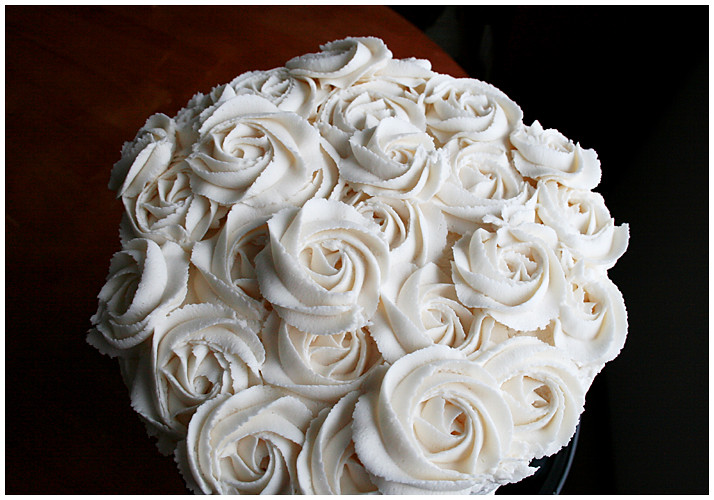
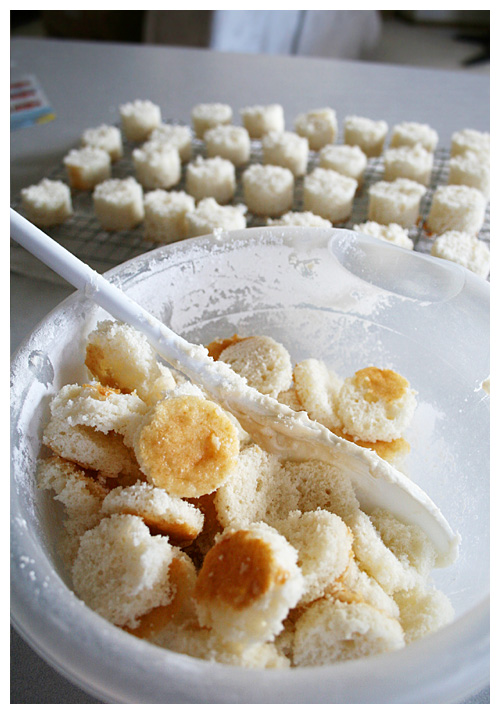
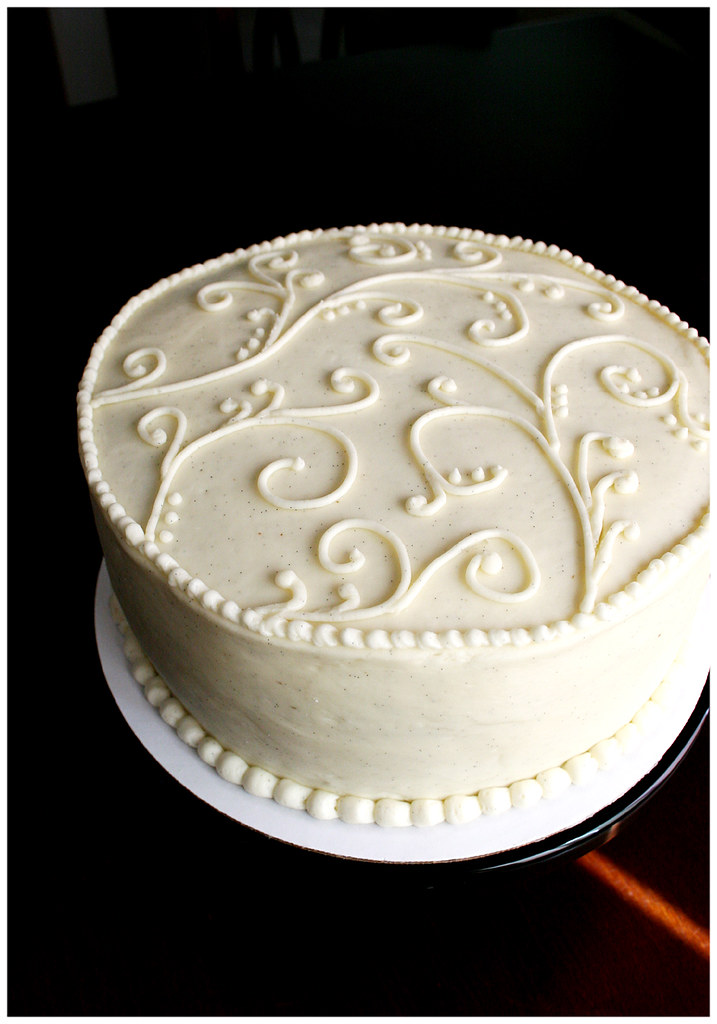
So I was basically playing around with decorating and trying to make it 
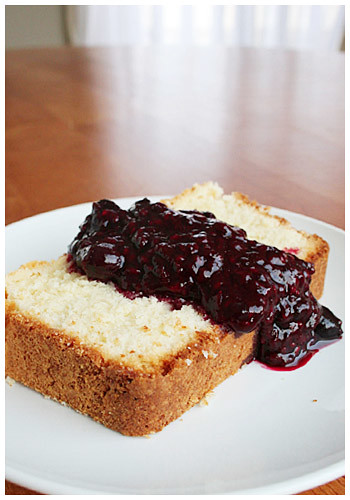
fancy schmancy.  I piped the border of buttercream around the inside edge of each layer 
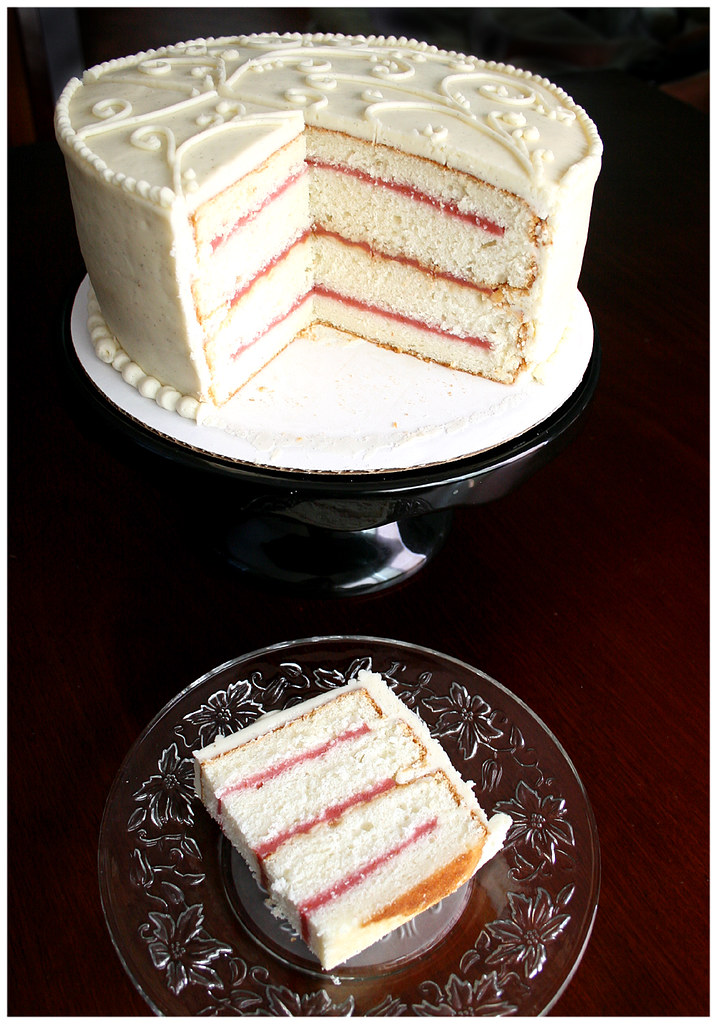
then filled with a basic strawberry filling (because I felt like it).  Did the crumb coat and smoothed all the lines, etc, etc.  
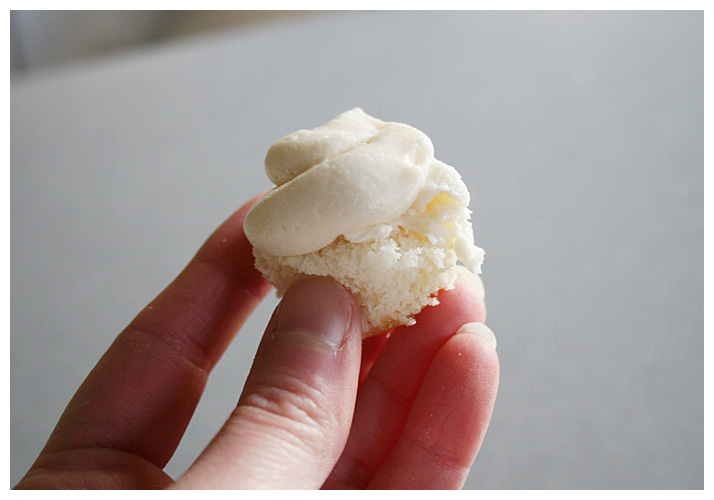
When I went to pipe the decoration though? woo boy. Rough.  Buttercream is most certainly NOT as agreeable as royal icing. Sure, it tastes better but it's just ornery! Go where I want you to, buttercream!!

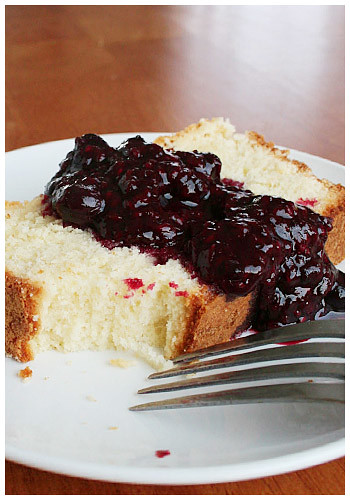
And, for my own amusement, when we went to cut into it, I tried a new cut technique that I saw in a cake magazine so we got rectangle cuts from a round cake. Like wedding cake pieces! I just thought they were darling (and had a hankering for some white wedding cake).  Just cut all the way across, off center (however long you want a piece) then start cutting perpendicular from that line! Kinda want to do all my round cakes this way now.  No skinny triangle edge! All even square!

The recipe was pretty good but not going in my favorites box. It was dense but not heavy and was a solid, vanilla cake. The family liked it but I'll keep looking for the perfect white cake...

 
WHITE CAKE
The Joy of Cooking

3 1/2 cups sifted cake flour
1 Tablespoon plus 1 teaspoon baking powder
1/2 teaspoon salt
1 cup milk
1 teaspoon vanilla
1/4 teaspoon almond extract
1 cup (2 sticks) unsalted butter
1 2/3 cups sugar + 1/3 cup
8 large egg whites
1/2 teaspoon cream of tartar

Preheat oven to 375 F. Have all ingredients at room temperature.  Grease and flour two 8 x 2-inch or 9 x 2-inch round cake pans and line the bottoms with parchment paper.

Whisk together first three dry ingredients thoroughly in a medium bowl.  Combine milk, vanilla and almond extract in a separate bowl or liquid measuring cup.

Beat butter in a large bowl until creamy.  Gradually add 1 2/3 cups sugar and beat until light and fluffy, 3 to 5 minutes.  On low speed, add the flour mixture in 3 parts, alternating with the milk mixture in 2 parts, beating until smooth.  Using clean beaters, beat egg whites and cream of tartar in another large bowl on medium speed until soft peaks form.  Gradually add 1/3 cup sugar, beating on high speed.  Beat until stiff but not dry.  Use a rubber spatula to fold one-quarter of the egg whites into the batter, then fold in remaining whites.  Divide the batter among the pans and spread evenly.

Bake until a toothpick inserted into the center comes out clean, about 25-35 minutes.  Cool and remove from the pan.  Spread the cake when cool with your choice of icing.


Vanilla Bean Buttercream Icing

1 cup (2 sticks) butter
4 cups sifted powdered sugar
1 teaspoon vanilla extract
1 - 2 Tbsp whole milk
1 vanilla bean

In a standing mixer fitted with a whisk, mix together sugar and butter. Mix on low speed until well blended and then increase speed to medium and beat for another 3 minutes.

Add vanilla, vanilla bean and cream and continue to beat on medium speed for 1 minute more, adding more cream if needed for spreading consistency.

Saturday, April 7, 2012

Birthday Season!

It's birthday season in my family! Well, I say that because of the immediate family, the coolest of us have April/May birthdays (that would be me, my mom and my fellow Taurus niece). WE'RE BOSS.

So my mom's birthday just passed and she requested an utterly boring vanilla cake mix with vanilla buttercream. yawn. But I made baby shower cupcakes for a coworker a few months ago with a new technique that I fell in love with.

Hey, look at this bouquet of roses I got for her birthday.

Saturday, January 22, 2011

Chewy Sugar Cookies

One can never have too many sugar cookie recipes. I've discovered this on my neverending journey to find the absolute best. Because I stumbled on a problem: there is no BEST. Sometimes you want chewy sugar cookies and sometimes you want sturdy but tasty ones for decorating and sometimes you want crispy, etc. Old Reliable (Cook's Illustrated) has taken care of one of these categories: the Chewy Sugar Cookie.

There's a few different techniques you can use to make each batch of these different and just a little alteration will affect them dramatically. Just a little more bake time and a perfectly crisp outer ring with chewy center turns into a full-on crunch show. So tread carefully with the first batch and see what works for you.

You can also press the ball of dough with the bottom of a glass to get the aforementioned perfect crisp/chew OR you can leave the dough in balls which results in a chewier, more raw taste (but it's cooked; trust). You can see the difference in appearance as well.

Personally, I like the flatter cookies because they came out with that chewy, soft center every time. I had family over for the holidays as I made these and they were served warm, fresh from the oven. An instant hit! (They keep really well too.)


CHEWY SUGAR COOKIES
Source: Cook's Illustrated


Note: The final dough will be slightly softer than most cookie dough. For the best results, handle the dough as briefly and gently as possible when shaping the cookies. Overworking the dough will result in flatter cookies.

2 1/4 cups (11 1/4 ounces) unbleached all-purpose flour
1/2 teaspoon baking soda
1 teaspoon baking powder
1/2 teaspoon table salt
1 1/2 cups (10 1/2 ounces) sugar, plus 1/3 cup for rolling
2 ounces cream cheese, cut into 8 pieces
6 tablespoons (3/4 stick) unsalted butter, melted and still warm
1/3 cup vegetable oil
1 large egg
1 tablespoon milk
2 teaspoons vanilla extract


1. Adjust oven rack to middle position and heat oven to 350 degrees. Line 2 large rimmed baking sheets with parchment paper. Whisk flour, baking soda, baking powder, and salt together in medium bowl. Set aside.

2. Place 1 1/2 cups sugar and cream cheese in large bowl. Place remaining 1/3 cup sugar in shallow baking dish or pie plate and set aside. Pour warm butter over sugar and cream cheese and whisk to combine (some small lumps of cream cheese will remain but will smooth out later). Whisk in oil until incorporated. Add egg, milk and vanilla; continue to whisk until smooth. Add flour mixture and mix with rubber spatula until soft homogeneous dough forms.

3. Divide dough into 24 equal pieces, about 2 tablespoons each (or use #40 portion scoop). Using hands, roll dough into balls. Working in batches, roll balls in reserved sugar to coat and evenly space on prepared baking sheet, 12 dough balls per sheet. Using bottom of drinking glass, flatten dough balls until 2 inches in diameter (or a little less than 1/2 inch tall).

4. Bake, 1 tray at a time, until edges are set and just beginning to brown, 11 to 13 minutes, rotating tray after 7 minutes. Cool cookies on baking sheets 5 minutes. Using wide metal spatula, transfer cookies to wire rack and cool to room temperature.

Thursday, October 29, 2009

Boo, ghosts. Boo.


Halloween is, by far, my favorite holiday. I'm not sure why because I've never been big on costumes or being scared at haunted houses or even trick-or-treating. But I guess it's fall and cute/spooky treats and decorations. Pumpkins were sent from Jesus as the greatest food stuff known to man. This is not a pumpkin entry; that's coming up next.

THIS is a Halloween cake entry because I seem to have those every other year. My best friend has a fall baby on the way (due late November) and she loves Halloween just as much and so decided the baby shower would be a perfect opportunity to have the best of both worlds. Hallo-baby party-shower! I'd seen these petits fours on Martha Stewart last year and almost died of the cute. I HAD to make them. But the holiday rolled around and went and I missed the chance. When this shower came up, I knew it would be the perfect occasion.

The thing about this blog I think I've found most fulfilling is the ability to go through a recipe, experience the process, and then post my reactions, good and bad, and try to help others not make the same mistakes. Or, in this case, say flat out: I will not make this recipe again. Don't get me wrong; another baker might look at it and decide it'll be worth the trouble. I can only say that from my standpoint, it's not.

I devised a few shortcuts from the word go that I thought would help me out. I'd bake the cake and freeze it so a hard (and not pillowy soft) cake would cut through easier when using the small biscuit round cutter. Yeah, no. Turns out, the cold cake stuck to the metal cutter and subsequently couldn't cut the third and fourth rounds neatly at all. There was much cleaning, cutting, cleaning, cutting.


I then saw that the pan made the cake too tall for the stumpy little ghosts. I had to go through and cut all the tops off the cylinders although this did provide me with a fun little sampler disk of cake. Mmm.


And that's another thing: this recipe WASTES so much cake. There's just something in me that cringes at having leftover bits with nothing to do with. I froze the trimmings and have yet to decide their fate.


So I piped the little cones of buttercream on top and froze that as well. There's always an issue of exposed cake drying out so I had to do a quick freeze for the frosting to set up then went back and lightly covered a hollow cake pan with plastic wrap so only the tops were touching. Froze them again so I could glaze the day of the shower.


Now. The glaze. Perhaps a more experienced petits-fours-making-person would've thinned it out further but there were two issues: #1. I didn't know if a thinner glaze would set up or if it would remain too liquid, and #2. Would a thinner glaze show the imperfections of the cake/frosting instead of being a smooth, ghosty outside? I don't know the answer to either still because I was too chicken to try thinning the glaze. As it is, it's kind of thick and VERY sweet. The ghosts came out okay but not great. The witch hats, however, were a small disaster. The chocolate "glaze" is nothing more than a ganache that completely smothers the tiny round of delicate cake. With the buttercream cone on top of that, you've got a giant helping of chocolate and frosting and not much else. I wanted to throw them away but, again, felt uneasy wasting food. They were an unadulterated failure, though.

One last thing: the chocolate piping. I wish I'd read Bakerella's notes on piping chocolate for faces in which she instructs to add a little vegetable oil to make the substance more fluid because MARTHA sure didn't. So, thanks to Martha Stewart, the chocolate was too thick, hard to manage and came out looking junky. Bakerella's, on the other hand, came out looking great (that's the pumpkin coming up next). Thanks for nothing, Martha!

The guests at the party were extremely nice and said they really liked the little ghosts but I was disappointed. I will absolutely never make these again but I'm glad I went through the experience and could pass it on to you guys. Attempt at your own risk!


GHOULISH PETITS FOURS
Martha Stewart

For witch hats, make petits fours through step two. Then create a brim using a dab of icing: Affix each petit four to a 2-to-2 1/2-inch chocolate wafer cookie. Proceed to step three, coating with Chocolate Glaze instead of Butter Glaze. In lieu of step four, wrap one or two pieces of licorice lace around the base of the hat immediately after glazing.


Makes about 40
White Sheet Cake
Confectioners' Sugar Icing
Butter Glaze
4 ounces semisweet chocolate, for eyes and mouth


Using a 1 1/2-inch cookie cutter, cut out circles from cake. Brush off any crumbs with a pastry brush.

Fit a pastry bag with a plastic coupler, and top cake rounds with icing in a ghost or hat shape, about 1 inch high.

Place a wire rack over a rimmed baking sheet; set aside. Set an iced cake round on a fork; hold over bowl of glaze. Using a large spoon, drizzle glaze evenly over cake and icing until completely covered. Transfer to wire rack. Repeat with remaining rounds. Let set, about 5 minutes.

Place chocolate in a heatproof bowl microwave at 50% power, stirring chocolate every 30 seconds until melted. Add small amount of vegetable oil to make more fluid. Transfer to a disposable pastry bag or resealable plastic bag; snip off tip with scissors. Pipe eyes and a mouth onto ghosts.


WHITE SHEET CAKE

Makes one 12-by-17-inch cake

1 cup (2 sticks) plus 2 tablespoons unsalted butter, room temperature, plus more for baking sheet and wire rack
4 1/2 cups sifted cake flour (not self-rising), plus more for baking sheet
2 tablespoons baking powder
3/4 teaspoon salt
1 1/2 cups milk
1 1/2 tablespoons pure vanilla extract
2 1/4 cups sugar
7 large egg whites

Preheat oven to 350 degrees. Butter a 12-by-17-by-1-inch rimmed baking sheet. Line bottom with parchment paper. Butter parchment, and dust with flour, tapping off any excess. Set sheet aside.

Into a medium bowl, sift together flour, baking powder, and salt; set aside. In a measuring cup, combine milk and vanilla; set aside. In the bowl of an electric mixer fitted with the paddle attachment, cream butter until very smooth. With mixer on medium speed, add sugar in a slow, steady stream; beat until mixture is light and fluffy, about 3 minutes.

Reduce speed to low. Add reserved flour mixture in three batches, alternating with reserved milk mixture, and starting and ending with flour. Mix until just combined; do not overmix. Set aside.

In a clean bowl, beat egg whites until stiff but do not let dry peaks form. Fold one-third of the egg whites into batter to lighten, then gently fold in remaining whites in two batches.

Scrape batter into prepared sheet; smooth top with an offset spatula. Bake in oven until cake is springy to the touch and a cake tester inserted in the center comes out clean, about 30 minutes. Transfer to a wire rack, and let cool 15 minutes. Loosen sides of cake with a small metal spatula or paring knife; invert onto a buttered wire rack. Peel off parchment. To prevent splitting, reinvert cake so top is facing up. Let cake cool completely.


CONFECTIONERS' SUGAR ICING
(I would HALVE this; it made WAY too much)

Makes about 7 cups

1 1/2 cups unsalted butter (3 sticks), room temperature
3 pounds confectioners' sugar
3/4 teaspoon salt
3 tablespoons pure vanilla extract
3/4 cup milk, plus more if needed


In the bowl of an electric mixer fitted with the paddle attachment, beat together the butter and sugar until well combined. Add salt, vanilla, and milk; beat until icing is smooth and creamy. The icing should be thick enough to pipe and hold its shape. If icing seems too thick, add 1 tablespoon milk at a time until proper consistency is reached. Use immediately, or refrigerate in an airtight container up to 2 days. If refrigerating, bring icing to room temperature before using, and lightly beat until creamy if necessary.


BUTTER GLAZE
Makes about 1 1/2 cups

2 1/2 cups sifted confectioners' sugar
1/2 cup (1 stick) unsalted butter
5 tablespoons milk


Place sugar in a medium bowl, and set aside. In a small saucepan, melt butter over medium heat. Immediately pour the melted butter into the bowl with the sugar. Add the milk, and whisk until mixture is smooth. Cover bowl, and store at room temperature until ready to use.


CHOCOLATE GLAZE (for witch hats)
Makes 1 1/2 cups

6 ounces best-quality bittersweet or semisweet chocolate
1 cup heavy cream


Chop the chocolate into small pieces, and place in a medium bowl. In a small saucepan, heat cream over medium-high heat until just simmering, and pour it over the chocolate. Let mixture stand 5 minutes, then stir until smooth. Let stand at room temperature about 10 minutes before using.


Friday, May 29, 2009

Lucky number 4


I think me and pound cake are done, professionally. #1, was bland and disappointing. #2, was okay but dry and nothing special. #3, I completely screwed up (under-baked in an attempt to not dry it out) AND it tasted junky. #4, was the best yet but still not Perfection In A Loaf Pan. What can I say; I seek perfection.

With four, count them, FOUR ultimate disappointments, I think I'm through with pound cake. At least for now. Maybe I'll go back to it some day. I just need to move on.

I would like to share this recipe, however, because it did come out the best of what I tried. It was from the ever-trustworthy Williams-Sonoma. It wasn't dry but not overly moist. It came out nice and soft (due to the very light and fluffy beat-the-butter phase) but not entirely a cake-like consistency. It was definitely worth making though I, personally, will probably continue on, in search of the Perfect pound cake before I make this again.
POUND CAKE
Source: Williams-Sonoma


1 1/2 cups all-purpose flour
1/4 tsp. baking soda
1/4 tsp. salt
12 Tbs. (1 1/2 sticks) unsalted butter, at room temperature
1 cup sugar
1 1/2 tsp. vanilla extract
1/4 tsp. almond extract (optional - but seriously do it)
2 eggs, at room temperature
1/2 cup sour cream, at room temperature


Preheat an oven to 325°F. Lightly grease an 8 1/2-by-4 1/2-inch loaf pan, preferably glass, and dust with flour.

In a bowl, whisk together the flour, baking soda and salt until blended. In the bowl of an electric mixer, beat together the butter, sugar, vanilla and almond extract on medium to medium-high speed until light and fluffy. Add the eggs one at a time, beating well after each addition until just blended. Sprinkle half of the flour mixture over the egg mixture and stir until both are just incorporated. Stir in the sour cream, then sprinkle with the remaining flour mixture and stir until evenly distributed.

Pour the batter into the prepared pan and tap gently on the counter to even out and settle the ingredients. Bake until a toothpick inserted into the center comes out clean, about 70 minutes, or longer if using a metal pan. Transfer the pan to a wire rack and let cool for 15 minutes.

Run a thin knife around the inside of the pan, invert the cake onto the rack and lift off the pan. Place the cake on one of its sides and continue cooling. Serve warm or at room temperature. Serves 8 to 10.

Wednesday, April 22, 2009

Fairycakes

I lived in London for a few years (I'm American) and while I was there, I have to admit - and my sincerest apologies to any Brits reading this - but I had pretty bad experiences whilst exposed to English baking. There was just something I didn't GET. From the Christmas puddings to the dense, dry cakes; I suspect I just didn't know where to find GOOD bakery because the local shop on the high street just wasn't it.

So when I started investigating these cupcakes and discovered the glaze-like icing more or less classified it as traditionally British and therefore a "fairycake", I got a little nervous. I did a little further investigation and found that "fairycakes" are kind of just what the British call cupcakes and there's no set recipe or characteristic to the cake itself. A weight was lifted. So I chose something light because, you know. Fairies. (C'mon; I was getting in the spirit!) I found a White Velvet Butter Cake recipe in Rose Levy-Beranbaum's Cake Bible and was intrigued by her endorsement as "the softest and most delicate of all butter cakes". Perfect!


Now, one characteristic that DOES seem a standard of fairycakes is baking the cake small and low enough so the runny icing can be caught by the cup sides and it makes this darling-looking cupcake. Well. I thought I filled them low enough but the damn cakes just rose and went all normal on me. Next time, I'll try half full or maybe even less than that!

I was pleasantly surprised with the cake, though. Rose wasn't lying; it's lovely and soft. AND despite it being soft, it worked; sometimes, when cupcakes are too soft, they're hard to handle or can't take the weight of even a basic buttercream or frosting. Because I was using such a light icing, the soft cake was perfect.


However, the icing didn't come out tasting as I expected. I'll chalk that up to inexperience. I used just powdered sugar and lemon juice, expecting the sugar to dull out the lemon. Yeah, that didn't happen. So instead of just being a sweet icing, it's lemon icing. But that's okay because the cake itself isn't too sweet and the two go well together (but lemony).

So, I have the powdered sugar sifted and the lemon juice waiting to put together for the icing when I realize I have no sprinkles. That was the whole point of these things - that you just sprinkle pretty sparklies on top and they sink into the thin icing while it's wet and it still looks adorable! And I have NONE. So. Plan B. I whipped out my white chocolate, melted it, added some coloring and started using toothpicks to put it in these tiny flower molds. I was surprised to see how cute they came out looking (especially since I had nothing else).

It's my birthday today so these are kind of perfect to post. Because they're pink and fun and wee!


WHITE VELVET BUTTER CAKE
Source: The Cake Bible, by Rose Levy Beranbaum

4 1/2 large egg whites
1 cup milk
2 1/4 teaspoons vanilla
3 cups sifted cake flour
1 1/2 cups sugar
1 tablespoon + 1 teaspoon baking powder
3/4 teaspoon salt
12 tablespoons unsalted butter (must be softened)


Preheat oven to 350 degrees F.

In a medium bowl lightly combine the egg whites, 1/4 cup milk and vanilla.

In a large mixing bowl combine the dry ingredients and mix on low speed for 30 seconds to blend. Add the butter and remaining 3/4 cup milk. Mix on low speed until the dry ingredients are moistened. Increase to medium speed (high speed if using a hand mixer) and beat for 1 1/2 minutes to aerate and develop the cake's structure. Scrape down the sides. Gradually add the egg mixture in 3 batches, beating for 20 seconds after each addition to incorporate the ingredients and strengthen the structure. Scrape down the sides.

Scrape the batter into the prepared pans and smooth surface with a spatula. The pans will be about 1/2 full. Bake cupcakes 15 to 18 minutes (or two 9-inch by 1 1/2-inch pans greased and bottoms lined with parchment then greased again for 25 to 35 minutes) or until a tester inserted near the center comes out clean and the cake springs back when pressed lightly in the center. (Cake will be light and will not brown even when done.) The cakes should start to shrink from the sides of the pan only after removal from the oven.

Let the cakes cool in the pans on racks for 10 minutes. For 9-inch pans, loosen the sides with a small metal spatula and invert onto greased wire racks. To prevent splitting, reinvert so that the tops are up and cool completely before wrapping airtight.


LEMON ICING
Sift powdered sugar to remove lumps. Mix with freshly squeezed lemon juice until icing is in a thick but runny enough consistency to slowly run over top of cupcakes.
Add small amount of coloring if desired.


Monday, March 30, 2009

Simple

I am embarrassed, of course, at my lack of updating. But trust in the fact that it's not that I've been baking up a storm and just neglecting my blog; I haven't been baking ANYTHING. It's all the XBox's fault; I got one for Christmas and never got off of it.

I finally found the motivation to bake something and had to scrounge up what I had in the house. That ended up being the most basic of basics: vanilla pound cake. It needed something extra, though, and I immediately thought of berry compote (because I had frozen mixed berries).

I grabbed a high rated recipe from All Recipes and you know what? I'm kind of starting to get irritated with All Recipes. Or, at least, the people reviewing on it. I made this highly rated recipe and it is utterly mediocre. I mean, to have that many stars, you'd think it'd be mouth wateringly AWESOME. But it's just not. It's bland and absolutely NEEDS the compote or other accompaniment. I always thought of a good pound cake as one so buttery and delish, it melts in your mouth a little. Because of all the butter. Delicious butter... But this one doesn't.

The berry compote, however, I got from Williams-Sonoma and it IS good. I think I'm going to stick to legit sources from now on... I won't be making this pound cake again but the compote is a keeper. I used a bag of frozen mixed berries that included raspberries, blueberries and marrionberries.

Together, they're good, but maybe that's because you're mostly just tasting the compote...


Cream Cheese Pound Cake III
Source: All Recipes, Submitted by: Nanci

1 (8 ounce) package cream cheese
1 1/2 cups butter
3 cups white sugar
6 eggs
3 cups all-purpose flour
1 teaspoon vanilla extract


1. Preheat oven to 325 degrees F (160 degrees C) grease and flour a 10 inch tube pan.

2. In a large bowl, cream butter and cream cheese until smooth. Add sugar gradually and beat until fluffy.

3. Add eggs two at a time, beating well with each addition. Add the flour all at once and mix in. Add vanilla.

4. Pour into a 10 inch tube pan. Bake at 325 degrees F (160 degrees C) for 1 hour and 20 minutes. Check for doneness at 1 hour. A toothpick inserted into center of cake will come out clean.


Berry Compote
Source: Williams-Sonoma

6 cups mixed berries
5 Tbs sugar
2 tsp lemon juice

In a saucepan over medium heat, stir together the berries, 2 Tbs. of the sugar and the lemon juice. Bring to a simmer and cook, stirring occasionally, until most of the berries have broken down and the mixture is thickened, about 30 minutes; reduce the heat if the compote sticks to the pan. Remove from the heat and let the compote cool to room temperature.

Wednesday, December 31, 2008

Holiday Cookies


A few weeks ago, I made about 12 dozen cookies to give away to family and friends for the holidays. I made sugar (a bust), peanut butter blossoms, magic cookie bars, chocolate chip cookies and biscochitos. I sent packages of a variety of these goodies to friends and that was the most fun. My friends were pleasantly surprised to receive a box of cookies out of no where which makes me all kinds of giddy!


Peanut butter blossoms are a tradition every Christmas and I used this same awesome recipe for the chocolate chip cookies. This is the first year I made the biscochitos, though, which are a Mexican (or Spanish, if you want to go that far back) cookie that we always get at the Mexican bakeries in Houston. I had a few recipes but the first I tried called for lard. Now, I've never SEEN lard, I've never SMELLED lard and I've certainly never COOKED with lard before. It was definitely different. I actually kind of thought it smelled like turkey. Weird, I know. But I made the cookies which vaguely smelled (like turkey, to me) and I just couldn't give them away. I made another batch with Crisco and they were SO MUCH better. My mom said, after comparing the two, that the lard cookie tasted richer. I agree but mostly because the Crisco cookie might've been lighter because it didn't have that heavy turkey taste. (I kid! But seriously; that mess is OFF.)

So I sent out the Crisco biscochitos to my friends in the shapes of Christmasy stars! Because my first attempt at sugar cookies was a bust, I had a second go at them. (See further down.)

It's funny but I made all those cookies and because I planned to give so many away, I really only ate one or two from each batch. I had to save the rest for others! So I made another pan of Magic Cookie Bars that stayed home for family. They're kind of my favorite bar-thing on the planet so. I gots to have some for meeeee.


BISCOCHITOS

1 cup vegetable shortening
2/3 cup sugar
1 egg
2 to 4 Tablespoons red wine, brandy or sherry
1 to 1 1/2 teaspoons crushed/ground anise seed
3 cups flour
2 teaspoons baking powder, optional
1/2 teaspoon salt, optional

Cinnamon Sugar:
1/4 cup sugar
1 tablespoon ground cinnamon


Preheat oven to 350°.

Beat lard with an electric mixer until light and fluffy. Slowly beat in the sugar, then the egg. Beat in 2 Tablespoons of the wine and the anise seed. Toss the flour together with the baking powder and salt, if using. Gently stir in, adding more wine as needed to form a soft dough. Let stand for 10 minutes or cover with plastic wrap and refrigerate for 15 minutes.

On a lightly floured surface, roll out 1/4-inch thick and cut into shapes as desired. Dip the top side of each cookie in the cinnamon-sugar and place on ungreased cookie sheets, about 1 inch apart.

Bake for 10 to 15 minutes, depending upon size, just until the edges turn a pale blond. Let cool a few minutes then remove to a wire rack to cool. Store in a cookie jar or airtight container.


THEN I committed myself to making sugar cookies and it came down to Christmas Eve but I did them. Next year I'll prepare better and do them right but these came out cute. :)


Tuesday, June 24, 2008

Tarts, tarts and more tarts


There's little that's more disappointing than failure. Especially when you pour time and effort into something that results in a complete waste of both. This is what happened with my first attempt at mini tarts.

My first mistake, probably, was believing I could splice a couple recipes together without having adequate knowledge of the procedure in the first place. Without specific instructions on how thick to roll the dough, I did it TOO thick. The mini crusts weren't weighed down with beans or pie weights and they came out thick, pale and barely cooked. The custard was a disaster: cooked too long and turning into a glob of rubbery goo. If ever there was a time to describe a baking attempt as a TOTAL failure, this was it.

And yet, as a perfectionist, I can't leave something done wrong. It has to be right. So, in classic cliché form (yes, I DID say to myself, "If at first you don't succeed..."), I tossed the failure in the garbage and started again with a new recipe and some determination. I'd learned a few things so maybe screwing up is necessary every now and then. I made the crust thinner, weighed it down (as the hasn't-failed-me-yet Ina instructed), baked it until I felt it was done. I was WAY more cautious with the custard, took it off the heat the moment it came together enough for me and added the last bit of butter and vanilla while still in the pan. It was so good, I was licking the spoon. And the bowl. ...and the pan a little after it cooled.


In the end, I guess my comically bad first attempt was a good learning experience because it made this success all the more satisfying. It felt much more like an accomplishment than it otherwise would have.

Oh and they taste really good. :)


MINI BERRY TARTS
Adapted from Ina Garten

Tart Shells:
1 1/4 cups all-purpose flour
3 tablespoons sugar
1/2 teaspoon kosher salt
6 tablespoons (3/4 stick) cold unsalted butter, diced
2 tablespoons cold shortening (recommended: Crisco)
1/4 cup ice water


Pastry Cream:
5 extra-large egg yolks, room temperature
3/4 cup sugar
3 tablespoons cornstarch
1 1/2 cups scalded milk
1/2 teaspoon pure vanilla extract
1 tablespoon unsalted butter
1 tablespoon heavy cream

1–2 cups mixed berries (strawberries, blueberries, blackberries, raspberries)
1/3 cup apricot jelly


Combine the flour, sugar, and salt in a small bowl and place in the freezer for 30 minutes. Put the flour mixture in the bowl of a food processor fitted with a steel blade. Add the butter and shortening and pulse about 10 times, or until the butter is in the size of peas. Add the ice water and process until the dough comes together. Dump on a well-floured board and form into a disk. Wrap in plastic and chill for at least 30 minutes.

Meanwhile, preheat the oven to 375 degrees F.

Roll out the dough to roughly 1/4-inch thick and use round cutters (or small bowls) to cut shapes to fit into 5 (3-inch) tart pans (or your preferred size mini tins). Don't stretch the dough when placing it in the pans or it will shrink during baking. Cut off the excess by rolling the pin across the top of each pan. Line the tart shells with a piece of buttered aluminum foil, butter side down, and fill them with dried beans or rice. Bake for 10 minutes. Remove the beans and foil, prick the bottom of the shells all over with a fork, and bake for another 15 to 20 minutes until lightly browned. Set aside to cool.


In the bowl of an electric mixer fitted with the paddle attachment, beat the egg yolks and sugar on medium-high speed for 4 minutes, or until very thick. Reduce to low speed, and add the cornstarch.

With the mixer still on low, slowly pour the hot milk into the egg mixture. Pour the mixture into a medium saucepan and cook over low heat, stirring constantly with a wooden spoon, until the mixture thickens, 5 to 7 minutes. Don't be alarmed when the custard comes to a boil and appears to curdle; switch to a whisk and beat vigorously. Cook, whisking constantly, for another 2 minutes; the custard will come together and become very thick, like pudding. Stir in the vanilla, Cognac, butter, and heavy cream. Pour the custard through a sieve into a bowl. Place plastic wrap directly on the custard and refrigerate until cold.

Before serving, fill the tart shells with the pastry cream. Arrange the berries decoratively on top of the cream. Melt the apricot jelly with 1 teaspoon of water and brush the top of the tarts.

Saturday, March 22, 2008

Easter goodness

I've been neglectful of the blog, it's true, but I have decent excuses that are too boring to go into. Suffice it to say, there were reasons. I return with cutesyness I dare you to refute!

I saw this eggs-in-the-grass-frosting decoration and knew I had to try it, if for nothing else than to just line them all up and see a field of greenery. I can't help it; I'm a Taurus and we're irrationally drawn to Earthy tones and, oddly, pastels.

I also dyed eggs for the first time in YEARS and while exact colors were an exercise in futility (see the lone "purple" atrocity), I like how they came out because they're PASTELS. I have so much love for Easter simply because it's so damn pretty.

But back to the cupcakes. I tried a new recipe, Billy's Vanilla Vanilla Cupcakes from Billy's Bakery in NYC. They're definitely very vanilla-y and they're good but I'm not sure I'd make it a staple. The cake is tender and, overall, a great little cake but I'm a traditionalist; you're kind of hit over the head with vanilla in these little things. They taste like sugar cookies: sweet and vanilla.

The frosting is also extremely sweet but with this nice, trim grass, it's not a sweet-overload problem for me. I used Wilton's Leaf Green color, the #233 tip for the grass and Cadbury Mini Eggs for the decoration. Et voila! Happy Easter to all!
BILLY'S VANILLA, VANILLA CUPCAKES
Source: Billy's Bakery in New York City via Martha Stewart

Makes about 30 cupcakes

  • 1 3/4 cups cake flour, not self-rising
  • 1 1/4 cups unbleached all-purpose flour
  • 2 cups sugar
  • 1 tablespoon baking powder
  • 3/4 teaspoon salt
  • 1 cup (2 sticks) unsalted butter, cut into 1-inch cubes and softened
  • 4 large eggs, room temperature
  • 1 cup whole milk, room temperature
  • 1 teaspoon pure vanilla extract

1. Preheat oven to 325 degrees. Line cupcake pans with paper liners; set aside. In the bowl of an electric mixer fitted with the paddle attachment, combine flours, sugar, baking powder, and salt; mix on low speed until combined. Add butter, mixing until just coated with flour.

2. In a large glass measuring cup, whisk together eggs, milk, and vanilla. With mixer on medium speed, add wet ingredients in 3 parts, scraping down sides of bowl before each addition; beat until ingredients are incorporated but do not overbeat.

3. Divide batter evenly among liners, filling about 2/3 full. Bake, rotating pan halfway through, until a cake tester inserted in the center comes out clean, 17 to 20 minutes.

4. Transfer to a wire rack to cool completely. Repeat process with remaining batter. Once cupcakes have cooled, use a small offset spatula to frost tops of each cupcake. Decorate with sprinkles, if desired. Serve at room temperature.


BILLY'S VANILLA BUTTERCREAM
Makes enough for 30 cupcakes

  • 1 cup (2 sticks) unsalted butter, room temperature
  • 6 to 8 cups confectioners' sugar
  • 1/2 cup milk
  • 1 teaspoon pure vanilla extract

1. In the bowl of an electric mixer fitted with the paddle attachment, cream butter until smooth and creamy, 2 to 3 minutes. With mixer on low speed, add 6 cups sugar, milk, and vanilla; mix until light and fluffy. If necessary, gradually add remaining 2 cups sugar to reach desired consistency.

Monday, January 28, 2008

Flan, the Finicky

In my search for that perfectly textured vanilla-y, cake-y-but-not-cake dessert, I've kind of wandered into custard-y territory. When all's said and done, I think I really craved a light bread pudding (is that possible?) but time's run out and I will soon succumb to Chocolate February in all it's Valentine's glory.

With one last vanilla hurrah, however, I tried a flan for the first time. Now, my mom's been making this for years during the holidays and she's perfected it however I hit a few bumps on the way but that's why I'm here: to warn you of where you might go wrong.

First, the sugar you melt to pour into the bottom of the custard cups for that pretty syrup that runs down everywhere when upturned. It has to be done on medium and SLOWLY. The moment it's liquefied, take it off the heat and pour away. Do not let it burn! I hesitated to make sure it got that one bubbling all over and it was too long. Side note, DO NOT try to taste it to SEE if it's burnt. This lesson is brought to you by Retarded Niki 101: liquid, scalding sugar = bad on finger and tongue. It tastes like BURNING.

Second, the texture of flan is very important. That's what makes good flan great. It should be completely smooth. If you overcook, it comes out a little chunky and not great. Keep a very close eye on it after 30 minutes (for 6 oz custard cups) and test with a knife often. If you think it's rather close to being done, know that it's going to continue cooking a little in the hot water bath after you take it out.

So. Better to take sugar and custard out of or off the heat than to overcook because they'll ruin if they go over.


FLAN
  • 1 cup sugar
  • 3 eggs plus 3 egg yolks
  • 2 teaspoons vanilla extract
  • 1 can (14-ounce) sweetened condensed milk
  • 1 1/4 cups milk
  • 2 ounces cream cheese, softened to room temperature

Place sugar in small skillet over medium heat and stir while it liquefies. Watch carefully so that it does not burn. Pour the caramel into the bottom of 6 oz custard cups (or 9-inch flan pan or soufflé dish) and, working very quickly, spread it evenly.

Preheat oven to 350 degrees. Place eggs, yolks, vanilla, milks and cream cheese in a blender or food processor and process AT LEAST 5 minutes. Blend to death!

Pour mixture into the cups and place in larger baking pan in the center of the oven. Pour boiling water halfway up the sides of thecups. Bake 30-35 minutes (or 1 hour and 10 minutes for 9-inch pan) or until knife inserted in the center comes out clean. Watch carefully and cover the flan with foil if the top seems to be getting too brown. Remove from oven, cool to room temperature, then cut around the edges and invert onto serving plate.

Serve each piece with some of the caramel syrup.


Monday, December 24, 2007

Cookies Part Deux


When I saw this blog post on Ooh You Tasty Little Things, I was instantly bowled over and inspired. I wanted to make them OMGRIGHTNOW because they're so adorable!

I ended up finding a recipe on AllRecipes.com that was rated highest for sugar cookies. Now, here's the thing with All Recipes (or any recipe site that has feedback and comments): there's ALWAYS suggestions on bettering the recipe. Some people are convincing. I rarely use the original recipe as is; there is always someone yelling about there being too much flour, not enough flavor, etc. So, as usual, I went with some suggestions and they didn't come out as I expect they would have had I used the original recipe. I'm going to include the modifications I used but link you to the original. If you do make it, I'd suggest the more sugar (2 3/4 cups should do), the lemon zest (so yummy), and extra 1 tsp vanilla. Keep the flour. These didn't have enough and the added sugar made them spread out, not hold any shape (thus the circles after my stars came out all bloated) and they never cooked fully before browning.

I remember the author of the blog musing how she loved decorating cookies, bless her. As I got to my second snowflake, I thought, 'I really don't love this. I'm a cake kind of girl...' It was so much work. But the end pretty is worth it, I suppose. :)


THE BEST ROLLED SUGAR COOKIES

Source: AllRecipes.com, Submitted by: Jill Saunders


1 1/2 cups butter, softened
3 cups white sugar
4 eggs
2 teaspoon vanilla extract
1 teaspoon lemon zest

4 3/4 cups all-purpose flour
2 teaspoons baking powder
1 teaspoon salt

In a large bowl, cream together butter and sugar until smooth. Beat in eggs and vanilla. Stir in the flour, baking powder, and salt. Cover, and chill dough for at least one hour (or overnight).

Preheat oven to 400 degrees F (200 degrees C). Roll out dough on floured surface 1/4 to 1/2 inch thick. Cut into shapes with any cookie cutter. Place cookies 1 inch apart on ungreased cookie sheets.

Bake 8-10 minutes in preheated oven. Cool completely.


ROYAL ICING
Source: Joy of Baking.com

2 large egg whites
2 teaspoons fresh lemon juice
1/2 teaspoon vanilla extract
3 cups powdered sugar, sifted
In the bowl of your electric mixer (or with a hand mixer), beat the egg whites with the lemon juice. Add the sifted powdered sugar and vanilla and beat on low speed until combined and smooth. The icing needs to be used immediately or transferred to an airtight container as royal icing hardens when exposed to air. Cover with plastic wrap when not in use.
Red and blue Christmas 2007 FTW!

Wednesday, December 19, 2007

CookiesCookiesCookies

Being a stickler for tradition, I can only make the classic Peanut Butter Blossoms at Christmas although there's nothing really inherently Christmasy about them. It's chocolate and peanut butter, you know? Alas, it's a Christmas Cookie in our family so when the month of December rolls around, it's one of the first things I look forward to. The light peanut butter cookie, the melty chocolate Kiss... Heaven.

I got kind of ambitious with the many things on my list of Christmas Foods this year so I started early. The first week I made four batches of cookies alone. (This week I'm on the more intense cakes and candies but I'll get to that later.) I made two batches of the blossoms then wanted something that would travel well and wasn't chocolate. I settled on Coconut Macaroons which turned out really good but, as my mom says, what with Eagle Brand isn't good?

Last, I knew I was going to make cut-out sugar cookies later but still craved a sugary cookie without all the work. I found a Soft Sugar Cookie on All Recipes that took a few tries with the shaping but finally came out quite nice. Simple but with a good taste. My Christmas color theme this year is red and light blue (like the former Houston Oilers! Holla!) so I rolled one set of the sugar cookies in blue and sprinkled a little more in the center just for pop.


PEANUT BUTTER BLOSSOMS

Cream together:

1/2 cup shortening
1/2 cup peanut butter
1/2 cup sugar
1/2 cup packed brown sugar (light)

Mix in:

1 egg slightly beaten
1 tsp vanilla
1 level tsp baking soda
1/2 tsp salt

Stir in:

1 1/4 cups of flour (watch for consistency; should look shiny but hold together. Add less if needed)

Roll into balls, coat w/sugar, bake 375 degrees for 10 min. Remove from oven, press chocolate kisses into each center spreading ball so edges crack. Bake additional 1-2 minutes until chocolate melts.


COCONUT MACAROONS
Source: Ina Garten

14 ounces sweetened shredded coconut
14 ounces sweetened condensed milk
1 teaspoon pure vanilla extract
2 extra-large egg whites, at room temperature
1/4 teaspoon kosher salt

Preheat the oven to 325 degrees F.

Combine the coconut, condensed milk, and vanilla in a large bowl. Whip the egg whites and salt on high speed in the bowl of an electric mixer fitted with the whisk attachment until they make medium-firm peaks. Carefully fold the egg whites into the coconut mixture.

Drop the batter onto sheet pans lined with parchment paper using either a 1 3/4-inch diameter ice cream scoop, or two teaspoons. Bake for 25 to 30 minutes, until golden brown. Cool and serve.


SOFT SUGAR COOKIES IV
From AllRecipes.com, Submitted by Laura Stearns


2/3 cup shortening
2/3 cup butter
1 1/2 cups white sugar
2 eggs
2 teaspoons vanilla extract
3 1/2 cups all-purpose flour
2 teaspoons baking powder
1 teaspoon salt
1/3 cup granulated sugar for decoration

Preheat oven to 350 degrees F (175 degrees C).

In a medium bowl, cream together the butter, shortening and sugar. Stir in the eggs and vanilla. Combine the flour, baking powder and salt, stir into the creamed mixture until dough comes together. Roll dough into walnut sized balls and roll the balls in sugar. Place them on an unprepared cookie sheet about 2 inches apart. Press gently with bottom of a glass to make into evenly thick discs.

Bake cookies 10 to 12 minutes in the preheated oven, until bottom is light brown. Remove from baking sheets to cool on wire racks.