Showing posts with label ice cream. Show all posts

Thursday, June 17, 2010

Happy Birthday, No One!


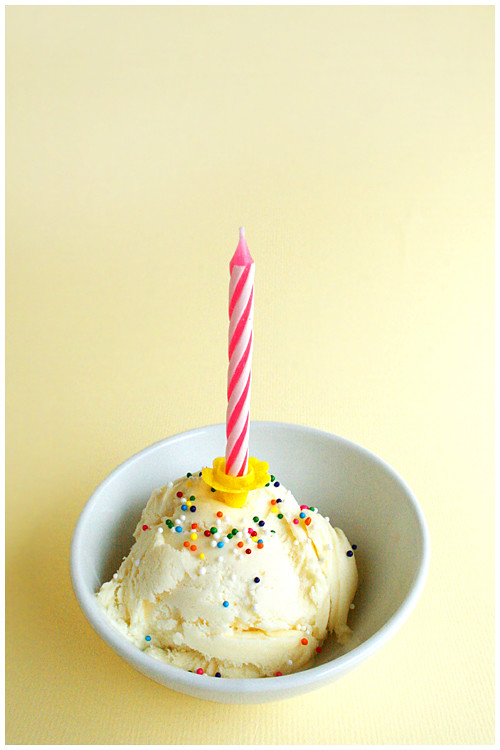
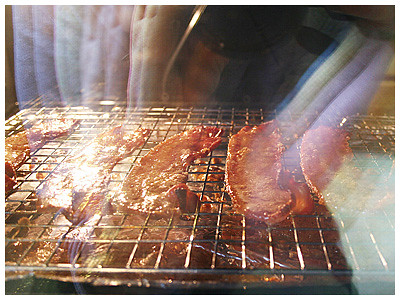
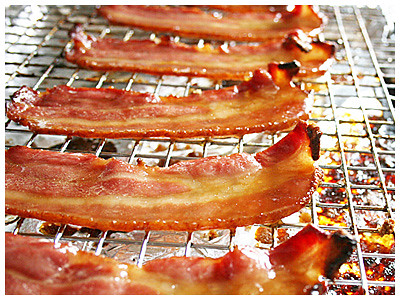
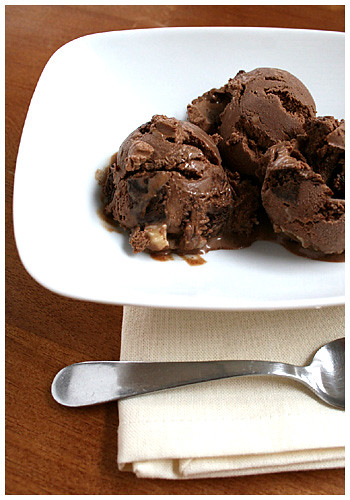
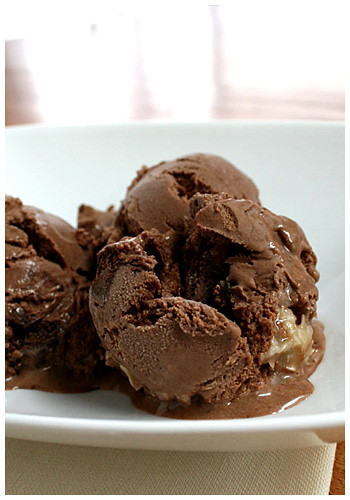
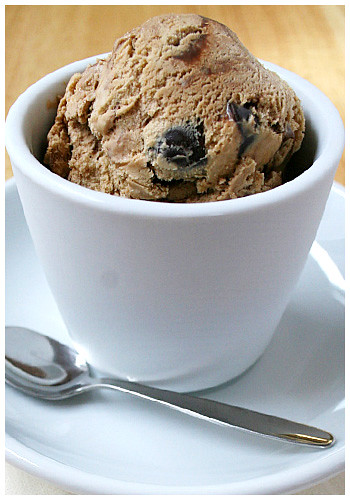
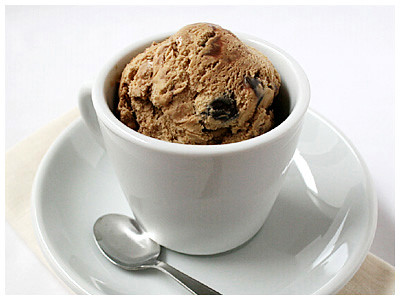
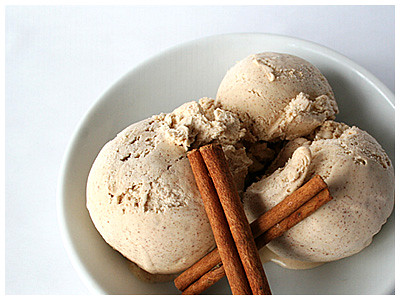
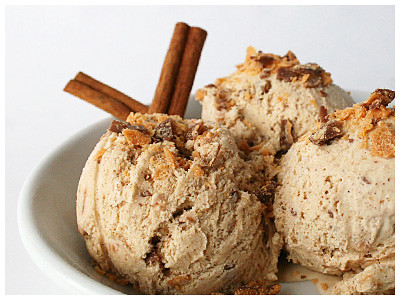
I've been in search of an awesome ice cream flavor because it's summer. Summer = ice cream, always. But over the last few years, I've made all my favorites: cinnamon, pistachio, coffee, coconut, German chocolate, bacon. I kid! The bacon wasn't just a favorite; it was THE favorite. kidding. So while I could make variations of these favorites, I kinda wanted something new. Well. This sounded awesome and while I never order cake batter ice cream at Cold Stone, it always seemed really good.

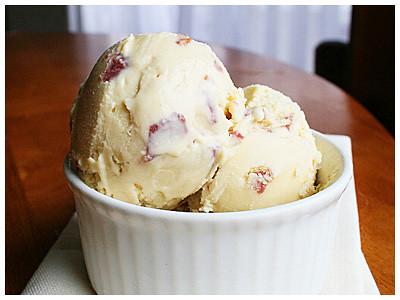
This is one of those ice creams that tastes like CREAM. Maybe that's the thing with homemade that I'm not used to. Some people like it. I'm on the fence... But it has actual cake mix in it so it's fine frozen but, man, don't let it melt because it becomes this mutant blob of non-solid, non-liquid goop. Not that you would let it melt but still. It's a weird concoction.

It's REALLY strong, though, and hard to eat much of. That's okay; this recipe doesn't make much. It's nice to have something novel to make/try but I don't think I'll be making it again.


CAKE BATTER ICE CREAM
Source: All Recipes, by Ekho

1 cup milk
1/2 cup white sugar
2 egg yolks, beaten
1 teaspoon vanilla extract
2 cups heavy whipping cream
3/4 cup white cake mix, sifted


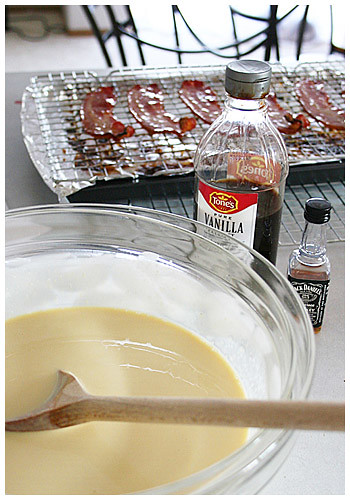
Whisk together milk, sugar, egg yolks, vanilla, cream, and cake mix in a saucepan until well blended. Cook over medium-low heat until mixture reaches 160 degrees F (70 degrees C), stirring frequently. Remove from heat and place in the refrigerator or freezer until liquid is cold.

Pour the chilled mixture into an ice cream maker and freeze according to manufacturer's directions until it reaches "soft-serve" consistency. Transfer ice cream to a one- or two-quart lidded plastic container; cover surface with plastic wrap and seal. For best results, ice cream should ripen in the freezer for at least 2 hours or overnight.

Tuesday, May 5, 2009

Coco-crazy.


It's that time again! Summer is upon us (a whopping upper 50s in Alaska! BREAK OUT THE SANDALS AND JEAN SHORTS!). That can only mean one thing: it's finally respectable to start making ice cream again. I should disclose the following factoid: Alaska eats the most ice cream per capita in the United States. Think about that for a second because we get about 3 months of summer and the rest is 40 and below from there. I've personally worn that factoid like a badge of honor; I've TOTALLY driven through McDonald's just for an ice cream in the dead of winter.

That being said, I don't MAKE a lot of ice cream in the winter. That just seems weird. But almost overnight, the sun started coming out and even though it's 50's-ish, it's still summer to us!

As previously mentioned in the last post, I started with coconut to duplicate a recipe I saw on a beautiful Flickr picture. I browsed my ice cream cookbooks and didn't find the coconut gelato she made, but did find a Toasted Coconut Ice Cream from David Lebovitz and this is the guy who came up with the bacon ice cream so I had to trust him. He's some sort of an authority on good ice cream so I felt I was in good hands.

And, man he was right. I don't mind taking two days to make something (the cooking then overnight freeze time) if it comes out this good. The coconut flavor infused in the ice cream is delicate but distinct and stands on its own perfectly. HOWEVER, I will admit that while I'm enjoying something purely coconut, my mind always wanders to chocolate (Mounds bars!) or maybe sliced almonds (Almond Joy!).

I even added more coconut on top of the ice cream when I devoured it because double double coconut is even better!

A quick note: the recipe requested unsweetened coconut but I didn't have that so I had to use sweetened. I kept the same amount of sugar that was called for, meaning mine would have come out slightly sweeter than Lebovitz' original. So you may want to weigh your options when deciding which road to take; I thought the sweetness of mine was perfect!


TOASTED COCONUT ICE CREAM
Source: David Lebovitz

Makes about 1 quart (1 liter)


1 cup dried, shredded coconut, preferably unsweetened
1 cup whole milk
2 cups heavy cream
3/4 cup sugar
Big pinch of salt
1 vanilla bean, split in half lengthwise
5 large egg yolks
1/2 teaspoon vanilla extract, or 1 teaspoon rum


Preheat the oven to 350 F. Spread the coconut on a baking sheet and bake for 5 to 8 minutes, stirring it frequently so it toasts evenly. Remove it from the oven when it's nice and fragrant and golden brown.

In a medium saucepan, warm the milk, 1 cup of the heavy cream, sugar and salt and add the toasted coconut. Use a paring knife, and scrape all the vanilla seeds into the warm milk, then add the pod as well. Cover, remove from the heat and let steep at room temperature for 1 hour.

Rewarm the coconut-infused mixture. Set a mesh strainer over another medium saucepan and strain the coconut-infused liquid through the strainer into the saucepan. Press down on the coconut very firmly with a flexible rubber spatula to extract as much of the flavor from it as possible. Remove the vanilla bean pieces and discard the coconut.

Pour the remaining 1 cup heavy cream into a large bowl and set the mesh strainer on top. In a separate medium bowl, whisk together the egg yolks. Slowly pour the warm coconut-infused mixture into the egg yolks, whisking constantly, then scrape the warmed egg yolks back into the saucepan.

Stir the mixture constantly over medium heat with a heatproof spatula, scraping the bottom as you stir, until the mixture thickens and coats the spatula. Pour the custard through the strainer and stir in the cream. Mix in the vanilla or rum and stir until cool over an ice bath.

Chill the mixture thoroughly in the refrigerator, then freeze it in your ice cream maker according to the manufacturer's instructions.

Monday, September 1, 2008

Chunky Indeed

I bought the Ben & Jerry's ice cream recipe book with high hopes. Finally! The secrets of some of my favorite ice creams revealed! well. It didn't exactly work out that way.

I tried the coffee recipe of theirs and it was good but I've never had their coffee ice cream anyway so I couldn't compare. So I moved on to banana because I HAVE had Chunky Monkey. Boy howdy; that was NOT Chunky Monkey. The consistency of the cream was icy (probably because the banana itself is quite watery) and I couldn't understand why it came out so wrong. I'm not especially surprised Ben & Jerry's didn't reveal their REAL recipe but, geez; something close would've been nice.

I should have given up but you know me; failure is not acceptable. It has to be right. So I went in search of another recipe and found one even titled "chunky" and made reference to being damn close to the famous flavor. I went to it and finally, something resembling the original! And so incredibly easy! Win!

In an effort to make it even closer to the brand flavor, I melted down some Dove dark chocolates and spread them in a thin (1/8 inch) layer on parchment paper. I chilled the chocolate in the fridge until hard and roughly cut it into rectangle pieces (maybe 2 x 1 1/2"). I don't love the texture of chocolate chips in ice cream and merely chopping a bar would make chocolate shavings throughout the mix. This worked really well. Homemade chocolate chunks. :)

I was pleased with how nice this one came out. It'd be even better with some chocolate syrup drizzled over top (but what wouldn't be better with that?)

CHUNKY BANANA NUT ICE CREAM
Adapted from All Recipes, Submitted by: Stephany Brown

4 bananas, broken into chunks
1 tablespoon lemon juice
1 teaspoon vanilla extract
1 cup white sugar
1 1/3 cups heavy cream, chilled
2/3 cup cold milk
1/2 cup chopped toasted walnuts
1/2 cup dark chocolate chunks


In a blender or food processor, combine bananas, lemon juice, vanilla, sugar, cream and milk. Puree until smooth. Transfer mixture to the freezer canister of an ice cream maker and freeze according to manufacturer's instructions.

When ice cream begins to stiffen, add walnuts and chocolate chunks.


Thursday, August 28, 2008

Bacon Ice Cream. Yep.

One of the best things about cooking is the excitement of trying something new, creating something or just doing the unusual because you can. My friend posed a challenge to me a few months ago, after I got my ice cream maker: she'd seen it on Top Chef and when I asked what flavor she wanted, she enthusiastically proposed BACON. She was probably half kidding but I take challenges seriously and she promised she'd at least try it if I made it.

I mulled it over for a while, thought about ways to infuse the custard base with bacon flavor (heat the cream with bacon bits then strain them out?). I planned, plotted, and was just about to just throw stuff together and see what happened. Then I found a recipe on David Lebovitz's blog and that was that. He starts by "candying" the bacon. Pretty much the same as making a sweet bacon (say, maple bacon). I really like the idea of baking the stuff, though; I have
issues with frying bacon. I know, it seems easy but there's always SOMETHING that gives you problems. Bacon is one of my enemies...
Sizzle sizzle!
And the finished product. It was kind of difficult to cut but that's because it wasn't crisp (which I didn't want for the ice cream, to be honest). So it's sticky from the brown sugar and soft. Messy messy. But wait! There's more... The custard is a simple, brown sugar base (with vanilla and a splash of whisky) and it was really good by itself. But if I didn't add the bacon then it would just be brown sugar ice cream and that's not what this was about. NO.

So I put it together and gave it a taste. It tastes like... [drum roll] ice cream and bacon. IKR?? Yeah, it's pretty straightforward. BUT the friend that requested it, liked it so that's all that mattered. (And a few more people who tried it were pretty okay with it!) It's something I can say I've tried now and that's something! BACON ICE CREAM
Source: David Lebovitz

For the candied bacon;
5 strips bacon
about 2 tablespoons light brown sugar

For the ice cream custard:
3 tablespoons salted butter
3/4 cup (packed) brown sugar, light or dark (you can use either)
2 3/4 cup half-and-half
5 large egg yolks
2 teaspoons dark rum or whiskey
1/4 teaspoon vanilla extract
optional: 1/4 teaspoon ground cinnamon


1. To candy the bacon, preheat the oven to 400F (200C).

2. Lay the strips of bacon on a baking sheet lined with a silicone mat or aluminum foil, shiny side down.


3. Sprinkle 1 1/2-2 teaspoons of brown sugar evenly over each strip of bacon, depending on length.


4. Bake for 12-16 minutes. Midway during baking, flip the bacon strips over and drag them through the dark, syrupy liquid that's collected on the baking sheet. Continue to bake until as dark as mahogany. Remove from oven and cool the strips on a wire rack.

5. Once crisp and cool, chop into little pieces, about the size of grains of rice. (Bacon bits can be stored in an airtight container and chilled for a day or so, or stored in the freezer a few weeks ahead.)

6. To make the ice cream custard, melt the butter in a heavy, medium-size saucepan. Stir in the brown sugar and half of the half-and-half. Pour the remaining half-and-half into a bowl set in an ice bath and set a mesh strainer over the top.

7. In a separate bowl, stir together the egg yolks, then gradually add some of the warm brown sugar mixture to them, whisking the yolks constantly as you pour. Pour the mixture back into the saucepan.

8. Cook over low to moderate heat, constantly stirring and scraping the bottom with a heatproof spatula, until the custard thickens enough to coat the spatula.

9. Strain the custard into the half-and-half, stirring over the ice bath, until cool. Add liquor, vanilla and cinnamon, if using.


10. Refrigerate the mixture. Once thoroughly chilled, freeze in your ice cream maker according to the manufacturer's instructions. Add the bacon bits during the last moment of churning, or stir them in when you remove the ice cream from the machine.

Saturday, July 5, 2008

Pistachios in Your Ice Cream

Ah, on to my third favorite flavor of ice cream (after coffee then cinnamon): pistachio. You know, Williams-Sonoma's recipes are swiftly becoming a safe bet; every one I've tried has come out really well. This was no exception. Creamy but not too sweet; a terrific balance of nutty pistachios and sweet cream!

Now that I've covered my absolute favs with success, I'm going to move on to more challenging flavors (banana, peanut butter?). The good news to all this ice cream making is, I'm getting pretty decent at getting a custard together. Practice really builds the confidence, you know? So much so, I think I'm ready to tackle more experimental flavors like... bacon. (I KNOW, RIGHT? Madness! Wish me luck...)


PISTACHIO ICE CREAM
Source: Williams-Sonoma

1 cup unsalted whole pistachios, roughly chopped
2/3 cup sugar
1 1/2 cups milk
1 1/2 cups heavy cream
4 egg yolks
Pinch of salt
1/2 tsp. almond extract


Preheat an oven to 350°F.

Arrange the pistachios in a single layer on a baking sheet and bake, shaking the pan occasionally, until the nuts are lightly golden and toasted, 5 to 7 minutes. Let cool to room temperature.

In a mini-food processor or standard-size food processor, combine 1/2 cup of the pistachios with the sugar and process until finely chopped and well blended. Reserve the remaining 1/2 cup pistachios.

In a saucepan, combine the milk, cream and the pistachio-sugar mixture and stir to blend. Set the pan over medium-low heat and warm the mixture, stirring occasionally, until the sugar is dissolved and steam begins to rise from the surface, 3 to 4 minutes. Remove from the heat and let the mixture steep for 10 to 15 minutes.

In a bowl, whisk together the egg yolks and salt until blended. Form a kitchen towel into a ring and place the bowl on top to prevent it from moving. Whisk in 1/2 cup of the pistachio-cream until smooth and blended, then pour the egg mixture back into the pan. Cook over medium-low heat, stirring slowly and continuously with a wooden spoon or spatula, until the custard thickens and a finger drawn across the back of the spoon leaves a path, 8 to 10 minutes; do not allow the custard to boil.

Pour the custard through a fine-mesh sieve set over a clean bowl; discard the pistachios. Nestle the bowl in a larger one filled halfway with ice and water and cool the custard to room temperature, stirring occasionally. Refrigerate until chilled, at least 1 hour.

Stir the almond extract into the custard, transfer to an ice cream maker and freeze according to the manufacturers instructions. At the end of the freezing stage, add the remaining 1/2 cup pistachios and continue processing just until they are blended into the ice cream. Transfer the ice cream to a chilled container, cover and freeze until firm, at least 3 hours or up to 3 days, before serving.

Makes about 1 quart.


Monday, June 16, 2008

German Chocolate Cake Ice Cream... Almost


You know what's hard to photograph? Ice cream. Even after you prep and do everything in your power short of shooting it IN the freezer, it just gives up on you and starts to melt in mere minutes. With this particular ice cream, it was SECONDS. I even froze the stuff in the shape of scoops so there was no lag between the freezer and my shots but still. It started breaking down about twenty seconds in. Prissy friggin' food.

Other than the prima donna act it gave me in front of the camera, this flavor really delivered. I got the chocolate base from Williams-Sonoma and had to modify it only superficially: I had no half-and-half so I substituted half milk and half cream (theoretically, half and half from scratch). They weren't kidding about it being rich. And after cooking the custard over the heat so there was no raw egg situation, I felt extremely comfortable licking the bowl of chocolate custard and dipping brownie in the creamy stuff as well. Mmmm. Chocolate 'splosion.

When I envisioned this flavor, I was aiming for German Chocolate cake. Then after I got home from the store, I remembered there are pecans in the caramel coconut part. Oh well. It came out just fine. The only complaint I'd have against the stuff is that the caramel is very sweet and the ice cream is very rich. It makes for an intense flavor. But some people like very sweet/very rich a lot so it's just up to personal tastes, really.

I was rather pleased with making the brownies and caramel sauce myself. It felt good to look at the final product and know I made every bit from scratch. This, from a novice cook, that is. I mean, watching the caramel come to a boil? Terrifying. I just knew it was going to burn the second I looked away. (So I never looked away.)

I've encountered a few issues with ice cream, though.

#1. It doesn't give you immediate results. I'm used to baking something and having it ready to eat right then. This, you go through all the work and then? Put it away (to freeze completely). It's somewhat unsatisfying.


#2. It's not portable. If the stuff melts only minutes out of the freezer, imagine a ten, fifteen or twenty minute car ride to someone's house! So people have to come to IT (again, with the prissy nature). It makes it difficult to get to family and friends.

However, my love of creating personal flavors outweighs any faults the cooking process may have. I see pistachio and then banana on the horizon...


MMMMM... BROWNIES
Source: cicada77 at AllRecipes.com


1/2 cup white sugar
2 tablespoons butter
2 tablespoons water
1 1/2 cups semisweet chocolate chips
2 eggs
1/2 teaspoon vanilla extract
2/3 cup all-purpose flour
1/4 teaspoon baking soda
1/2 teaspoon salt


Preheat the oven to 325 degrees F (165 degrees C). Grease an 8x8 inch square pan.

In a medium saucepan, combine the sugar, butter and water. Cook over medium heat until boiling. Remove from heat and stir in chocolate chips until melted and smooth. Mix in the eggs and vanilla. Combine the flour, baking soda and salt; stir into the chocolate mixture. Spread evenly into the prepared pan.

Bake for 25 to 30 minutes in the preheated oven, until brownies set up. Do not overbake! Cool in pan.

After completely cool, cut out 1/4 of pan and freeze. When hard, cut into 1 inch cubes (roughly 1 cup of chunks) and refreeze until ready to use.


CARAMEL COCONUT SWIRL
Adapted from Gourmet, Nov 1998

1/2 cup sugar
1/3 cup light corn syrup
1/4 cup water
7 tablespoons heavy cream
1/2 teaspoon vanilla
3/4 - 1 cup shredded coconut


In a 3-quart heavy saucepan boil sugar, corn syrup, water, and a pinch salt over moderate heat, stirring, until sugar is dissolved. Boil mixture, without stirring, gently swirling pan, until a deep golden caramel. Remove pan from heat and carefully pour cream and vanilla down side of pan (mixture will vigorously steam and caramel will harden). Simmer mixture, stirring, until caramel is dissolved. Remove pan from heat, add coconut and cool caramel. Caramel swirl may be made 1 week ahead and chilled, covered. Bring caramel swirl to room temperature before using. (If caramel swirl is too stiff to pour, heat slightly.)


CHOCOLATE ICE CREAM
Adapted from Williams Sonoma


1 1/2 cups heavy cream
1 1/2 cups whole milk
6 oz. bittersweet chocolate, finely chopped
(about 1 1/3 cups)
5 egg yolks
1 cup sugar
Pinch of salt
1 tsp. vanilla extract


In a saucepan over medium heat, warm the heavy cream and milk until bubbles form around the edges of the pan. Remove from the heat, add the chocolate and stir until smooth and blended.

In a large bowl, whisk together the egg yolks, sugar and salt until blended. Slowly add the chocolate cream, whisking constantly until fully incorporated.

Pour the mixture into a bowl on top of a double boiler. Set the pan over but not touching simmering water in the bottom pan. Cook, stirring constantly with a wooden spoon, until a finger drawn across the back of the spoon leaves a path, 10 to 12 minutes; do not allow the custard to boil. Pour the custard through a fine-mesh sieve set over a clean bowl and stir in the vanilla. Nestle the bowl in a larger one filled halfway with ice and water. Cool the custard, stirring occasionally, about 30 minutes.

Transfer the custard to an ice cream maker and freeze according to the manufacturer's instructions. Just before ice cream is finished churning, add brownie chunks and stir in completely. Transfer one third ice cream to an airtight container and drizzle one third caramel swirl over it. Repeat layering with remaining ice cream and caramel swirl. Cover and freeze until firm, 3 to 4 hours, before serving. Makes about 1 quart.


Sunday, June 8, 2008

Coffee Ice Cream Too!

Continuing on with the ice cream experimenting, I next attempted my second favorite flavor: coffee ice cream with fudge swirl and chocolate covered almonds (AKA Starbucks' Java Chip). I guess I should disclose that the ice cream is the only thing I actually made: the almonds and chocolate fudge are store bought. Next time, I'll make my own chocolate. This was good, of course, but it wasn't MINE.

I ran into an issue with this recipe and the entire Ben & Jerry's ice cream book: they use raw eggs. I was nervous. Very very nervous. But after asking around (and the fact that these recipes are tried and true), I went for it and it's fine.

Another issue that haunted me was the swirl... The recipe calls to "fold" it in as the very last stage however, it also says to chill the chocolate so it's not exactly pliable. It was a big clump so I kept cutting and folding and soon it became mostly-mocha ice cream. I've heard some people layering the ice cream and fudge in the storage container itself so when you scoop in, distinct stripes of chocolate you get! Will try that next time...

COFFEE ALMOND SWIRL
Adapted from Ben & Jerry's

2 large eggs
3/4 cup plus 2 tablespoons sugar
2 cups heavy or whipping cream
1 cup milk
3 tablespoons espresso powder
3/4 cup chocolate covered almonds (halved)
1 cup cold fudge sauce


1. Whisk the eggs in a mixing bowl until light and fluffy, 1 to 2 minutes. Whisk the sugar, a little at a time, then continue whisking until completely blended, about 1 minute more. Add the cream, milk and 2 tablespoons of the coffee and whisk to blend.

2. Transfer the mixture to an ice cream maker and freeze following the manufacturer's instructions.

3. After the ice cream stiffens (about 2 minutes before it is done), add the remaining 1 tablespoon of coffee and 3/4 cup almonds, then continue freezing until ice cream is ready. Remove the dasher and fold in fudge sauce with a spatula.

Tuesday, May 27, 2008

You scream, I scream.

I'm still here! I haven't disappeared! I'm in the middle of moving to a new house so you'll have to excuse my bouts of absence. It's kind of hard to cook when you can't find measuring cups... But I finally got an ice cream maker for my birthday and I couldn't be more excited. So many recipes to try! I can make my own ice cream?! SCORE. This is my very first and it was a total success! A little explanation first, though:

You all know those ice cream chains that mix up toppings and stuff into the ice cream in front of you. Cold Stone is probably the most widespread but in Houston, Marble Slab came first. They have many amazing flavors but my favorite is the Vanilla Cinnamon. One day, my mom decided to mix in a never-fails ingredient: Butterfinger. And the rest is history. Or, you know; my favorite ice cream flavor of all time. Since I'm no longer in Houston and have no access to Marble Slab, I knew I would have to attempt cinnamon ice cream with Butterfinger mixed in.

Now, ice cream making is intense; this entire process took 3 DAYS. It'll take two next time but this time I had to freeze the bowl overnight, make the ice cream and chill the liquid form in the fridge overnight then brew it up in the machine the next morning then freeze it AGAIN overnight. When it first comes out of the machine, it's like soft serve and that's just not real ice cream to me. But when I took it out today? Perfect!

I found a few cinnamon recipes but tried one that was highly rated at All Recipes first. It doesn't look like Marble Slab's but it sure is cinnamony!

It came out smooth and creamy and so so good. I split the batch and kept half plain then I went ahead and mixed my Butterfinger in the rest!!
oh good God. It's SO good. I don't know what it is (cinnamon and Butterfinger??) but it goes so well together. VERY sweet but so yummy. I still can't believe I made ice cream! It looks and tastes so real!! I'm going to include my modified recipe but just cut out the crushed Butterfinger if you want straight cinnamon ice cream (which is delicious on it's own). It would go wonderfully with a dense chocolate cake...


CINNAMON ICE CREAM WITH BUTTERFINGER
Adapted from Elizabeth's Cinnamon Ice Cream

  • 1 cup white sugar
  • 1 1/2 cups half-and-half cream
  • 2 eggs, beaten
  • 1 cup heavy cream
  • 1 teaspoon vanilla extract
  • 2 teaspoons ground cinnamon
  • 1/2 cup crushed Butterfinger (or to your liking)

1. In a saucepan over medium-low heat, stir together the sugar and half-and-half. When the mixture begins to simmer, remove from heat, and whisk half of the mixture into the eggs. Whisk quickly so that the eggs do not scramble. Pour the egg mixture back into the saucepan, and stir in the heavy cream. Continue cooking over medium-low heat, stirring constantly, until the mixture is thick enough to coat the back of a metal spoon. Remove from heat, and whisk in vanilla and cinnamon. Cool in refrigerator overnight.


2. Pour cooled mixture into an ice cream maker, and freeze according to the manufacturer's instructions.


3. At end of mixing process, add crushed Butterfinger and let stir until fully combined. Remove from ice cream maker and store in air tight container in freezer overnight (to allow ice cream to fully refreeze).