Wednesday, December 31, 2008

Holiday Cookies


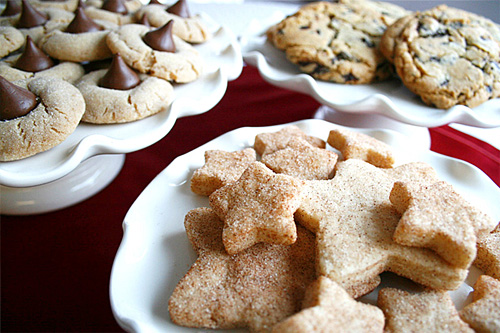
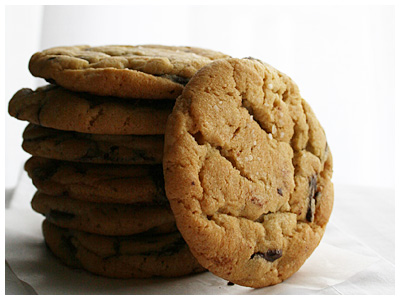
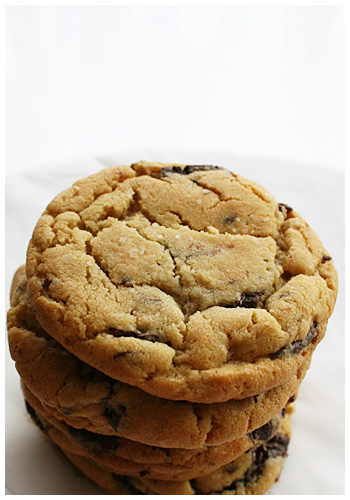
A few weeks ago, I made about 12 dozen cookies to give away to family and friends for the holidays. I made sugar (a bust), peanut butter blossoms, magic cookie bars, chocolate chip cookies and biscochitos. I sent packages of a variety of these goodies to friends and that was the most fun. My friends were pleasantly surprised to receive a box of cookies out of no where which makes me all kinds of giddy!


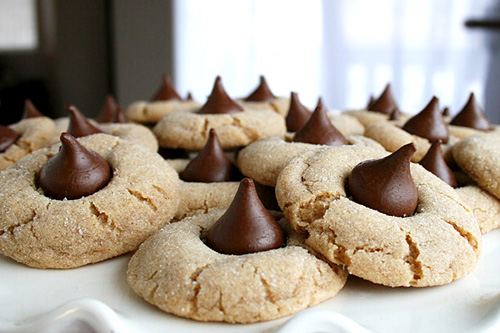
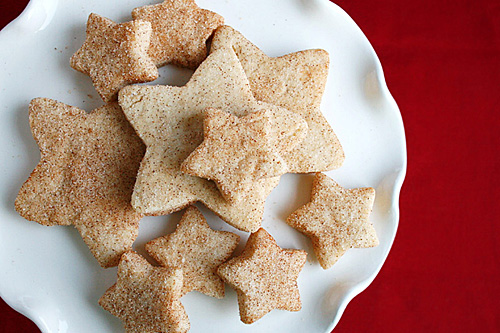
Peanut butter blossoms are a tradition every Christmas and I used this same awesome recipe for the chocolate chip cookies. This is the first year I made the biscochitos, though, which are a Mexican (or Spanish, if you want to go that far back) cookie that we always get at the Mexican bakeries in Houston. I had a few recipes but the first I tried called for lard. Now, I've never SEEN lard, I've never SMELLED lard and I've certainly never COOKED with lard before. It was definitely different. I actually kind of thought it smelled like turkey. Weird, I know. But I made the cookies which vaguely smelled (like turkey, to me) and I just couldn't give them away. I made another batch with Crisco and they were SO MUCH better. My mom said, after comparing the two, that the lard cookie tasted richer. I agree but mostly because the Crisco cookie might've been lighter because it didn't have that heavy turkey taste. (I kid! But seriously; that mess is OFF.)

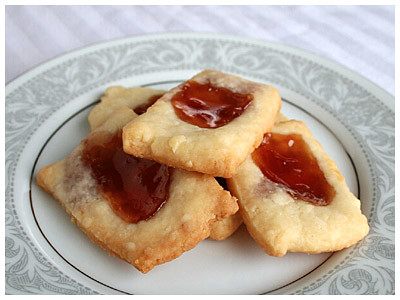
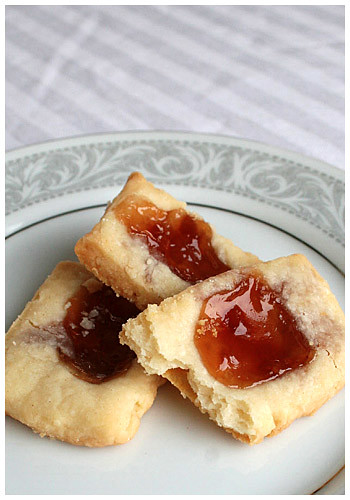
So I sent out the Crisco biscochitos to my friends in the shapes of Christmasy stars! Because my first attempt at sugar cookies was a bust, I had a second go at them. (See further down.)

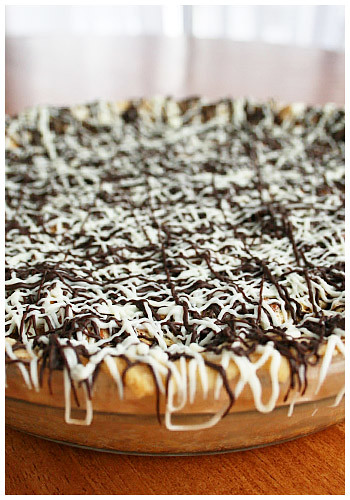
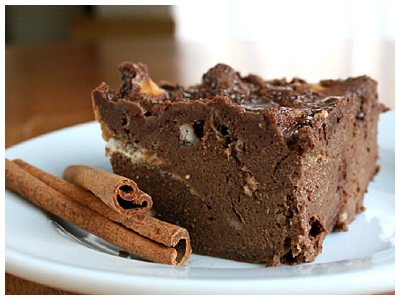
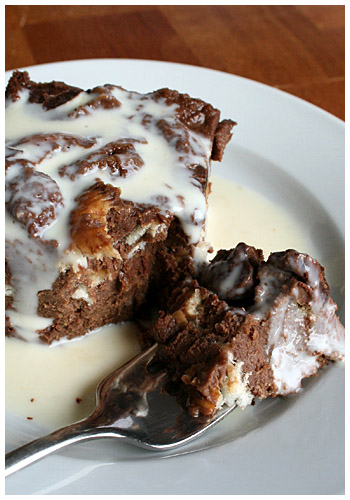
It's funny but I made all those cookies and because I planned to give so many away, I really only ate one or two from each batch. I had to save the rest for others! So I made another pan of Magic Cookie Bars that stayed home for family. They're kind of my favorite bar-thing on the planet so. I gots to have some for meeeee.


BISCOCHITOS

1 cup vegetable shortening
2/3 cup sugar
1 egg
2 to 4 Tablespoons red wine, brandy or sherry
1 to 1 1/2 teaspoons crushed/ground anise seed
3 cups flour
2 teaspoons baking powder, optional
1/2 teaspoon salt, optional

Cinnamon Sugar:
1/4 cup sugar
1 tablespoon ground cinnamon


Preheat oven to 350°.

Beat lard with an electric mixer until light and fluffy. Slowly beat in the sugar, then the egg. Beat in 2 Tablespoons of the wine and the anise seed. Toss the flour together with the baking powder and salt, if using. Gently stir in, adding more wine as needed to form a soft dough. Let stand for 10 minutes or cover with plastic wrap and refrigerate for 15 minutes.

On a lightly floured surface, roll out 1/4-inch thick and cut into shapes as desired. Dip the top side of each cookie in the cinnamon-sugar and place on ungreased cookie sheets, about 1 inch apart.

Bake for 10 to 15 minutes, depending upon size, just until the edges turn a pale blond. Let cool a few minutes then remove to a wire rack to cool. Store in a cookie jar or airtight container.


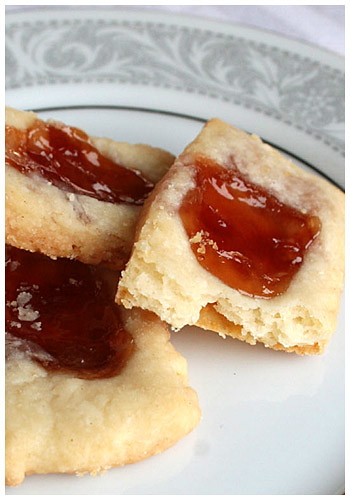
THEN I committed myself to making sugar cookies and it came down to Christmas Eve but I did them. Next year I'll prepare better and do them right but these came out cute. :)


Friday, December 5, 2008

Mini Pies!

As I mentioned in the last post, I made a chocolate pecan pie for work and didn't get to taste it. Then my mother made the same pie for Thanksgiving and I had a small piece (because there were three pies to sample!). So the week after Thanksgiving, I realized I didn't get my pecan pie fix like I shoulda. I didn't want to make a whole pie for myself. C'mon give me some credit; I do have some control. However I needed it so the solution was clearly MINI pie.

I used the same Pecan Pie recipe from the last post (without the chocolate) and simply split the filling recipe in half. I used the equivalent to one pie crust and it made five mini tart/pies. The only adjustment I had to make was to the baking time: I lowered the temperature to around 320 degrees and it ended up baking 40 minutes or so. The toothpick test will let you know when they're done!

They're perfect for one serving of your very own little pie! :)

Sunday, November 30, 2008

Invisible cakes and pies

Okay, here's the thing: I HAVE been baking over this past month. However. It's been for work parties and such so I haven't been able to take proper pictures and cut them open, etc. Unless I cut a piece out and took it to work that way. 'Happy Birthday! Oh BTW, I already had a piece. That's cool, right?'

So I've made a pumpkin cake with cream cheese icing which was pretty all right. I'd make it again (and might so I can post about it and someone other than my coworkers can taste it). I also made a pumpkin pie for Thanksgiving that was an experiment that I didn't love. It involved a crumb topping that didn't work out. I won't make that again.

Then I made a chocolate pecan pie which is a Thanksgiving tradition in my family. It's very rich and very sweet but we love it; we have it every year. It might look like a lot but trust me, if your tastes run decadent, this pie is definitely for you.

SOUTHERN CHOCOLATE PECAN PIE

1/2 cup sugar
1/4 cup butter (melted)
1 cup light corn syrup
1/4 tsp salt
1 tsp vanilla
3 eggs
1/2 cup chocolate chips (plus more for drizzling on top)
1 to 1/2 cups pecans
1 9-inch deep dish pie shell (unbaked)


1. Preheat oven to 350 degrees F.

2. Mix sugar and butter well in mixing bowl. Add syrup, salt and vanilla. Mix again. Add eggs one at a time and mix after each.

3. Spread chocolate chips over bottom of unbaked pie crust. Spread pecans over chocolate chips. Pour mixture on top of both chocolate and pecans.

4. Bake until top is brown and pie set (about 45-55 minutes). Toothpick stuck in center of pie should come out almost dry.

5. When pie is completely cool, drizzle melted white and dark chocolate on top (easiest way is to slowly microwave in a Ziplock freezer bag and cut small hole in bottom corner of baggie).

Monday, November 3, 2008

Spider Cake

This is getting to be a THING, methinks...

I made this for the cake walk at my work and the woman who picked it was very pleased! She had a gathering the next night and said all her friends enjoyed it and asked for the recipe! It was awesome!


It was just my usual chocolate cake in two layers and vanilla buttercream (recipe here). The lady who took it really liked the frosting. lol. I thought, who doesn't??

The black is the premade Wilton tube frosting; I didn't want to mess with trying to color my own because black is never as good as Wilton's makes it. And it tasted fine!

It didn't come out perfect; if I were to do it again, I'd use a thinner tip for the web and I'd make a GIANT spider (possibly with balloons...)

Friday, October 10, 2008

Pumpkin On!


The pumpkin madness continues! I noticed a weird trend, though, when I jumped back in my blog to last fall: THEN I made a bread pudding, a pumpkin dessert, some chocolate chip cookies, some strawberry and tea cookies, a crème brûlée... Are we sensing a pattern here? Yeah, these are all things I've made THIS fall too. Granted, they're variations on flavors this year but still. Seems like in the fall I get cravings for a lot of the same stuff: comfort foods and pumpkin! I have to make it my mission to try some new stuff when I get back from my vacation.

But back to THIS recipe. The funny thing about pumpkin desserts which inevitably have the same familiar spices is, they kind of all remind you of pumpkin pie. This crème brûlée was just like that, pie-like, only in a softer texture.


The exciting thing with this crème brûlée, however, is that I borrowed my mom's serious, hardware-section blow torch and it worked PERFECTLY. No more putting the custards under a broiler and hoping they come out evenly done (but always burning just a little bit too much). I had complete control to make it an even, perfectly browned, sugar top! I will never use anything else again!

And my mom said it didn't need whipped cream but I just can't help it; pumpkin just seems wrong without it...


PUMPKIN CRÈME BRÛLÉE
Source: Williams-Sonoma

1 1/2 cups heavy cream
1 1/2 tsp. freshly grated cinnamon
1/4 tsp. ground allspice
1/2 tsp. freshly grated ginger
3/4 tsp. freshly grated nutmeg
5 egg yolks
1/2 tsp. vanilla extract
Pinch of salt
6 Tbs. pumpkin puree
1/3 cup plus 4 tsp. granulated sugar
1 Tbs. firmly packed light brown sugar


Preheat an oven to 300°F. Have a pot of boiling water ready.

Pour the cream into a small saucepan and whisk in the cinnamon, allspice, ginger and nutmeg. Set over medium-low heat and warm the cream mixture until bubbles form around the edges of the pan and steam begins to rise from the surface, about 3 minutes. Remove from the heat and let stand for 15 minutes.

In a large bowl, whisk together the egg yolks, vanilla, salt, pumpkin puree, the 1D3 cup granulated sugar and the brown sugar until smooth and blended. Slowly pour in the cream mixture, stirring until blended. Pour the mixture through a fine-mesh sieve set over a bowl. Divide the mixture among four 8-fl.-oz. ramekins and place in a large baking pan. Add boiling water to fill the pan halfway up the sides of the ramekins. Cover the pan loosely with aluminum foil and bake until the custards are just set around the edges, about 30 minutes.

Transfer the ramekins to a wire rack and let cool to room temperature. Cover with plastic wrap and refrigerate for at least 4 hours or up to 3 days.

Just before serving, sprinkle 1 tsp. granulated sugar evenly over the surface of each custard. Using a kitchen torch according to the manufacturer's instructions, move the flame continuously in small circles over the surface until the sugar melts and lightly browns. Refrigerate until sugar top hardens slightly then serve. Serves 4.

Tuesday, October 7, 2008

Flaky Cookies and Tea

Sometimes the easiest dishes taste the best. There's something pure and perfect about simple flavors. My mother made these cookies MAYBE twice, about ten years ago, and I still remembered them. There's almost nothing to them but they're flaky, sometimes chewy (with cooked jelly) and they're altogether lovely.


And I've got a serious soft spot for strawberry sweets and tea. Of course, you can use whatever jelly or jam you like best! Go crazy!

A word of advice: these won't rise at all. I recommend making them the thickness you'd like in a buttery cookie (1/2-inch is ideal to me) and make deep wells for the jelly. It likes to escape its cookie when it can!

And one more warning? They're super addictive. Good luck having just one...


CREAM CHEESE / JELLY COOKIES

3 ounces cream cheese (may use 1/3 less fat)
1 stick (4 oz) unsalted butter, softened (*if using salted, omit salt)
1 cup all-purpose flour
1 pinch salt
jam, jelly, or preserves, your favorite


Cream the cream cheese and butter together. Blend in flour and salt.

Roll out on a floured surface and cut into lines dividing lines 2 x 1 inch long. Press a trowel in center with end of spoon or finger/thumb. Place a dab of preserves or jam in the center of each cookie.

Bake on an ungreased cookie sheet at 375 degrees for about 10 to 15 minutes.

Friday, September 26, 2008

Pumpkin Season Begins


There's something kind of perfect about pumpkin. Not only is it good for you (it is, for serious), when paired with the classic spices of cinnamon, nutmeg and cloves, it immediately evokes this feeling of warmth, familiarity and family. It might solely be an American thing because the traditional pumpkin pie is mandatory at Thanksgiving dinner every November, every year, without fail. Pumpkin then becomes this symbol of tradition and comfort. That flush of happiness that pumpkin flavors provoke is genuine and impossible to manufacture. It's home.

Therefore, I'm always eager to get going on the pumpkin train when fall rolls around. August is always a little too soon (the summer clings on!), September is good but October is GREAT. November, of course, is virtually Pumpkin Month, what with Thanksgiving and all. Last year I had great plans and then fell short on nearly all of them. I ended up only making pumpkin chocolate chip muffins and a pumpkin bread that wasn't fantastic (so it never got posted). This year, I am not falling down on the job. I have at least three more pumpkin-centric recipes that I WILL be making over the next two months. But first, there is bread pudding:

I think I can safely put bread pudding up there as one of my favorite things ever. I've made three different kinds now and each one has been delish. I found this recipe on Epicurious.com and adapted it for individual servings (the original is for an 11x7 pan) and, again, I used the plain hoagie bread instead of the "egg bread" that's called for. The beauty of bread pudding seems to be how versatile it is. I'm sure an egg bread such as Challah would have been just as good. I also played it safe because I was changing up the recipe and baked the ramekins in a water bath, lowered the temperature and cut the bake time virtually in half. Smaller portions bake faster and all. The water bath may be unnecessary so exclude at your own risk!


Then there's the caramel sauce that goes along. I'll admit this seemed a little unnecessary once you taste the finished product. Pumpkin is a strong enough flavor with it's spices to stand on its own; you don't need caramel taking anything away from that perfect combination. Unless you're a stickler for decoration, I'd skip it. It looks like it enhances the dish, but it doesn't really. A dollop of whipped cream is all you need to go with pumpkin goodness. I'm seriously beginning to love the consistency of bread pudding and this one came out lovely!


PUMPKIN BREAD PUDDING
Adapted from Bon Appétit

Makes about 8-9 individual ramekins


2 cups half and half
1 15-ounce can pure pumpkin
1 cup (packed) plus 2 tablespoons dark brown sugar
2 large eggs
1 1/2 teaspoons pumpkin pie spice
1 1/2 teaspoons ground cinnamon
1 1/2 teaspoons vanilla extract
10 cups 1/2-inch cubes bread (about 10-ounces)


Optional Caramel Sauce

1 1/4 cups (packed) dark brown sugar
1/2 cup (1 stick) unsalted butter
1/2 cup whipping cream

For bread pudding: Preheat oven to 330°F.

Whisk half and half, pumpkin, dark brown sugar, eggs, pumpkin pie spice, cinnamon and vanilla extract in large bowl to blend. Fold in bread cubes. Let stand 15 minutes.

Transfer mixture to 8 ramekins. Set in a large pan and fill halfway up ramekins with boiling water. Bake pumpkin bread pudding until tester inserted into center comes out clean, about 20 minutes.

Meanwhile, prepare caramel sauce: Whisk brown sugar and butter in heavy medium saucepan over medium heat until butter melts. Whisk in cream and stir until sugar dissolves and sauce is smooth, about 3 minutes.

Serve warm with a dollop of whipped cream and drizzle with caramel sauce.

Sunday, September 21, 2008

Chocolate. Bread. Pudding!


There's a restaurant chain in Houston, TX, where I'm from, called Pappa's. The original was seafood but over the past 30+ years, they've expanded to separate restaurants specializing in Cajun, barbeque, steak, burgers, Greek and Mexican. It's at the excellent Pappasito's Cantina (the best Mexican restaurant that I know of) that I first tasted chocolate bread pudding.


It was magnificent. It contradicted what I believed bread pudding to be - it was solid, rich and decadent. It quickly became a staple of the ultimate meal at Pappasito's. The restaurant serves it at room temperature (or even slightly chilled) with crème anglaise AND a scoop of cinnamon ice cream. The two creamy sides compliment the rich chocolate dessert perfectly.

So when I went in search of a chocolate bread pudding recipe, I started getting discouraged: those with pictures clearly looked nothing like the kind from Pappasito's. They were more traditional bread pudding, thin, kind of goopy or loose, and none had terrific reviews. Then I stumbled on one called "DOUBLE Chocolate Bread Pudding" and I was intrigued. The recipe was directly from a restaurant called South City Kitchen in Georgia and the picture looked JUST like Pappasito's (in terms of consistency). However, it called for croissants instead of a regular French bread and having seen bits of bread-bread in Pappasitos', I knew I would have to alter their recipe. That made for a little uncertainty but once the finished product came out, I had absolute NO complaints.

It was better than I could've hoped for. VERY close to Pappasitos' recipe. I even made sure to have crème anglaise with it! I ended up using hoagie bread which are just small (about 5-6 inch long), oval loaves and they weren't stale or hard. They were still soft and they soaked up the custard very well, making a solid pudding.

This is, without a doubt, one of my favorite things. If you enjoy rich, chocolatey desserts, you MUST make this.

DOUBLE CHOCOLATE BREAD PUDDING
Adapted from South City Kitchen, Vinings

8 ounces semi-sweet chocolate, cut into small chunks
1 cup milk
1 1/2 cups heavy cream
1/4 cup (1/2 stick) unsalted butter
4 eggs
1/2 cup granulated sugar
1 tablespoon vanilla extract
1 teaspoon cinnamon
1/4 teaspoon nutmeg
1 pinch salt
8 ounces bread (about 3 large hoagie-sized pieces)
1 cup (6 ounces) semi-sweet chocolate chips


Preheat oven to 225 degrees. Place the semisweet chocolate in a large mixing bowl and set aside. In a saucepan over medium heat, heat the milk, cream and butter until butter is melted. Add to the semisweet chocolate, cover with a plate and set aside for a few minutes, then whisk until smooth.

In a small bowl, beat together the eggs, sugar, vanilla, cinnamon, nutmeg and salt. Beat a small amount of the warm chocolate mixture into the eggs, then whisk all of the egg mixture into the warm chocolate mixture.

Break up the bread into about 1-inch pieces and fold them into the custard mixture. (Add only enough to coat the bread very well and have a little liquid left over.) Then fold in the chocolate chips.

Pour into a buttered 2 quart baking dish (or 8-inch square pan). Bake until set, about 1 1/2 hours. Let rest at room temperature for 10 minutes; serve warm. Chill remainder as soon as possible. Leftovers can be reheated in a microwave oven.


CREME ANGLAISE
Source: Williams-Sonoma

2 cups milk
2 eggs plus 1 egg yolk
1/4 cup sugar
2 tsp. vanilla extract


Rinse the inside of a nonaluminum saucepan with water and shake out the excess water. Pour in the milk, place over medium-low heat and cook until small bubbles form around the edges of the pan, about 5 minutes.

In a small bowl, combine the eggs, egg yolk and sugar and whisk just until blended. Gradually whisk in half of the hot milk, then pour the egg mixture into the pan. Set over low heat and cook, stirring constantly, until the mixture is thick enough to coat the back of a spoon and leaves a clear trail when a finger is drawn through it, 6 to 8 minutes. Do not allow it to boil.

Strain the mixture through a fine-mesh sieve into a bowl. Stir in the vanilla. Cover with plastic wrap, pressing it directly on the surface to prevent a skin from forming, and let cool. Refrigerate for at least 2 hours or for up to 2 days.

Makes about 2 cups.


Saturday, September 20, 2008

Reddish Pink Velvet

You know, I love trying new recipes but I've run into a predicament: if I make something that I've never had before, I don't know if it's RIGHT. That is to say, I'm not sure that I've made it in the usual way it's supposed to be. Now, I guess one could argue that as long as it's good, it's a success. But not me; I wouldn't argue that. That's silly logic.

So I got bored the other day and decided to try red velvet cupcakes. The first recipe I had saved was Paula Deen's and I thought, Hell, she's a Southerner; these should be as standard as they come.


The batter was pretty sticky looking and I only had one tablespoon of red dye on hand (who has that much liquid red dye sitting around??). So it looked like pink glue. They baked up fine but once I took a bite, they were kinda... plain. I was expecting a dense, dark and rich cake, akin to chocolate in its texture. This was kind of just regular, fluffy cake with a tiny hint of cocoa.

Needless to say I was disappointed and a little baffled. Surely this is not how most red velvet cakes come out... I've SEEN them; they're THICK. I sort of concluded that it must be this recipe that was less than stellar. I would like to try a different one but I've got to get to the store for more red dye. Maybe some other time; I wasn't terribly impressed with the taste so I'm not in a rush to duplicate.

Besides, it's FALL. Time for pumpkin and warm, yummy foods!


RED VELVET CUPCAKES
Source: Paula Deen

For the cupcakes:
2 1/2 cups all-purpose flour
1 1/2 cups sugar
1 teaspoon baking soda
1 teaspoon salt
1 teaspoon cocoa powder
1 1/2 cups vegetable oil
1 cup buttermilk, room temperature
2 large eggs, room temperature
2 tablespoons red food coloring
1 teaspoon white distilled vinegar
1 teaspoon vanilla extract


For the Cream Cheese Frosting:
1 pound cream cheese, softened
2 sticks butter, softened
1 teaspoon vanilla extract
4 cups sifted confectioners' sugar


For the cupcakes:
Preheat the oven to 350 degrees F. Line 2 (12-cup) muffin pans with cupcake papers.

In a medium mixing bowl, sift together the flour, sugar, baking soda, salt, and cocoa powder. In a large bowl gently beat together the oil, buttermilk, eggs, food coloring, vinegar, and vanilla. Add the sifted dry ingredients to the wet and mix until smooth and thoroughly combined.

Divide the batter evenly among the cupcake tins about 2/3 filled. Bake in oven for about 20 to 22 minutes, turning the pans once, half way through. Test the cupcakes with a toothpick for doneness. Remove from oven and cool completely before frosting.


For the Cream Cheese Frosting:
In a large mixing bowl, beat the cream cheese, butter and vanilla together until smooth. Add the sugar and on low speed, beat until incorporated. Increase the speed to high and mix until very light and fluffy.

Cook's Note: Frost the cupcakes with a butter knife or pipe it on with a big star tip.


Monday, September 8, 2008

The Ultimate Chocolate Chip Cookies?

My local newspaper ran an article from the New York Times by David Leite in which he went in search of the "perfect chocolate chip cookie". He went to New York City's best bakeries and got all the insider tips. Custom chocolate made exclusively for bakers, small batches baked so they are always fresh, warming trays for customers who wanted their cookies all nice and gooey.


One of the most interesting things was offered by Dorie Greenspan who noted that salt was incredibly important when dealing with sweet baked goods. Not only mixed in the cookie itself but sprinkled on top as well. I was intrigued. The recipe called for sea salt that I did not have. I used kosher salt and it was a VERY interesting addition. GOOD-interesting and something that was always present in chocolate chip cookies but somehow enhanced the contrast to sweet without being overwhelming.

Another unusual practice that was common across the board for the professional bakers was refrigerating the dough for at least 36 hours! This technique is said to "allow the dough and other ingredients to fully soak up the liquid - in this case, the eggs - to get a drier and firmer dough, which bakes to a better consistency." To be perfectly honest, it worked like a charm! I've never made cookies that came out so evenly cooked and soft yet still firm and crispy around the edges. These are absolutely the best chocolate chip cookies I've ever made!


CHOCOLATE CHIP COOKIES

Source: David Leite


  • 2 cups minus 2 tablespoons (8 1/2 ounces) cake flour
  • 1 2/3 cups (8 1/2 ounces) bread flour
  • 1 1/4 teaspoons baking soda
  • 1 1/2 teaspoons baking powder
  • 1 1/2 teaspoons coarse salt
  • 2 1/2 sticks (1 1/4 cups) unsalted butter
  • 1 1/4 cups (10 ounces) light brown sugar
  • 1 cup plus 2 tablespoons (8 ounces) granulated sugar
  • 2 large eggs
  • 2 teaspoons natural vanilla extract
  • 1 1/4 pounds bittersweet chocolate disks, at least 60 percent cacao content (I roughly chopped mine into at least halves)
  • sea salt

1. Sift flours, baking soda, baking powder and salt into a bowl. Set aside.

2. Using a mixer fitted with paddle attachment, cream butter and sugars together until very light, about 5 minutes. Add eggs, one at a time, mixing well after each addition. Stir in the vanilla. Reduce speed to low, add dry ingredients and mix until just combined, 5 to 10 seconds. Drop chocolate pieces in and incorporate them. Press plastic wrap against dough and refrigerate for 24 to 36 hours. Dough may be used in batches, and can be refrigerated for up to 72 hours.

3. When ready to bake, preheat oven to 350 degrees. Line a baking sheet with parchment paper or a nonstick baking mat. Set aside.

4. Scoop six 3 1/2-ounce mounds of dough (the size of generous golf balls) onto baking sheet, making sure to turn horizontally any chocolate pieces that are poking up; it will make for a more attractive cookie. Sprinkle lightly with sea salt and bake until golden brown but still soft, 18 to 20 minutes. Transfer sheet to a wire rack for 10 minutes, then slip cookies onto another rack to cool a bit more. Repeat with remaining dough or reserve dough, refrigerated, for baking remaining batches the next day. Eat warm with a big napkin.

Makes 1 1/2 dozen 5-inch cookies.


Monday, September 1, 2008

Chunky Indeed

I bought the Ben & Jerry's ice cream recipe book with high hopes. Finally! The secrets of some of my favorite ice creams revealed! well. It didn't exactly work out that way.

I tried the coffee recipe of theirs and it was good but I've never had their coffee ice cream anyway so I couldn't compare. So I moved on to banana because I HAVE had Chunky Monkey. Boy howdy; that was NOT Chunky Monkey. The consistency of the cream was icy (probably because the banana itself is quite watery) and I couldn't understand why it came out so wrong. I'm not especially surprised Ben & Jerry's didn't reveal their REAL recipe but, geez; something close would've been nice.

I should have given up but you know me; failure is not acceptable. It has to be right. So I went in search of another recipe and found one even titled "chunky" and made reference to being damn close to the famous flavor. I went to it and finally, something resembling the original! And so incredibly easy! Win!

In an effort to make it even closer to the brand flavor, I melted down some Dove dark chocolates and spread them in a thin (1/8 inch) layer on parchment paper. I chilled the chocolate in the fridge until hard and roughly cut it into rectangle pieces (maybe 2 x 1 1/2"). I don't love the texture of chocolate chips in ice cream and merely chopping a bar would make chocolate shavings throughout the mix. This worked really well. Homemade chocolate chunks. :)

I was pleased with how nice this one came out. It'd be even better with some chocolate syrup drizzled over top (but what wouldn't be better with that?)

CHUNKY BANANA NUT ICE CREAM
Adapted from All Recipes, Submitted by: Stephany Brown

4 bananas, broken into chunks
1 tablespoon lemon juice
1 teaspoon vanilla extract
1 cup white sugar
1 1/3 cups heavy cream, chilled
2/3 cup cold milk
1/2 cup chopped toasted walnuts
1/2 cup dark chocolate chunks


In a blender or food processor, combine bananas, lemon juice, vanilla, sugar, cream and milk. Puree until smooth. Transfer mixture to the freezer canister of an ice cream maker and freeze according to manufacturer's instructions.

When ice cream begins to stiffen, add walnuts and chocolate chunks.