Showing posts with label coconut. Show all posts

Sunday, January 30, 2011

Italian Cream Cake is coconutty!

My family knows I love baking. They also know that there's nothing I love more than baking BIRTHDAY CAKE. The best thing about birthday cakes is, because they come around every year, my fam usually gives me a challenge and requests something different each time. So I get to try new techniques and recipes AND do something for my loved ones at the same time!

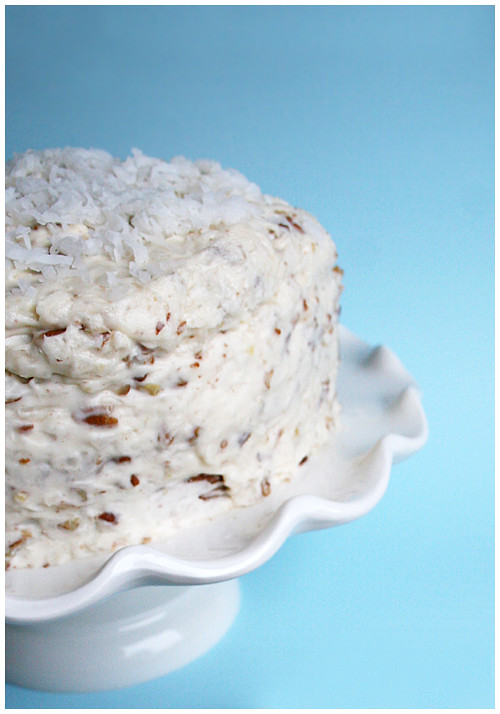
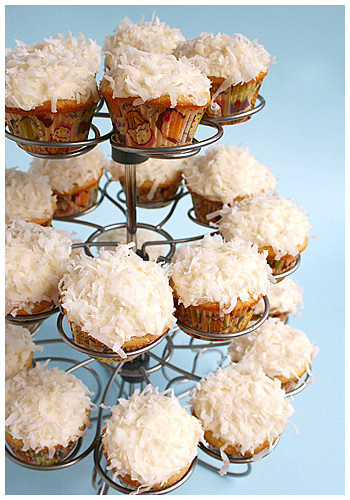
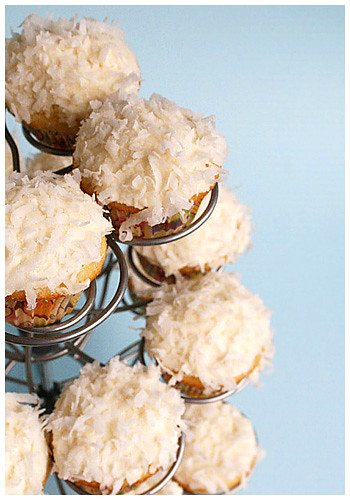
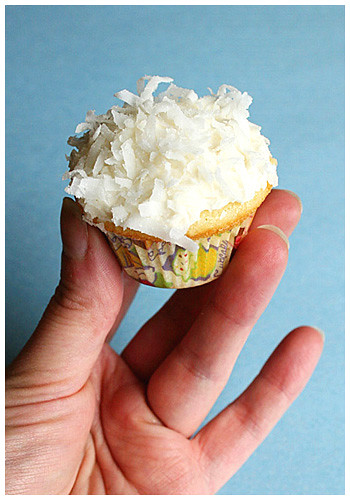
This year, my dad just said coconut cake but I had something special in mind. My friend from work and I share our cooking adventures and recipes with each other and she brought in a piece of this Italian Cream Cake a few months ago from her husband's birthday. It was DIVINE. So moist and coconutty. Auuggghhhh. She generously gave me the recipe and I sat on it, waiting for the perfect time to try it. HULLO, BIRTHDAY!

So, a few things first off: when you combine the baking soda and buttermilk, IT WILL FIZZ. I turned away for five seconds and when I looked back, it had overflowed from my cup. You've been warned! Use bigger than a 1 cup measuring cup.

Second, something in the chemical makeup of this batter cooks the eggs. You'll see pieces of scrambled egg and I don't know what I did to cause it. HOWEVER. I picked out the bigger pieces that made me nervous and baked and you couldn't tell ANYTHING in the final cake. So breathe easy; the egg will disappear!

Third, it'll seem like there's not enough icing for a three layer cake. I spread as thin a layer as possible on the insides (not even going all the way to the edge of the cake) and covered generously over the outside because that's the part that matters. You want the pretty swirliness on the outside. The inside layers were fine! The cake itself is sweet enough that it doesn't need too much icing. It was perfect the way it was!

This delish cake went SO FAST. It was just so gooooood. It's absolutely going on my all-time favorites!


ITALIAN CREAM CAKE


Cake
1/2 cup shortening, room temperature
1/2 cup butter, room temperature
2 cups sugar
5 eggs, room temperature
1 cup buttermilk
1 teaspoon baking soda
2 cups flour
1 teaspoon vanilla
1 2/3 cup coconut

Icing
1/2 cup butter, room temperature
8 oz cream cheese, room temperature
1 box (~ 4 cups) sifted powdered sugar
1 teaspoon vanilla
1 cup coconut
1 cup chopped nuts (I used pecans)


1. Blend shortening and butter and sugar until creamy. Blend in egg yolks into mixture.

2. Add baking soda to buttermilk. Stir buttermilk and flour, alternately into egg mixture.

3. Beat egg whites until stiff; add vanilla. Fold stiff egg whites into batter, and then fold in coconut.

4. Divide batter into 3 8 or 9” cake pans that are greased and floured. Bake at 350° for 25-30 minutes or until toothpick comes out clean.

5. For Icing: Mix butter and cream cheese. Add sugar and vanilla. After mixed, add coconut and chopped nuts. Sprinkle coconut on top of cake after it is frosted. (I did mine just on top but it would look super pretty all the way around the sides too!)
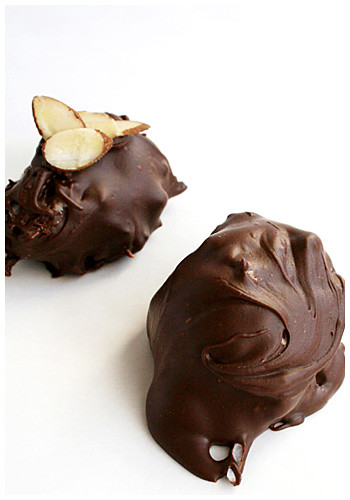
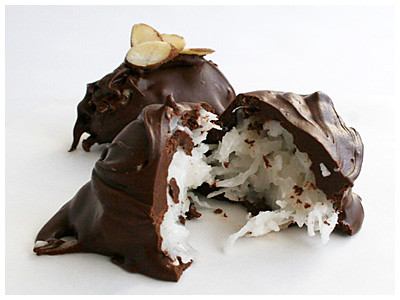
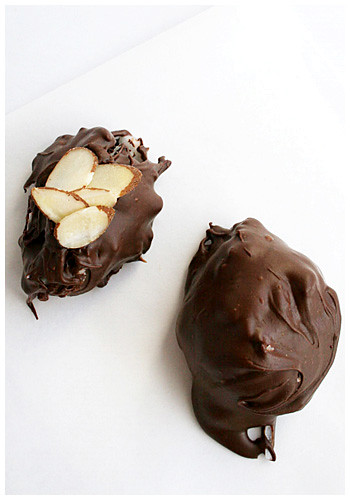
Saturday, May 16, 2009

Making candy now

So, remember that aside I made in the coconut ice cream post about every time I have coconut I start wishing there was some chocolate with it? It was more than an aside in my life. It was a CRAVING.

A normal individual might get in their car, drive to the store and purchase that which they crave: a Mounds bar. To those unacquainted, it's a chocolate covered, coconut-filled candy. And it's delish. I, however, am almost shamefully lazy and didn't want to drive to the store. So I made it.

I went with the first semi-reputable recipe I could find that got rave reviews. I had all the necessary ingredients (I love having tons of chocolate and coconut cream just sitting around my house) so I went to it.

I did run into a slight snafu when I opened the can of coconut cream and found something that appeared to be a greyish-tan sludge. I'm talking tub paste here, people. The kind your kids spoon out with that stick attached to the top of the lid. D: Needless to say, I called in for help and Mom assured me that could probably (maybe?) be okay. The label on the can said it might solidify in cooler temperatures and I am in Alaska so, okay. I set the can in a bowl of warm water and waited it out. It turned liquid in no time so all was well. Crisis averted.

The coconut mixture itself was extremely wet and sticky and impossible to shape. I wish I could've figured out another way. Another problem I encountered was coating the frozen coconut balls; my chocolate was not warm enough or maybe just not thin enough because it coated too thick. I didn't hear complaints from the people who ate them but they're just not very pretty all globbed up with chocolate...

Other than that, I got a great reaction from those who did try them! They're sweet but they definitely defeated that chocolate and coconut craving I was having!


HOMEMADE MOUNDS BARS

12 ounces flaked coconut
1 cup confectioner's sugar, sifted
1/2 can cream of coconut milk
12 ounces semi-sweet chocolate
1 tsp of vegetable shortening


Mix together coconut, confectioner's sugar and cream of coconut. Roll into 1-inch balls and chill thoroughly or freeze. Freezing is not necessary, but it helps with the chocolate coating.

Melt chocolate and vegetable shortening in double boiler (or microwave in 30 second intervals and careful not to burn) and dip frozen centers, using a wooden skewer or toothpick.

One batch makes about 60 pieces of candy.

Tuesday, May 5, 2009

Coco-crazy.


It's that time again! Summer is upon us (a whopping upper 50s in Alaska! BREAK OUT THE SANDALS AND JEAN SHORTS!). That can only mean one thing: it's finally respectable to start making ice cream again. I should disclose the following factoid: Alaska eats the most ice cream per capita in the United States. Think about that for a second because we get about 3 months of summer and the rest is 40 and below from there. I've personally worn that factoid like a badge of honor; I've TOTALLY driven through McDonald's just for an ice cream in the dead of winter.

That being said, I don't MAKE a lot of ice cream in the winter. That just seems weird. But almost overnight, the sun started coming out and even though it's 50's-ish, it's still summer to us!

As previously mentioned in the last post, I started with coconut to duplicate a recipe I saw on a beautiful Flickr picture. I browsed my ice cream cookbooks and didn't find the coconut gelato she made, but did find a Toasted Coconut Ice Cream from David Lebovitz and this is the guy who came up with the bacon ice cream so I had to trust him. He's some sort of an authority on good ice cream so I felt I was in good hands.

And, man he was right. I don't mind taking two days to make something (the cooking then overnight freeze time) if it comes out this good. The coconut flavor infused in the ice cream is delicate but distinct and stands on its own perfectly. HOWEVER, I will admit that while I'm enjoying something purely coconut, my mind always wanders to chocolate (Mounds bars!) or maybe sliced almonds (Almond Joy!).

I even added more coconut on top of the ice cream when I devoured it because double double coconut is even better!

A quick note: the recipe requested unsweetened coconut but I didn't have that so I had to use sweetened. I kept the same amount of sugar that was called for, meaning mine would have come out slightly sweeter than Lebovitz' original. So you may want to weigh your options when deciding which road to take; I thought the sweetness of mine was perfect!


TOASTED COCONUT ICE CREAM
Source: David Lebovitz

Makes about 1 quart (1 liter)


1 cup dried, shredded coconut, preferably unsweetened
1 cup whole milk
2 cups heavy cream
3/4 cup sugar
Big pinch of salt
1 vanilla bean, split in half lengthwise
5 large egg yolks
1/2 teaspoon vanilla extract, or 1 teaspoon rum


Preheat the oven to 350 F. Spread the coconut on a baking sheet and bake for 5 to 8 minutes, stirring it frequently so it toasts evenly. Remove it from the oven when it's nice and fragrant and golden brown.

In a medium saucepan, warm the milk, 1 cup of the heavy cream, sugar and salt and add the toasted coconut. Use a paring knife, and scrape all the vanilla seeds into the warm milk, then add the pod as well. Cover, remove from the heat and let steep at room temperature for 1 hour.

Rewarm the coconut-infused mixture. Set a mesh strainer over another medium saucepan and strain the coconut-infused liquid through the strainer into the saucepan. Press down on the coconut very firmly with a flexible rubber spatula to extract as much of the flavor from it as possible. Remove the vanilla bean pieces and discard the coconut.

Pour the remaining 1 cup heavy cream into a large bowl and set the mesh strainer on top. In a separate medium bowl, whisk together the egg yolks. Slowly pour the warm coconut-infused mixture into the egg yolks, whisking constantly, then scrape the warmed egg yolks back into the saucepan.

Stir the mixture constantly over medium heat with a heatproof spatula, scraping the bottom as you stir, until the mixture thickens and coats the spatula. Pour the custard through the strainer and stir in the cream. Mix in the vanilla or rum and stir until cool over an ice bath.

Chill the mixture thoroughly in the refrigerator, then freeze it in your ice cream maker according to the manufacturer's instructions.

Sunday, July 20, 2008

Cuckoo for Coco

For my birthday back in April, my best friend got me this adorable cupcake tree that I've wanted since the beginning of time. Or, uh, since I first saw it a few years ago.

She got me the one for mini cupcakes which I've, surprisingly, never made before. I know, right? I'm a cupcake maniac; you'd think I'd be all over the map with my cupcake adventures. I've also never made (or eaten) coconut cake. So, naturally, I went to my reliable Ina. They were good, of course, but I find Ina's cakes sometimes to be a little more dense than I'd like. I'm not looking for a chiffon-type texture but something a little lighter. I'll definitely try another recipe later to compare the two. Maybe my perfect cake is a pipe dream...

But these were absolutely worth making. They were a hit with my taste testers! :)


COCONUT CUPCAKES
Source: Ina Garten (cupcakes) and Williams-Sonoma (icing)

For the Cupcakes:

3/4 pound unsalted butter at room temperature (3 sticks)
2 cups sugar
5 extra-large eggs at room temperature
1 1/2 teaspoons pure vanilla extract
1 1/2 teaspoons pure almond extract
3 cups all-purpose flour
1 teaspoon baking powder
1/2 teaspoon baking soda
1/2 teaspoon salt
1 cup buttermilk
14 oz. sweetened, shredding coconut


For the vanilla frosting:

12 Tbs. (1 1/2 sticks) unsalted butter, at room temperature
3 1/4 cups confectioners' sugar
2 tablespoons heavy cream
2 teaspoons vanilla extract
1/4 teaspoon salt
2 cups sweetened, shredded coconut


Preheat oven to 325 degrees.

In the bowl of an electric mixer fitted with the paddle attachment, cream the butter and sugar for 5 minutes – until light and fluffy. With the mixer running on low, add the eggs one at a time, scraping down the sides of the bowl after each addition. Add the vanilla and almond extracts and mix well.

In a separate bowl, sift together the flour, baking powder, baking soda, and salt. In three parts, alternately add the ingredients and the buttermilk to the batter, beginning and ending with the dry. Mix until just combined. Fold in 7 ounces of coconut.

Lin a muffin pan with paper liners. Fill each cup to the top with batter. Bake for 20 to 35 minutes, until the tops are brown and a toothpick comes out clean. Allow to cool in the pan for 15 minutes. Remove to a baking rack and cool completely.

While cupcakes are cooling, make the icing. In the bowl of an electric mixer fitted with the paddle attachment, beat together the butter, confectioners' sugar, cream, vanilla and salt on low speed until smooth, about 3 minutes. Pour the 2 cups coconut into a shallow bowl.

Using an icing spatula, frost the top of each cupcake, mounding the icing in the center. Holding the bottom of each cupcake, roll the frosted top in the coconut.


Monday, June 16, 2008

German Chocolate Cake Ice Cream... Almost


You know what's hard to photograph? Ice cream. Even after you prep and do everything in your power short of shooting it IN the freezer, it just gives up on you and starts to melt in mere minutes. With this particular ice cream, it was SECONDS. I even froze the stuff in the shape of scoops so there was no lag between the freezer and my shots but still. It started breaking down about twenty seconds in. Prissy friggin' food.

Other than the prima donna act it gave me in front of the camera, this flavor really delivered. I got the chocolate base from Williams-Sonoma and had to modify it only superficially: I had no half-and-half so I substituted half milk and half cream (theoretically, half and half from scratch). They weren't kidding about it being rich. And after cooking the custard over the heat so there was no raw egg situation, I felt extremely comfortable licking the bowl of chocolate custard and dipping brownie in the creamy stuff as well. Mmmm. Chocolate 'splosion.

When I envisioned this flavor, I was aiming for German Chocolate cake. Then after I got home from the store, I remembered there are pecans in the caramel coconut part. Oh well. It came out just fine. The only complaint I'd have against the stuff is that the caramel is very sweet and the ice cream is very rich. It makes for an intense flavor. But some people like very sweet/very rich a lot so it's just up to personal tastes, really.

I was rather pleased with making the brownies and caramel sauce myself. It felt good to look at the final product and know I made every bit from scratch. This, from a novice cook, that is. I mean, watching the caramel come to a boil? Terrifying. I just knew it was going to burn the second I looked away. (So I never looked away.)

I've encountered a few issues with ice cream, though.

#1. It doesn't give you immediate results. I'm used to baking something and having it ready to eat right then. This, you go through all the work and then? Put it away (to freeze completely). It's somewhat unsatisfying.


#2. It's not portable. If the stuff melts only minutes out of the freezer, imagine a ten, fifteen or twenty minute car ride to someone's house! So people have to come to IT (again, with the prissy nature). It makes it difficult to get to family and friends.

However, my love of creating personal flavors outweighs any faults the cooking process may have. I see pistachio and then banana on the horizon...


MMMMM... BROWNIES
Source: cicada77 at AllRecipes.com


1/2 cup white sugar
2 tablespoons butter
2 tablespoons water
1 1/2 cups semisweet chocolate chips
2 eggs
1/2 teaspoon vanilla extract
2/3 cup all-purpose flour
1/4 teaspoon baking soda
1/2 teaspoon salt


Preheat the oven to 325 degrees F (165 degrees C). Grease an 8x8 inch square pan.

In a medium saucepan, combine the sugar, butter and water. Cook over medium heat until boiling. Remove from heat and stir in chocolate chips until melted and smooth. Mix in the eggs and vanilla. Combine the flour, baking soda and salt; stir into the chocolate mixture. Spread evenly into the prepared pan.

Bake for 25 to 30 minutes in the preheated oven, until brownies set up. Do not overbake! Cool in pan.

After completely cool, cut out 1/4 of pan and freeze. When hard, cut into 1 inch cubes (roughly 1 cup of chunks) and refreeze until ready to use.


CARAMEL COCONUT SWIRL
Adapted from Gourmet, Nov 1998

1/2 cup sugar
1/3 cup light corn syrup
1/4 cup water
7 tablespoons heavy cream
1/2 teaspoon vanilla
3/4 - 1 cup shredded coconut


In a 3-quart heavy saucepan boil sugar, corn syrup, water, and a pinch salt over moderate heat, stirring, until sugar is dissolved. Boil mixture, without stirring, gently swirling pan, until a deep golden caramel. Remove pan from heat and carefully pour cream and vanilla down side of pan (mixture will vigorously steam and caramel will harden). Simmer mixture, stirring, until caramel is dissolved. Remove pan from heat, add coconut and cool caramel. Caramel swirl may be made 1 week ahead and chilled, covered. Bring caramel swirl to room temperature before using. (If caramel swirl is too stiff to pour, heat slightly.)


CHOCOLATE ICE CREAM
Adapted from Williams Sonoma


1 1/2 cups heavy cream
1 1/2 cups whole milk
6 oz. bittersweet chocolate, finely chopped
(about 1 1/3 cups)
5 egg yolks
1 cup sugar
Pinch of salt
1 tsp. vanilla extract


In a saucepan over medium heat, warm the heavy cream and milk until bubbles form around the edges of the pan. Remove from the heat, add the chocolate and stir until smooth and blended.

In a large bowl, whisk together the egg yolks, sugar and salt until blended. Slowly add the chocolate cream, whisking constantly until fully incorporated.

Pour the mixture into a bowl on top of a double boiler. Set the pan over but not touching simmering water in the bottom pan. Cook, stirring constantly with a wooden spoon, until a finger drawn across the back of the spoon leaves a path, 10 to 12 minutes; do not allow the custard to boil. Pour the custard through a fine-mesh sieve set over a clean bowl and stir in the vanilla. Nestle the bowl in a larger one filled halfway with ice and water. Cool the custard, stirring occasionally, about 30 minutes.

Transfer the custard to an ice cream maker and freeze according to the manufacturer's instructions. Just before ice cream is finished churning, add brownie chunks and stir in completely. Transfer one third ice cream to an airtight container and drizzle one third caramel swirl over it. Repeat layering with remaining ice cream and caramel swirl. Cover and freeze until firm, 3 to 4 hours, before serving. Makes about 1 quart.


Wednesday, December 19, 2007

CookiesCookiesCookies

Being a stickler for tradition, I can only make the classic Peanut Butter Blossoms at Christmas although there's nothing really inherently Christmasy about them. It's chocolate and peanut butter, you know? Alas, it's a Christmas Cookie in our family so when the month of December rolls around, it's one of the first things I look forward to. The light peanut butter cookie, the melty chocolate Kiss... Heaven.

I got kind of ambitious with the many things on my list of Christmas Foods this year so I started early. The first week I made four batches of cookies alone. (This week I'm on the more intense cakes and candies but I'll get to that later.) I made two batches of the blossoms then wanted something that would travel well and wasn't chocolate. I settled on Coconut Macaroons which turned out really good but, as my mom says, what with Eagle Brand isn't good?

Last, I knew I was going to make cut-out sugar cookies later but still craved a sugary cookie without all the work. I found a Soft Sugar Cookie on All Recipes that took a few tries with the shaping but finally came out quite nice. Simple but with a good taste. My Christmas color theme this year is red and light blue (like the former Houston Oilers! Holla!) so I rolled one set of the sugar cookies in blue and sprinkled a little more in the center just for pop.


PEANUT BUTTER BLOSSOMS

Cream together:

1/2 cup shortening
1/2 cup peanut butter
1/2 cup sugar
1/2 cup packed brown sugar (light)

Mix in:

1 egg slightly beaten
1 tsp vanilla
1 level tsp baking soda
1/2 tsp salt

Stir in:

1 1/4 cups of flour (watch for consistency; should look shiny but hold together. Add less if needed)

Roll into balls, coat w/sugar, bake 375 degrees for 10 min. Remove from oven, press chocolate kisses into each center spreading ball so edges crack. Bake additional 1-2 minutes until chocolate melts.


COCONUT MACAROONS
Source: Ina Garten

14 ounces sweetened shredded coconut
14 ounces sweetened condensed milk
1 teaspoon pure vanilla extract
2 extra-large egg whites, at room temperature
1/4 teaspoon kosher salt

Preheat the oven to 325 degrees F.

Combine the coconut, condensed milk, and vanilla in a large bowl. Whip the egg whites and salt on high speed in the bowl of an electric mixer fitted with the whisk attachment until they make medium-firm peaks. Carefully fold the egg whites into the coconut mixture.

Drop the batter onto sheet pans lined with parchment paper using either a 1 3/4-inch diameter ice cream scoop, or two teaspoons. Bake for 25 to 30 minutes, until golden brown. Cool and serve.


SOFT SUGAR COOKIES IV
From AllRecipes.com, Submitted by Laura Stearns


2/3 cup shortening
2/3 cup butter
1 1/2 cups white sugar
2 eggs
2 teaspoons vanilla extract
3 1/2 cups all-purpose flour
2 teaspoons baking powder
1 teaspoon salt
1/3 cup granulated sugar for decoration

Preheat oven to 350 degrees F (175 degrees C).

In a medium bowl, cream together the butter, shortening and sugar. Stir in the eggs and vanilla. Combine the flour, baking powder and salt, stir into the creamed mixture until dough comes together. Roll dough into walnut sized balls and roll the balls in sugar. Place them on an unprepared cookie sheet about 2 inches apart. Press gently with bottom of a glass to make into evenly thick discs.

Bake cookies 10 to 12 minutes in the preheated oven, until bottom is light brown. Remove from baking sheets to cool on wire racks.