Thursday, August 23, 2007

Lemon Cupcakes: Conquered

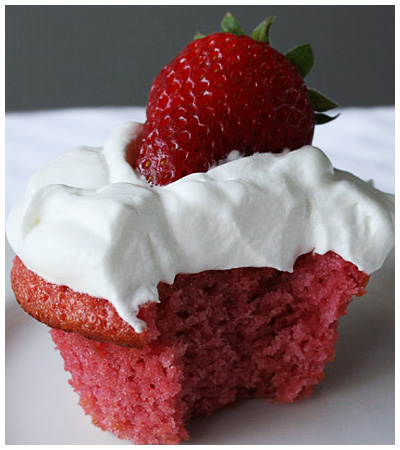
In approximately two months, I've completed four flavors of my self-appointed mission to find a really really good recipe for each cupcake flavor I fancied. At four batches per each flavor (except Lemon which I scored on the third), two dozen per batch, I've roughly made 360 cupcakes in the past two months. The bad news is, that was for only the first four flavors: Vanilla, Chocolate, Strawberry and Lemon, and I have many many more to go (Coconut, Banana, Red Velvet, Pistachio, and on and on). The good news? Well, I'm getting pretty decent at whipping up a cake. Practice and all that. I think I've earned a slight reprieve from cake, though. There is so much more to explore.

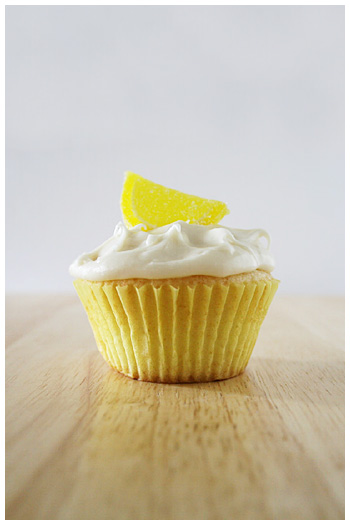
But for now, I can celebrate in finding Lemon! I was becoming seriously disillusioned with the first couple recipes that came out either dense or crumbly (ugh) or not sweet enough, etc. In them, the lemon juice is added to the batter and there is a significant increase in the eggs. In the last, winning recipe, the eggs are normal, there is only lemon ZEST in the batter. Now, not lemony enough, you cry? WELL. Ina Garten thinks of everything. The lemon juice is sweetened in a saucepan and spooned over the cake for a perfectly lemony but sweet jolt of flavor that infuses through every bite.


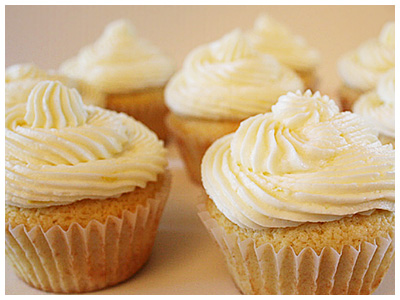
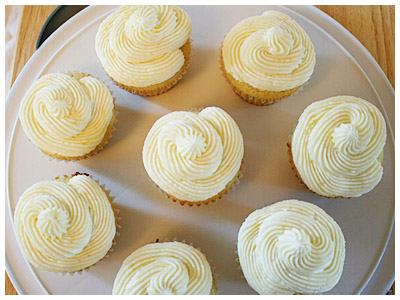
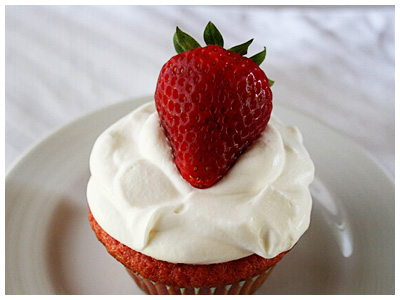
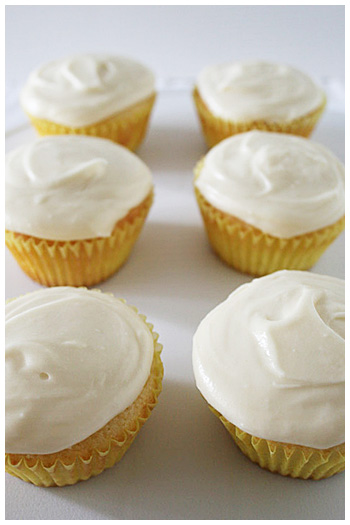
The first two attempts I took a shot at different lemon buttercreams (as you'll see in some pictures as the piped icing) but it was just okay. To me, lemon cake is too subtle for the almost-greasy flavor of buttercreams. Ina's recipe called for a simple glaze over the top but her recipe was also for two pound cake pans that are a presentation onto themselves. I needed an icing for cupcakes and a glaze just won't do. I found a very yummy cream cheese frosting recipe on All Recipes but made a few changes, taking out the lemon zest in favor of a smoother, gentler taste so the lemon-on-lemon icing-and-cake combo wasn't overpowering. It came out lovely and they go terrifically together!


LEMON CUPCAKES
Adapted from Barefoot Contessa

1/2 pound (2 sticks) unsalted butter at room temperature
2 1/2 cups granulated sugar, divided
4 extra-large eggs, at room temperature
1/3 cup grated lemon zest lightly packed (6 to 8 large lemons - Use only fresh lemon juice and zest)
3 cups all-purpose flour
1/2 teaspoon baking powder
1/2 teaspoon baking soda
1 teaspoon salt
3/4 cup freshly squeezed lemon juice
3/4 cup buttermilk, at room temperature
1 teaspoon pure vanilla extract

Preheat the oven to 350 degrees F. Prepare two muffin pans with paper liners or non-stick cooking spray.

1. Cream the butter and 2 cups granulated sugar in the bowl of an electric mixer fitted with the paddle attachment. You cannot beat too much at this stage so get it very light and fluffy, about 5 minutes. With the mixer on medium speed add the eggs, 1 at a time, and the lemon zest.

2. Sift together the flour, baking powder, baking soda, and salt in a bowl. Separately, combine 1/4 cup lemon juice, the buttermilk, and vanilla.

3. Add the flour and buttermilk mixtures alternately, beginning and ending with the flour. Spoon into the pans, smooth the tops, and bake for 18-20 minutes, until a cake tester comes out clean.

4. Cook 1/2 cup granulated sugar with 1/2 cup lemon juice in a small saucepan and cook over low heat until the sugar dissolves. When the cupcakes are done, cool for 5 minutes, then set them onto a rack set over a tray and spoon the lemon syrup over the cakes. Allow the cakes to cool completely.


LEMON CREAM CHEESE FROSTING
Makes about 3 cups
  • 1 (8 ounce) package cream cheese, softened
  • 1/4 cup butter
  • 2 tablespoons lemon juice
  • 1 teaspoon vanilla extract
  • 5 cups confectioners' sugar

1. Beat cream cheese, butter, lemon juice, lemon rind, and vanilla together until smooth and light.

2. Add confectioners' sugar slowly. Beat until creamy. Add more powder sugar or juice as needed for desired consistency.

Wednesday, August 22, 2007

Key Lime Bars. And thas all.

All right, limes. You and me need a break. It's not a break up. Just... a break, okay? I need some space.

A friend of mine suggested this recipe after I mentioned I'd made the key lime pie and I
still had leftover limes. She noted the differences and said I should give it a try. Man, am I glad she did. The filling was so much better than the pie! It was stronger, more tart, more LIME. Maybe it was the 1 egg yolk compared to the 4 in the pie. Whatever it was, it worked.

The crust was so-so (graham cracker crust is hard to beat with lime; this one was a duller animal cracker crumb) but one could replace it easily. It's also imparative that it's served close to room temperature; when cold, the crust is like a tasteless brick. So
that's what directions are for...


KEY LIME BARS

Adapted from Cook's Illustrated magazine

Makes sixteen 2-inch bars


CRUST
5 ounces animal crackers
3 tablespoons packed brown sugar (light or dark)
Pinch table salt
4 tablespoons unsalted butter , melted and cooled slightly

FILLING
2 ounces cream cheese , room temperature
1 tablespoon grated lime zest , minced
Pinch table salt
1 (14-ounce) can sweetened condensed milk
1 egg yolk
1/2 cup fresh lime juice , either Key lime or regular


1. Adjust oven rack to middle position and heat oven to 325 degrees. Cut about 12-inch length extra-wide heavy-duty foil; fold cut edges back to form 7 1/2-inch width. With folded sides facing down, fit foil securely into bottom and up sides of 8-inch-square baking pan, allowing excess to overhang pan sides. Spray foil with nonstick cooking spray.

2. TO MAKE THE CRUST: In workbowl of food processor, pulse animal crackers until broken down, about ten 1-second pulses; process crumbs until evenly fine, about 10 seconds (you should have about 1 1/4 cups crumbs). Add brown sugar and salt; process to combine, ten to twelve 1-second pulses (if large sugar lumps remain, break them apart with fingers). Drizzle butter over crumbs and pulse until crumbs are evenly moistened with butter, about ten 1-second pulses. Press crumbs evenly and firmly into bottom of prepared pan. Bake until deep golden brown, 18 to 20 minutes. Cool on wire rack while making filling. Do not turn off oven.

3. TO MAKE THE FILLING: While crust cools, in medium bowl, stir cream cheese, zest, and salt with rubber spatula until softened, creamy, and thoroughly combined. Add sweetened condensed milk and whisk vigorously until incorporated and no lumps of cream cheese remain; whisk in egg yolk. Add lime juice and whisk gently until incorporated (mixture will thicken slightly).

4. TO ASSEMBLE AND BAKE: Pour filling into crust; spread to corners and smooth surface with rubber spatula. Bake until set and edges begin to pull away slightly from sides, 15 to 20 minutes. Cool on wire rack to room temperature, 1 to 1 1/2 hours. Cover with foil and refrigerate until thoroughly chilled, at least 2 hours.

5. Loosen edges with paring knife and lift bars from baking pan using foil extensions; cut bars into 16 squares. Sprinkle with toasted coconut, if using, and serve. (Leftovers can be refrigerated up to 2 days; crust will soften slightly. Let bars stand at room temperature about 15 minutes before serving.)


Sunday, August 19, 2007

"I Like PIE."

Sometimes you make things because you bought the ingredients on impulse and you've really got to use them before they go bad. Sometimes it's a bag of limes. This would be one of those times. I really wanted to try the Key Lime Bars from Cook's Illustrated but didn't have all ingredients. I might make it to the store for those but I only had stuff for PIE. And what's more fun than PIE, I ask you. Or, at least, saying "PIE".

I was informed, afterwards, that you can put a bit of green food coloring in the filling to make it, you know. Green. Since it's not. It's yellow-ish. It tastes like lime, sure, but I have to admit, there's a little disappointment. I know for future reference.

Being a relative beginner to cooking, I was pleased with how easy this was. Whip up some filling, plop it into a crust then throw some cream in the standing mixer and voila. There was a lot of cooling time in between each step so it took a while in that regard but the actual prep was easy. It's not as tart as I expected but I suspect that's because I didn't use real Key Limes. It's mild and quite nice but I think in the future, I'd use the real deal to get that punch of flavor.


KEY LIME PIE

Source: The Best Recipe, Cook's Illustrated

LIME FILLING

4 teaspoons grated zest plus 1/2 cup strained juice from 3 to 4 limes
4 large egg yolks
1 14-ounce can sweetened condensed milk

GRAHAM CRACKER CRUST

11 full-size graham crackers, processed to fine crumbs (1 1/4 cups)
3 tablespoons granulated sugar
5 tablespoons unsalted butter, melted

WHIPPED CREAM TOPPING

3/4 cup heavy cream, chilled
1/4 cup confectioners' sugar
1/2 lime, sliced paper thing and dipped in sugar (optional)


1. FOR THE FILLING: Whisk zest and yolks in medium bowl until tinted light green, about 2 minutes. Beat in milk, then juice; set aside at room temperature to thicken.

2. FOR THE CRUST: Adjust oven rack to center position and heat oven to 325 degrees. Mix crumbs and sugar in medium bowl. Add butter; stir with fork until well blended. Scrape mixture into 9-inch pie pan; press crumbs over bottom and up sides of pan to form even crust. Bake until lightly browned and fragrant, about 15 minutes. Transfer to wire rack; cool to room temperature, about 20 minutes.

3. Pour lime filling into crust; bake until center is set, yet wiggly when jiggled, 15 to 17 minutes. Return pie to wire rack; cool to room temperature. Refrigerate until well chilled, at least 3 hours. (Can be covered with lightly oiled or oil-sprayed plastic wrap laid directly on filling and refrigerated up to 1 day.)

4. FOR THE WHIPPED CREAM: Up to 2 hours before serving, whip cream in medium bowl to very soft peaks. Adding confectioners' sugar 1 tablespoon at a time, continue whipping to just-stiff peaks. Decoratively pipe whipped cream over filling or spread evenly with rubber spatula. Garnish with optional sugared lime slices and serve.


Wednesday, August 15, 2007

Blueberries get a turn

I had some blueberries and never having made them before, I thought, why not? I used big, 3" muffin tins and this recipe only made four of those and let me tell you, they were WAY too big. The muffin tastes great but you can't eat too much of it. It weighs you down and good. These would be perfect in a regular 12 cup muffin pan. They're so filling, I had one for dinner and then another half for breakfast the next day. Nothing quite beats warm cake, does it?


BLUEBERRY MUFFINS (TO DIE FOR)

From All Recipes.com recipe submitted by: Colleen


1 1/2 cups all-purpose flour
3/4 cup white sugar
1/2 teaspoon salt
2 teaspoons baking powder
1/3 cup vegetable oil
1 egg
1/3 cup milk
1/2 tsp vanilla
1 cup fresh blueberries
1/2 cup white sugar
1/3 cup all-purpose flour
1/4 cup butter, cubed
1 1/2 teaspoons ground cinnamon

1. Preheat oven to 400 degrees F (200 degrees C). Grease muffin cups or line with muffin liners.

2. Combine 1 1/2 cups flour, 3/4 cup sugar, salt and baking powder. Place vegetable oil into a 1 cup measuring cup; add the egg and enough milk to fill the cup. Mix this with flour mixture. Fold in blueberries. Fill muffin cups right to the top, and sprinkle with crumb topping mixture.

3. To Make Crumb Topping: Mix together 1/2 cup sugar, 1/3 cup flour, 1/4 cup butter, and 1 1/2 teaspoons cinnamon. Mix with fork, and sprinkle over muffins before baking.

4. Bake for 20 to 25 minutes in the preheated oven, or until done.


Sunday, August 12, 2007

Crème Brûlée! HounHounHoun!

Someday I'm going to stop with the French desserts. Subject lines are getting a smidge pretentious, no? On a completely related note, I am the boys from Flight of the Conchords with their song en Français. "Voila mon passport! Ahhh, Gerard Depardieu. Baguette!"

Anyway. I made crème brûlée a few years ago and it turned out so well, I was pretty confident in this second attempt. And then I screwed it up (and used deeper ramekins than the recipe anticipated so they didn't set all the way through and then they 'sploded in the center. Just follow the directions completely and wait for the thing to
set; don't just go by the recommended time). So the THIRD attempt yielded better results. It was a bit plain, however, and I'd like to try various flavors in the future.

In any event, it's a very easy and straightforward recipe so, points for that!


PERFECT CRÈME BRÛLÉE

From The Best Recipe, Cook's Illustrated

1 tbsp unsalted butter, softened
6 large egg yolks, chilled
6 tbsp white sugar
1 1/2 cups whipping cream, chilled
4 tbsp dark brown sugar

1. Adjust oven rack to center position and heat oven to 275 degrees. Buter six 1/2-cup ramekins or 2/3-cup custard cups and set them in a glass baking pan.

2. Whisk yolks in medium bowl until slightly thickened. Add white sugar and whisk until dissolved. Whisk cream, then pour mixture into prepared ramekins.

3. Set baking pan on oven rack and pour warm water into pan to come halfway up the ramekins. Bake uncovered until custards are just barely set, about 45 minutes.

4. Remove baking pan from oven, leaving ramekins in the hot water; cool to room temperature. Cover each ramekin with plastic wrap and refrigerate until chilled, at least 2 hours. (Can be covered and refrigerated overnight.)

5. While custards are cooling, spread brown sugar in a small baking pan; set in turned-off (but still warm) oven until sugar dries, about 20 minutes. Transfer sugar to a small zipper-lock freezer bag; seal bag and crush sugar fine with rolling pin. Store sugar in an airtight container until ready to top custards.

6. Adjust oven rack to the next-to-the-highest position and heat broiler. Remove chilled ramekins from refrigerator, uncover, and even spread each with 2 teaspoons dried sugar. Set ramekins in a baking pan. Broil, watching constantly and rotating pan for even caramelization, until toppings are brittle, 2 to 3 minutes, depending on heat intensity.

7. Refrigerate crème brûlées to rechill custard, about 30 minutes. Brown sugar topping will start to deteriorate in about 1 hour.

Wednesday, August 8, 2007

Strawberry Cupcakes... of DOOM

When I was younger, my mom made a strawberry cake. And it was the greatest cake I'd ever had. Fast forward ten or so years and I asked for it again and got it for my sixteenth birthday. The fond memories wrapped up with the insatiable love of strawberries made it the best cake I'd ever had. Again. Going in with these kinds of high expectations was really just setting myself up for disappointment. I realize this now. But in the end, it is what it is. Also, I hate that phrase.

The last two cupcake flavors, vanilla and chocolate, were a cake walk (heh. cake) compared to finding a good strawberry cake recipe from scratch. I found a few promising ones on AllRecipes.com but every one seemed to have Jello in it and when made, somehow weighed the cake down without making it dense. It was almost sticky-thick but not heavy. The first (the Strawberry Cake from Scratch from AllRecipes) was a disaster: not sweet enough, not strawberry-y enough. I'll take responsibility for it, though; I took some suggestions from the reviews and commenters and I will be more cautious about that in the future. The second, I started to fiddle with by myself. Instead of just pureed strawberries, I made The Cake Bible's Strawberry Puree/Sauce which concentrates the juices, adds sugar, makes it stronger. It still had Jello in it so that consistency thing was still an issue but it came out not bad. But it was only the second try so I soldiered on.

Next I tried to substitute strawberry puree for bananas in a Banana Cake recipe. What came out of my oven was a purple crime against nature. Let us never speak of it again. But it did teach me one lesson: strawberry puree alone barely flavored cake at all and there was a reason this Jello stuff was in all these recipes. In a last ditch effort, I attempted strawberry jam (with a Jam Cake by Emeril Legassi). It was nothing like what I was looking for; it had brown sugar, cinnamon and it had the darker color and taste that accompanies these flavors. It tasted okay, just not what I wanted.


So in the end, the one I modified and made more strawberry-y came out on top. The recipe called for a cream cheese (with butter) icing which just came out ho-hum and tasting a little like yogurt so I made a simple whipped cream topping for them. The cake is sweet enough and has a strong enough strawberry punch that the light cream works with it, just as real whipped cream does with fresh strawberries. I'd like to try a vanilla buttercream just to see how those two strong flavors go together but for now, this would be fantastic as a layered cake with whipped cream and sliced strawberries in the middle and whole ones for decoration on top.


STRAWBERRY CUPCAKES

2 cups Self rising Flour
3 eggs
1 cup vegetable oil
1 3/4 cup sugar
1 pkg strawberry jello (3 oz)
1/2 cup buttermilk
1 1/4 cup of Strawberry Puree

Prepare Strawberry Puree (*recipe follows)

1. Preheat oven to 350 degrees. Line two standard 12-cup muffin pans with paper liners; set aside.

2. Sift flour into a bowl and set aside. In another bowl beat eggs then add oil, sugar, gelatin, and buttermilk. Stir until well blended. Add flour to the mixture and blend. Fold in puree.

3. Pour in pans and bake for 17 to 20 min, or till lightly browned. Let cool on wire racks completely.


* STRAWBERRY PUREE AND SAUCE

5 cups strawberries, fresh (or 20 oz bag of frozen, unsweetened)
2 tsp lemon juice, freshly squeezed
1/4 cup sugar (optional)


Freeze fresh strawberries. In a colander suspected over a deep bowl, thaw the strawberries completely. This will take several hours. Press them, if necessary, to force out the juice. There should be close to 1 1/4 cups of juice.

In a small saucepan (or a microwave* on high power) boil the juice until reduced to 1/4 cup. Pour it into a lightly oiled heatproof glass measure.

In a food processor puree the strawberries. You should have 1 full liquid cup of puree. Stir in the strawberry syrup and lemon juice. Add sugar (if needed; depends on sweetness of berries). The correct amount of sugar is 1/5 the volume of the puree (for 10 tablespoons puree, add 2 tablespoons sugar). Stir until the sugar dissolves.


*If using a microwave, place the juice in a 4-cup heatproof glass measure or bowl to allow for bubbling.


WHIPPED CREAM

1/2 cup heavy cream, well chilled
1 tbsp confectioners' sugar
1/4 tsp vanilla extract

1. Place a mixing bowl and beaters from electric mixer in the freezer or refrigerator until well chilled, about 15 minutes.

2. Combine the heavy cream, confectioners' sugar, and vanilla extract in the mixing bowl.

3. With an electric mixer on low speed, begin beating the cream, gradually increasing the speed to high as cream thickens. (Do this slowly, or the cream will splatter.)

4. Beat until the cream forms soft peaks. Test to see if it is ready by turning off the mixer and lifting the beaters out of the cream - if the cream makes soft peaks that topple over slightly, then it's done.

Serve immediately or cover with plastic wrap and refrigerate for up to 2 hours.

I've made my peace with strawberry and now I can move on to the next flavor. Lemon!!

Sunday, August 5, 2007

Tea and biscuits. Pretty much.


I lived in London for a few years and while a lot (okay, MOST) of the food was nothing to write home about (I am from Texas, after all), there were a few eating habits and preferences that stuck. The most notable is the craving for a nice, warm cup of tea on a rainy day and now that it's August in Alaska, it's clouding over more often than not. Today was one such lovely, rainy day.


A PROPER tea sit down for me, though, must include biscuits. Yeah. I said biscuits. (My British Shorthair cat is named Biscuit for this very reason.) My favorite biscuit (OKAY, cookie) with tea was a vanilla creme sandwich with strawberry jam in the center made by the grocery chain, Waitrose. I haven't found anything that's even close to it in the States. I knew I wouldn't be able to pull THAT off today so I settled for a butter biscuit then threw in a little strawberry jam on top just for that strawberry/cookie texture and taste with the tea. The cookies were not terribly sweet but I suspect that was my fault: it calls for 1 cup superfine sugar (processed in food processor) and I measured a cup THEN processed it and I believe (after tasting them), it meant a full cup of the processed sugar. It's a rookie mistake, I know. I'm working on it.

BUT, lucky me, I had the jam there for the straight sweetness so it went together fine. I adapted two different recipes - one for the plain rolled butter cookies from The Best Recipe and another for the thumbprint variation from The Dessert Bible.

They're so petite and cute, I can't stop eating them. GET IN MY BELLY.


THUMBPRINT JAM AND BUTTER COOKIES


1/2 pound (2 sticks) unsalted butter, softened
1 cup superfine sugar, or granulated sugar processed in food processor for 30 seconds
1/2 teaspoon salt
1 large egg plus 1 yolk
2 teaspoons vanilla extract
2 1/2 cups all-purpose flour

1. Either by hand or with electric mixer, cream butter, sugar, and salt until light and fluffy, about 3 minutes with mixer set at medium speed. Add yolk, beat well, then add whole egg and vanilla; continue beating until well incorporated. Add flour; beat at low speed until flour is just mixed in. Shape the dough into a round, wrap in plastic and refrigerate for at least 2 hours, or up to 3 days.

2. Adjust oven racks to upper- and lower-middle positions and heat oven to 375 degrees. Remove disk of dough from refrigerator and shape rounded teaspoons of dough into balls using your palms and place onto parchment-lined baking sheet about 2 inches apart. Make an indention in the middle of the dough with your thumb and fill with 1/4 teaspoon jam. Bake for 10 to 12 minutes, reversing cookie sheets (from top to bottom and back to front) halfway through baking time, until evenly light brown.

3. Immediately transfer cookies to cooling rack. Cool to room temperature and allow to set, 1 hour.


Serve with a piping hot cup of PG Tips and you're all set!


(My favorite fancy tea cup. Go ahead; do your Mrs. Doubtfire voice. "Oh HEL-LOOOO! A spot of tea in the garden, love!? YEEEAAASSS!!)

Wednesday, August 1, 2007

Chocolate Chip Cookies win!

I was in the mood for some easy comfort food after that last, complicated concoction so I turned immediately to the old staple: chocolate chip cookies. I recently got The Dessert Bible by Christopher Kimball, trusting the author as a contributer to Cook's Illustrated and, subsequently, The Best Recipe cookbook. Yeah. Not a great idea. I guess you never know about a recipe until you try it. His idea of the "best" chocolate chip cookie was bland, flour-y and tasteless. They quickly became Trash Cookies.

I compared his recipe to The Best Recipe and saw immediately he'd changed the fat (butter) content by half which explained why the ratio of flour was so off. The Best Recipe cookbook merely modifies the tried and true Tollhouse recipe (which, I agree, isn't perfect). Their modifications resulted in a perfectly shaped, textured and tasty cookie. Once again, The Best Recipe comes through. I really shouldn't be surprised anymore but any time I make something that comes out right, I really really am.


TRADITIONAL CHOCOLATE CHIP COOKIES
Source: The Best Recipe

2 1/4 cups all-purpose flour
1 teaspoon salt
1 teaspoon baking soda
1/2 pound (2 sticks) unsalted butter, softened
1 cup light or dark brown sugar, packed
1/2 cup granulated sugar
2 large eggs
1 teaspoon vanilla extract
1/2 teaspoon water
2 cups semisweet chocolate chips
1 cup coarsely chopped walnuts or pecans (optional)


1. Adjust oven racks to upper- and lower-middle positions and heat oven to 375 degrees. Whisk flour, salt and baking soda together in medium bowl; set aside.

2. Either by hand or with electric mixer, cream together butter and sugars until light and fluffy, about 3 minutes with mixer set at medium speed. Scrape sides of bowl with rubber spatula. Add eggs, vanilla and water. Beat until combined, about 40 seconds. Scrape sides of bowl.

3. Add dry ingredients and beat at low speed until just combined, 15 to 20 seconds. Add chocolate chips and nuts and stir until combined.

4. Drop batter by tablespoons onto ungreased cookie sheets, spacing pieces of dough about 1 inch apart. Bake, reversing position of cookie sheets halfway through baking (from top to bottom and front to back), until cookies are light golden brown and outer edges begin to crisp, 8 to 10 minutes. Cool cookies on sheets for 1 to 2 minutes before transferring to cooling racks with wide spatula.