I'm always a little floored when I get compliments from strangers on my baking. It takes a second and I get all flustered and don't know how to appropriately convey my utter gratitude so it comes out like a rushed 'oh thanks...' Which is too casual and completely inadequate with how amazing their compliment makes me feel.
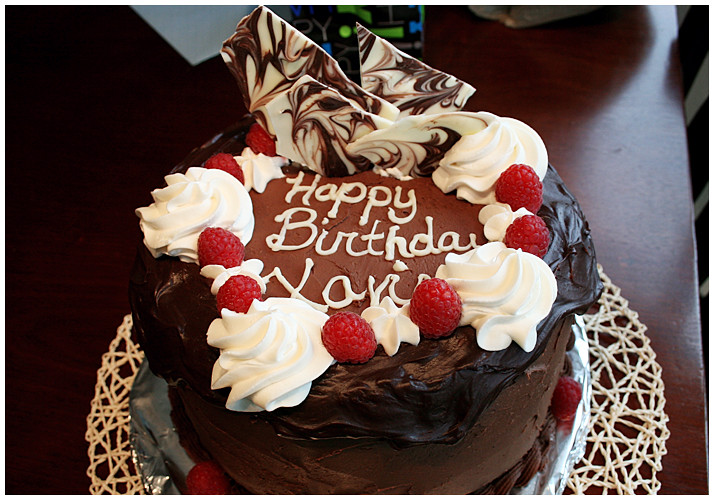
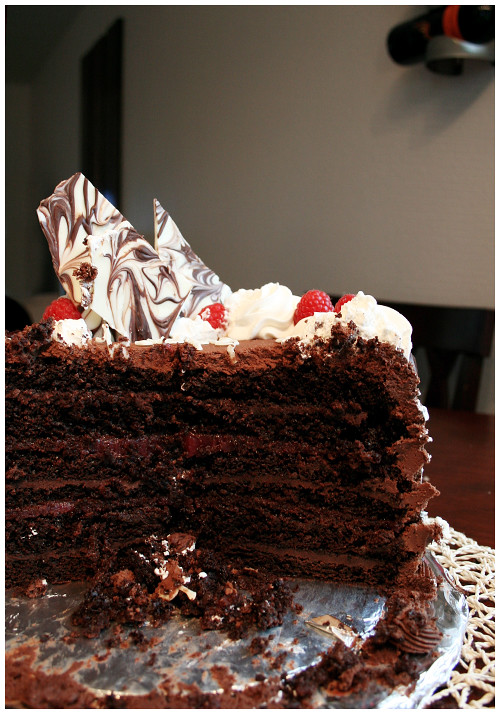
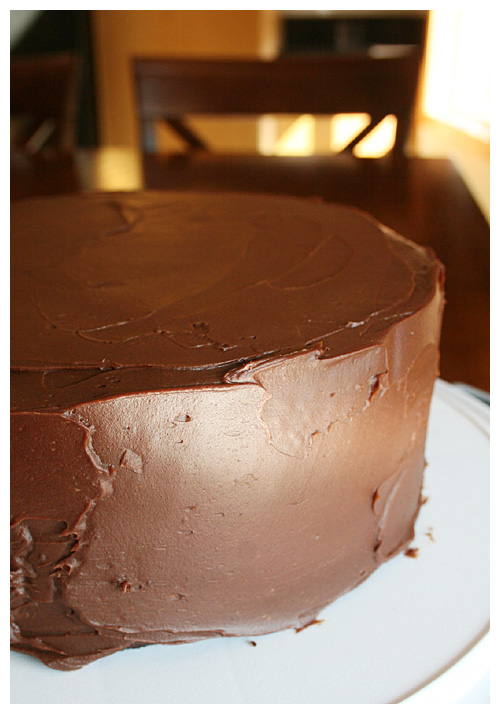
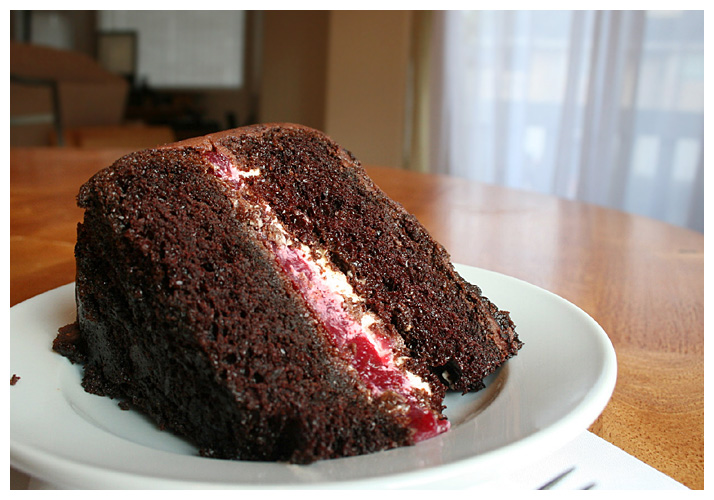
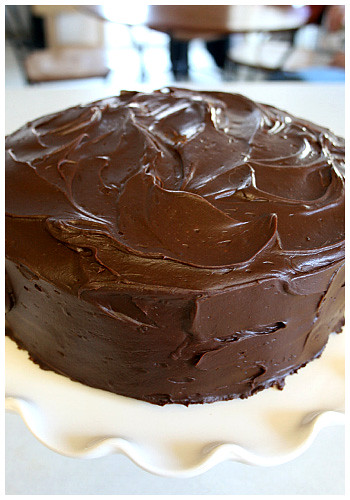
The ultimate compliment, of course, is being asked to make something special for someone. My best friend asked me to make her first son's birthday cake (which I bombed by making a blue monstrosity - I'm sorry, Tres! ILU!) and I've happily donated cakes for office parties. This petite cake was made for an individual in the office who just asked for a small chocolate cake. It's two layers of a 6-inch round which might be my favorite mini cake size ever.
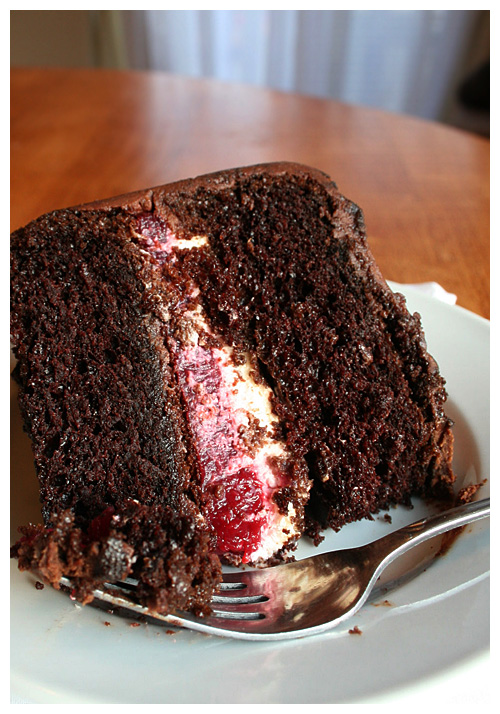
I'm a sucker for berries and chocolate so I liked how it turned out. And the ganache finally dripped so prettily!
I used the same chocolate cake recipe I always use, Beatty's Chocolate and a basic chocolate buttercream BUT I have to share the ganache ratio since it took me forever to find one that works:
Chocolate Ganache
6 ounces semi-sweet chocolate
2/3 cup heavy cream
1 tablespoon corn syrup
Good luck not putting that stuff on everything - berries, cookies, toast. It's allll good.
Showing posts with label cake. Show all posts
Saturday, February 9, 2013
Wednesday, January 30, 2013
Double Musky Carrot - er, Everything Cake
Every year I make my dad's birthday cake and it gives me an excuse to try recipes I've been itching to attempt. This year I non-too-subtly persuaded him to a carrot cake that's famous around these parts. It's from the Double Musky, a local restaurant here in Alaska, and it's loaded with stuff. I mean, it should be called the kitchen sink cake: carrots, walnuts, pineapple, coconut, pecans; you name it.
And guess what? It's AWESOME. Seriously; like the best carrot cake I've ever had. And don't be scared of the stuff: you don't even really taste the pineapple. It just adds a ton of moisture so it's goooood.
Now, usually it's in a ho-hum 9x13 pan but this was a birthday so I went for two rounds to fancy it up. I'm also not a huge cream cheese frosting fan so I weakened the tanginess by adding a little more powdered sugar to the recipe and whipping the stuff within an inch of its life - it came out nice and light which was a perfect compliment to the dense, richness of the cake! (The frosting even drew it's own compliments!)
Seriously, this one was hard to stop eating. If you have any inclination for carrot cake, TRY THIS RECIPE RIGHT NOW. Mmm, just looking at the pictures is giving me mouth-watering flashbacks...
Double Musky Carrot Cake
Adapted from source: Cheryl Canter
2 cups sugar
1 1/2 cups vegetable oil
3 eggs
2 tsp vanilla
2 1/4 cups all purpose flour
2 tsp cinnamon
2 tsp baking soda
1 tsp salt
2 cups finely shredded carrots
2 cups flaked coconut (I used sweetened)
1 20 ounce can crushed pineapple, drained
1 cup walnuts, chopped
Frosting:
8 ounces cream cheese, room temperature
1/4 lb. butter, room temperature
2 tsp vanilla
1/4 tsp salt
4 cups powdered sugar
3/4 cups pecans, chopped
May add 1/4 cup milk to thin
Preheat oven to 350 degrees. Grease or butter two 9-inch round cake pans, add cut parchment round to bottom and grease; set aside.
Mix sugar, oil, eggs, and vanilla. Stir in flour, cinnamon, soda, and salt. Fold in carrot, coconut, pineapple, and nuts. Pour into greased pans. Bake at 350 degrees for 35-50 minutes, or until a tester inserted into center comes out clean. Cool completely.
Frosting: Beat cream cheese and butter until lumps are gone. Combine with vanilla, salt, and powdered sugar, mixing with electric mixer until it’s light and airy. (The longer you mix, the lighter it will be!) Spread on cooled cake. Garnish immediately with chopped pecans to wet frosting.
Tuesday, July 31, 2012
Fancy Cake For Practice
After making so many cookies, I got very comfortable with royal icing and the piping bags and the whole routine of it. I was asked to make a cake (or three) for my office and realized I was way out of practice in just CAKES: my first love. So I set out to make a tester just to get back in the groove.
I chose the Joy of Cooking's basic white cake because I'm always eager to try staples that have withstood the test of time. I was also very eager to try out a few new bits and bobs as recommended by the cake queen, Rose Levy Beranbaum. That lady is amazing. I'm talking so meticulous and exact, I read The Cake Bible with my jaw gaping. How to open and close the oven door?? (She says GENTLY so as not to force too much of the heated air out). In awe of her. SO. I got to try out, 1. Evenbake Cake Strips and Baker's Joy flour spray. I used the spray on both layers (and a parchment round on the bottom just to be safe) then the cake strip on #1 and no cake strip on #2. Take a look:

IT WORKS! So beautifully! Look how even and golden #1 - the cake stripped layer - is! And the other, same cooking time AND in the back of my oven which is traditionally cooler, is darker and has a round center. I will never EVER bake without cake strips again. Wonderful! (And the layers slipped right out of the pans with the flour spray so a win on both new experiments!)
I chose the Joy of Cooking's basic white cake because I'm always eager to try staples that have withstood the test of time. I was also very eager to try out a few new bits and bobs as recommended by the cake queen, Rose Levy Beranbaum. That lady is amazing. I'm talking so meticulous and exact, I read The Cake Bible with my jaw gaping. How to open and close the oven door?? (She says GENTLY so as not to force too much of the heated air out). In awe of her. SO. I got to try out, 1. Evenbake Cake Strips and Baker's Joy flour spray. I used the spray on both layers (and a parchment round on the bottom just to be safe) then the cake strip on #1 and no cake strip on #2. Take a look:

IT WORKS! So beautifully! Look how even and golden #1 - the cake stripped layer - is! And the other, same cooking time AND in the back of my oven which is traditionally cooler, is darker and has a round center. I will never EVER bake without cake strips again. Wonderful! (And the layers slipped right out of the pans with the flour spray so a win on both new experiments!)
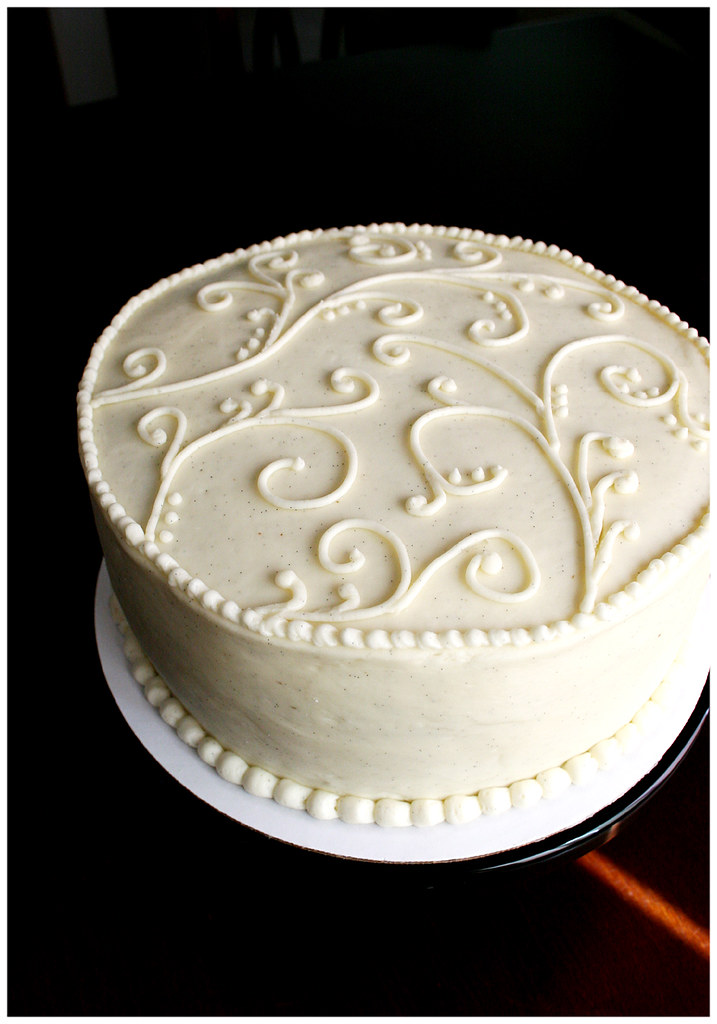
So I was basically playing around with decorating and trying to make it
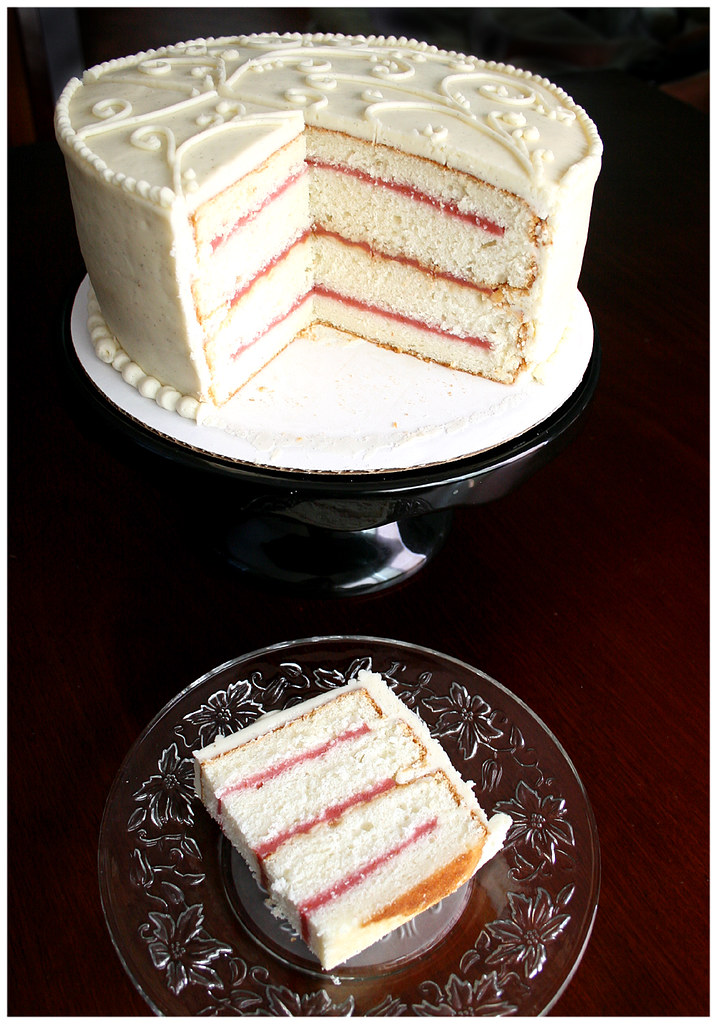
fancy schmancy. I piped the border of buttercream around the inside edge of each layer
then filled with a basic strawberry filling (because I felt like it).
Did the crumb coat and smoothed all the lines, etc, etc.
When I went to pipe the decoration though? woo boy. Rough. Buttercream
is most certainly NOT as agreeable as royal icing. Sure, it tastes
better but it's just ornery! Go where I want you to, buttercream!!
And, for my own amusement, when we went to cut into it, I tried a new cut technique that I saw in a cake magazine so we got rectangle cuts from a round cake. Like wedding cake pieces! I just thought they were darling (and had a hankering for some white wedding cake). Just cut all the way across, off center (however long you want a piece) then start cutting perpendicular from that line! Kinda want to do all my round cakes this way now. No skinny triangle edge! All even square!
The recipe was pretty good but not going in my favorites box. It was dense but not heavy and was a solid, vanilla cake. The family liked it but I'll keep looking for the perfect white cake...
WHITE CAKE
The Joy of Cooking
3 1/2 cups sifted cake flour
1 Tablespoon plus 1 teaspoon baking powder
1/2 teaspoon salt
1 cup milk
1 teaspoon vanilla
1/4 teaspoon almond extract
1 cup (2 sticks) unsalted butter
1 2/3 cups sugar + 1/3 cup
8 large egg whites
1/2 teaspoon cream of tartar
Preheat oven to 375 F. Have all ingredients at room temperature. Grease and flour two 8 x 2-inch or 9 x 2-inch round cake pans and line the bottoms with parchment paper.
Whisk together first three dry ingredients thoroughly in a medium bowl. Combine milk, vanilla and almond extract in a separate bowl or liquid measuring cup.
Beat butter in a large bowl until creamy. Gradually add 1 2/3 cups sugar and beat until light and fluffy, 3 to 5 minutes. On low speed, add the flour mixture in 3 parts, alternating with the milk mixture in 2 parts, beating until smooth. Using clean beaters, beat egg whites and cream of tartar in another large bowl on medium speed until soft peaks form. Gradually add 1/3 cup sugar, beating on high speed. Beat until stiff but not dry. Use a rubber spatula to fold one-quarter of the egg whites into the batter, then fold in remaining whites. Divide the batter among the pans and spread evenly.
Bake until a toothpick inserted into the center comes out clean, about 25-35 minutes. Cool and remove from the pan. Spread the cake when cool with your choice of icing.
Vanilla Bean Buttercream Icing
The Joy of Cooking
3 1/2 cups sifted cake flour
1 Tablespoon plus 1 teaspoon baking powder
1/2 teaspoon salt
1 cup milk
1 teaspoon vanilla
1/4 teaspoon almond extract
1 cup (2 sticks) unsalted butter
1 2/3 cups sugar + 1/3 cup
8 large egg whites
1/2 teaspoon cream of tartar
Preheat oven to 375 F. Have all ingredients at room temperature. Grease and flour two 8 x 2-inch or 9 x 2-inch round cake pans and line the bottoms with parchment paper.
Whisk together first three dry ingredients thoroughly in a medium bowl. Combine milk, vanilla and almond extract in a separate bowl or liquid measuring cup.
Beat butter in a large bowl until creamy. Gradually add 1 2/3 cups sugar and beat until light and fluffy, 3 to 5 minutes. On low speed, add the flour mixture in 3 parts, alternating with the milk mixture in 2 parts, beating until smooth. Using clean beaters, beat egg whites and cream of tartar in another large bowl on medium speed until soft peaks form. Gradually add 1/3 cup sugar, beating on high speed. Beat until stiff but not dry. Use a rubber spatula to fold one-quarter of the egg whites into the batter, then fold in remaining whites. Divide the batter among the pans and spread evenly.
Bake until a toothpick inserted into the center comes out clean, about 25-35 minutes. Cool and remove from the pan. Spread the cake when cool with your choice of icing.
Vanilla Bean Buttercream Icing
1 cup (2 sticks) butter
4 cups sifted powdered sugar
1 teaspoon vanilla extract
1 - 2 Tbsp whole milk
1 vanilla bean
In a standing mixer fitted with a whisk, mix together sugar and butter. Mix on low speed until well blended and then increase speed to medium and beat for another 3 minutes.
Add vanilla, vanilla bean and cream and continue to beat on medium speed for 1 minute more, adding more cream if needed for spreading consistency.
Saturday, April 7, 2012
Birthday Season!
It's birthday season in my family! Well, I say that because of the immediate family, the coolest of us have April/May birthdays (that would be me, my mom and my fellow Taurus niece). WE'RE BOSS.
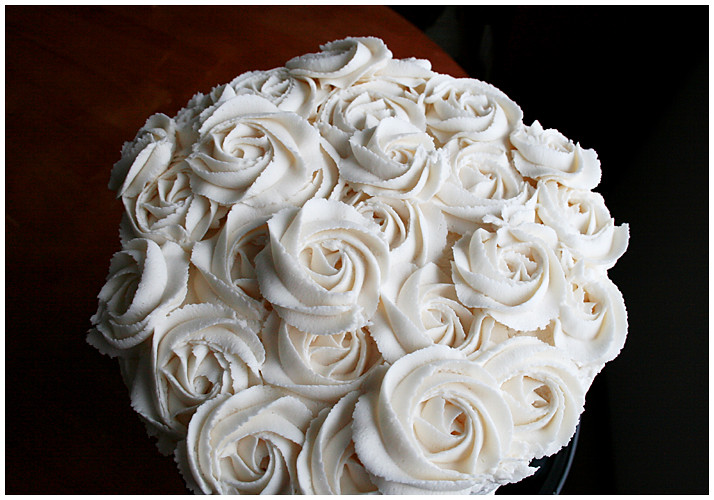
So my mom's birthday just passed and she requested an utterly boring vanilla cake mix with vanilla buttercream. yawn. But I made baby shower cupcakes for a coworker a few months ago with a new technique that I fell in love with.
Hey, look at this bouquet of roses I got for her birthday.
So my mom's birthday just passed and she requested an utterly boring vanilla cake mix with vanilla buttercream. yawn. But I made baby shower cupcakes for a coworker a few months ago with a new technique that I fell in love with.
Hey, look at this bouquet of roses I got for her birthday.Wednesday, November 23, 2011
Fancied Up Chocolate Raspberry
I have a 14 year old nephew that's kind of a foodie. He wants to be a chef. But he also likes a lot of different foods so when I asked him what kind of cake he wanted for his birthday and he said the same chocolate/raspberry one I'd made for another friend before, I wasn't challenged. It was a smidge disappointing. So I went in search of at least prettying it up. I found a beautiful picture on flickr of a chocolate raspberry cake that I've, regrettably, lost the link to. I attempted to duplicate it and didn't quite succeed but my nephew liked it a lot so that was my main goal.
The thing I didn't prepare for was how time consuming every bit of this cake was. From the ganache to cutting the three layers to making the raspberry filling then chocolate buttercream then whipped cream THEN white chocolate marble decoration. so much work. But I'm glad it came out nice. And it was just as yummy as chocolate and raspberry always are. Win!
And it's six layers with three ganache fills and two raspberries. Mmmm!Monday, November 7, 2011
More Halloween!
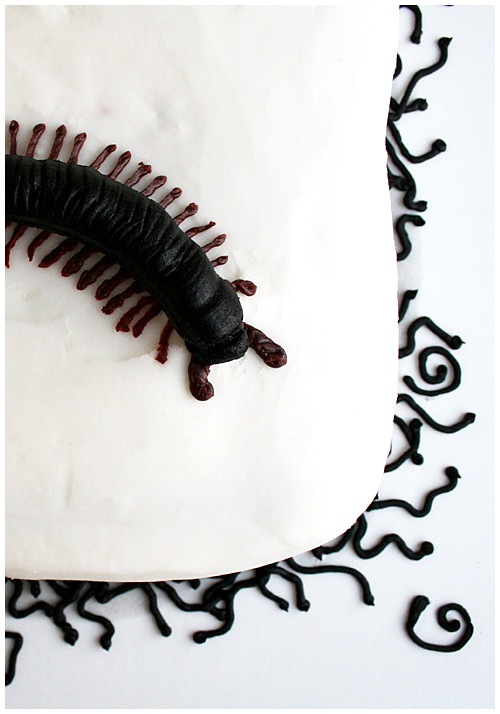
Every year, my office puts on a Halloween party and they usually ask for desserts to be contributed. This year they're doing a dessert contest but I was just excited to make something creepy. I saw this cake on I Am Baker and thought it was AWESOME so I went about trying to replicate.She mentions she uses Americolor for the buttercream coloring but I couldn't get my hands on it before the due date so I cheated (again) and used the Wilton bottle of black icing. Now, the legs, on hers, are red and almost gel-looking so I was stumped. I bought the little red gel bottle and that was way too bright. I added black coloring to it and it plunged into darkness; too dark! So I ended up using the leftover red Wilton bottle icing from the little vampire cupcake fangs of last week! Added a little black to darken it and voila! Kind of reddish/black legs!
Thanks to this from I Am Baker to this awesomely creepy design!!

Sunday, January 30, 2011
Italian Cream Cake is coconutty!
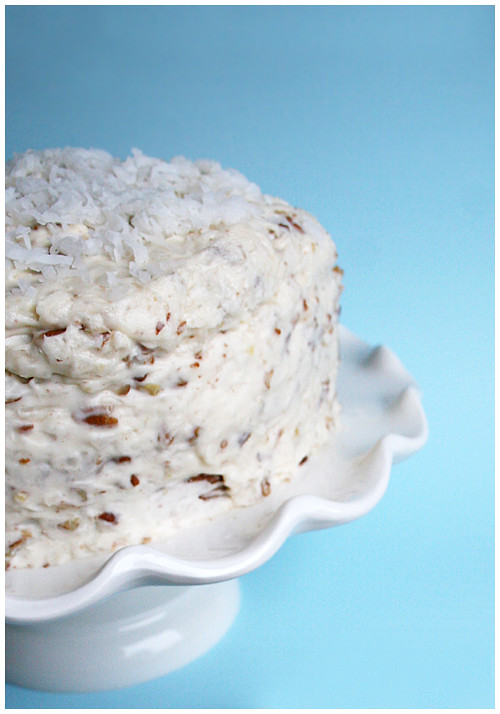
My family knows I love baking. They also know that there's nothing I love more than baking BIRTHDAY CAKE. The best thing about birthday cakes is, because they come around every year, my fam usually gives me a challenge and requests something different each time. So I get to try new techniques and recipes AND do something for my loved ones at the same time!This year, my dad just said coconut cake but I had something special in mind. My friend from work and I share our cooking adventures and recipes with each other and she brought in a piece of this Italian Cream Cake a few months ago from her husband's birthday. It was DIVINE. So moist and coconutty. Auuggghhhh. She generously gave me the recipe and I sat on it, waiting for the perfect time to try it. HULLO, BIRTHDAY!
So, a few things first off: when you combine the baking soda and buttermilk, IT WILL FIZZ. I turned away for five seconds and when I looked back, it had overflowed from my cup. You've been warned! Use bigger than a 1 cup measuring cup.
Second, something in the chemical makeup of this batter cooks the eggs. You'll see pieces of scrambled egg and I don't know what I did to cause it. HOWEVER. I picked out the bigger pieces that made me nervous and baked and you couldn't tell ANYTHING in the final cake. So breathe easy; the egg will disappear!
Third, it'll seem like there's not enough icing for a three layer cake. I spread as thin a layer as possible on the insides (not even going all the way to the edge of the cake) and covered generously over the outside because that's the part that matters. You want the pretty swirliness on the outside. The inside layers were fine! The cake itself is sweet enough that it doesn't need too much icing. It was perfect the way it was!
This delish cake went SO FAST. It was just so gooooood. It's absolutely going on my all-time favorites!

ITALIAN CREAM CAKE
Cake
1/2 cup shortening, room temperature
1/2 cup butter, room temperature
2 cups sugar
5 eggs, room temperature
1 cup buttermilk
1 teaspoon baking soda
2 cups flour
1 teaspoon vanilla
1 2/3 cup coconut
Icing
1/2 cup butter, room temperature
8 oz cream cheese, room temperature
1 box (~ 4 cups) sifted powdered sugar
1 teaspoon vanilla
1 cup coconut
1 cup chopped nuts (I used pecans)
1. Blend shortening and butter and sugar until creamy. Blend in egg yolks into mixture.
2. Add baking soda to buttermilk. Stir buttermilk and flour, alternately into egg mixture.
3. Beat egg whites until stiff; add vanilla. Fold stiff egg whites into batter, and then fold in coconut.
4. Divide batter into 3 8 or 9” cake pans that are greased and floured. Bake at 350° for 25-30 minutes or until toothpick comes out clean.
5. For Icing: Mix butter and cream cheese. Add sugar and vanilla. After mixed, add coconut and chopped nuts. Sprinkle coconut on top of cake after it is frosted. (I did mine just on top but it would look super pretty all the way around the sides too!)
Sunday, November 7, 2010
Zombies! ...scare me

I was asked to make something for the office Halloween party and when instructed to make it "gory" and "gross", I had to abandon the adorable pumpkin truffles I was imagining making. I came across this zombie cake by Dessert By Candy last year and looooooved the way it looked! And, also loving a challenge, I decided it was perfect for my needs.
I knew I wouldn't make that intense of a cake for a casual office party - the recipe she uses seems more of a one-layer, dense, flourless cake. Instead, I fell back on my favorite chocolate, the Beatty's Chocolate Cake Ina Garten put out a while ago. I use it for everything, I swear; it's delicious! Then, because this was supposed to be gory, I made my OTHER favorite chocolate accompaniment, raspberry filling! Like BLOOD! Get it??

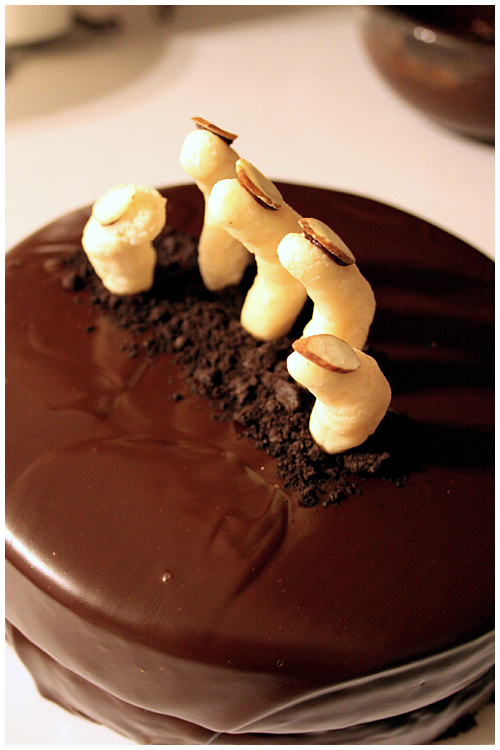
That left the decoration which was really my focus from the beginning. The fingers are made of marzipan, which I've never worked with before. As I opened the box to find an air-tight tube, I got a little nervous to find the stuff hard as a brick. I should've done more research but I threw the log (unwrapped) in the microwave and heated it slowly until it was more pliable. It started to dry out immediately and I had to work VERY fast to get anything resembling a shape from it. In the end, I wasn't 100% happy with the results (because they didn't look like Dessert by Candy's) but everyone said it worked because the hand was a dead zombie so all the cracks were fine! (And the nails are almond slices, attached with extra ganache.)
Ultimately, the whole thing was a hit! Happy belated Halloween! (And get ready for pumpkin coming your way!)
Friday, May 7, 2010
Pig Cake!
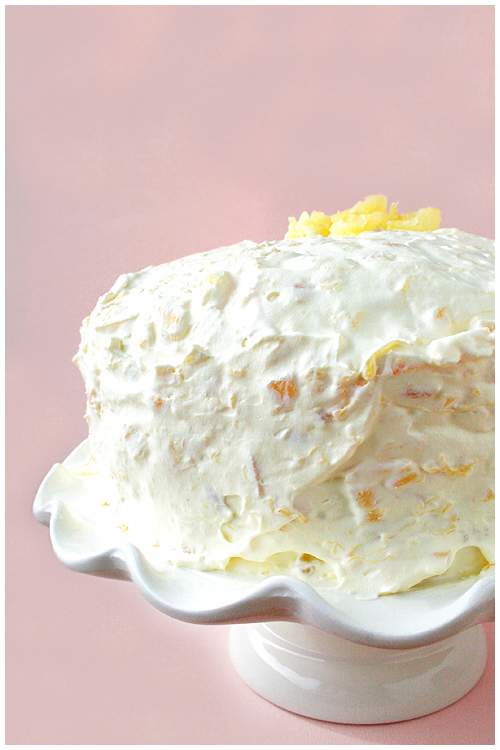
Every year I make my mom's birthday cake at the beginning of April and she makes mine at the end. We're both pretty easy to make happy - I like anything pink or with berries and she likes chocolate. This year, she felt like something different and she produced a recipe she'd cut out of the Houston Post over 20 years ago (1987 omg!). It was a cake she'd had at a potluck and *remembered* liking it a lot but couldn't exactly remember why. So she gave the recipe to me and said Make it so!Personally, I'm a little offended by ~cake mixes. Mostly because sometimes cake mixes are just plain better than homemade. They're so soft and effortlessly fluffy... It's not FAIR. It's cheating! However. This recipe called for a mix which made it super easy to make.
It was also super easy to EAT. They say it's called "Pig Pickin' " because you make a pig of yourself. I will support this claim. We all went back for seconds. I'll keep this cake in rotation, no problem. Mmmm!
PIG PICKIN' CAKE
Adapted from: Ann Valentine
1 package yellow cake mix with pudding
1 11-ounce can mandarin oranges, UNDRAINED
4 eggs
1/2 cup vegetable oil
1/2 cup chopped walnuts
1 (20-ounce) can crushed pineapple, UNDRAINED
1 9-ounce carton frozen whipped topping thawed
1 (3.75-ounce) package vanilla instant pudding mix
Grease two 9-inch layer cake pans. Line bottoms with waxed paper; grease again; set aside. Combine cake mix, mandarin oranges, eggs and oil; beat 2 minutes at highest speed of electric mixer. Reduce speed to low; beat 1 minute. Stir in walnuts. Pour batter into prepared pans. Bake at 350 for 20 to 25 minutes or until a wooden pick inserted in center comes out clean. Cool in pans on racks 10 minutes; remove layers from pans, let cool completely.
Combine remaining 3 ingredients; beat 2 minutes at medium speed of electric mixer; let stand 5 minutes in refrigerator or until mixture is of spreading consistency. Spread pineapple mixture between layers and on top of cake - you may frost sides if desired. Chill at least 2 hours before serving. Store in the refrigerator.
Tuesday, March 23, 2010
Irish Cream tastes like Irish Cream

I've done better at baking, I HAVE. See this cake?? I made it almost two weeks ago as a tester for a work potluck! It was BEFORE St. Patty's, I promise. I just never got around to posting. It's been a busy few weeks.
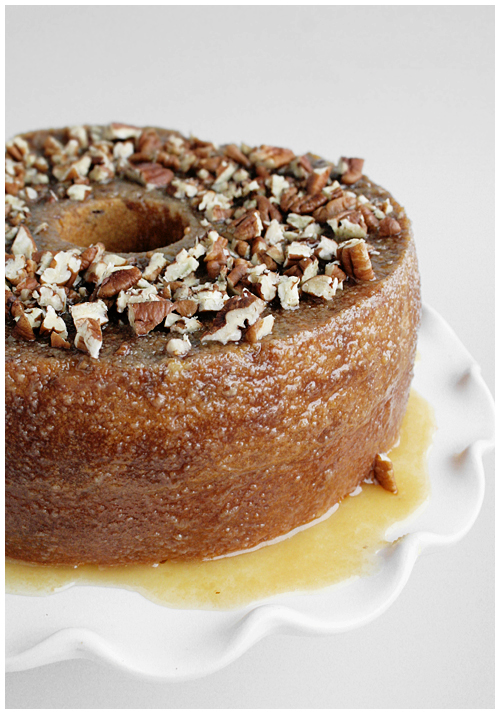
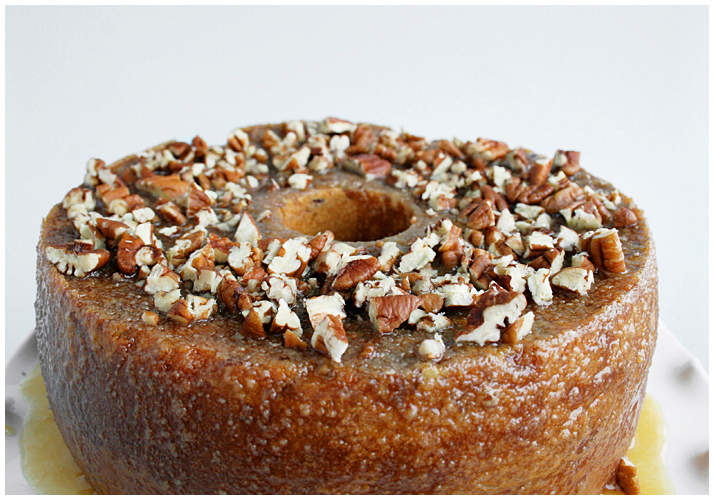
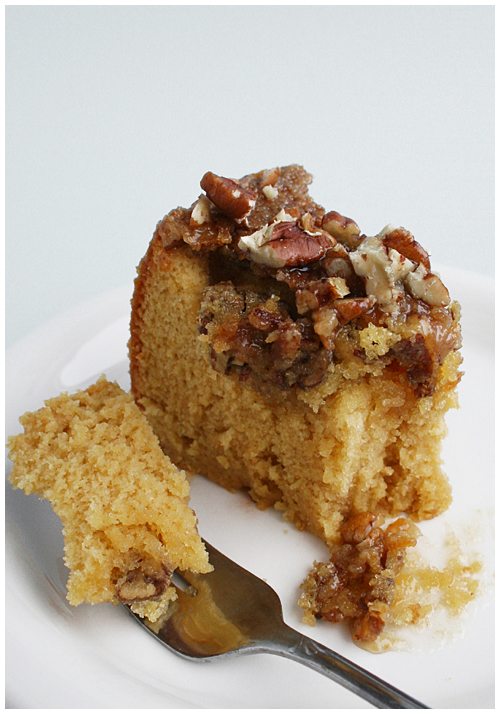
So in my search for Irish and/or St. Patty's themed food, I came across an insanely high rated Irish Cream cake at All Recipes. Sounded promising. I made it with minor adjustments (an angel food pan instead of Bundt so the top was flat and could be dressed prettier) and dug in with high hopes. Yeah, it tasted like alcohol. Okay, not ENTIRELY. Actually, the second day, the alcohol in the glaze and cake was much more subtle and the cake had absorbed most of the glaze to make it nice and moist. But there was still Irish cream in it. I don't know what I was expecting; it's an IRISH CREAM CAKE. Now, I enjoy my liquor as much as the next gal but there's just something about mixing certain desserts and alcohol. I didn't love it. But those I tested it on thought it was quite nice. So maybe I'm a harsh critic.
If you like a little bite to a moist cake, this one will hit the spot.

IRISH CREAM BUNDT CAKE
Source: All Recipes, by Sue Haser
1 cup chopped pecans
1 (18.25 ounce) package yellow cake mix
1 (3.4 ounce) package instant vanilla pudding mix
4 eggs
1/4 cup water
1/2 cup vegetable oil
1 cup Irish cream liqueur
1/2 cup butter
1/4 cup water
1 cup white sugar
1/4 cup Irish cream liqueur
Preheat oven to 325 degrees F (165 degrees C). Grease and flour a 10 inch angel food (or bundt) pan. Sprinkle chopped nuts evenly over bottom of pan.
In a large bowl, combine cake mix and pudding mix. Mix in eggs, 1/4 cup water, 1/2 cup oil and 1 cup Irish cream liqueur. Beat for 5 minutes at high speed. Pour batter over nuts in pan.
Bake in the preheated oven for 60 minutes, or until a toothpick inserted into the cake comes out clean. Cool for 10 minutes in the pan, then invert onto the serving dish. Prick top and sides of cake; I used a chopstick for larger holes. Spoon glaze over top and brush onto sides of cake. Allow to absorb glaze repeat until all glaze is used up.
To make the glaze: In a saucepan, combine butter, 1/4 cup water and 1 cup sugar. Bring to a boil and continue boiling for 5 minutes, stirring constantly. Remove from heat and stir in 1/4 cup Irish cream. If it looks curdled, whisk quickly until glaze becomes smooth.
Sprinkle extra chopped pecans on top for decorative dressing.

Thursday, October 29, 2009
Boo, ghosts. Boo.

Halloween is, by far, my favorite holiday. I'm not sure why because I've never been big on costumes or being scared at haunted houses or even trick-or-treating. But I guess it's fall and cute/spooky treats and decorations. Pumpkins were sent from Jesus as the greatest food stuff known to man. This is not a pumpkin entry; that's coming up next.
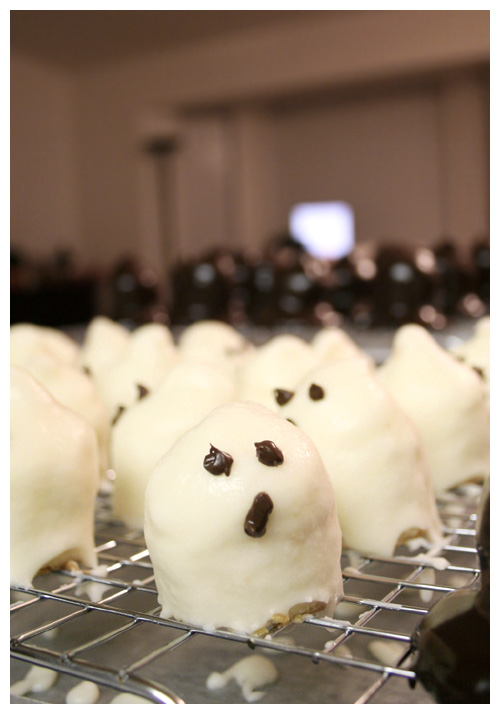
THIS is a Halloween cake entry because I seem to have those every other year. My best friend has a fall baby on the way (due late November) and she loves Halloween just as much and so decided the baby shower would be a perfect opportunity to have the best of both worlds. Hallo-baby party-shower! I'd seen these petits fours on Martha Stewart last year and almost died of the cute. I HAD to make them. But the holiday rolled around and went and I missed the chance. When this shower came up, I knew it would be the perfect occasion.
The thing about this blog I think I've found most fulfilling is the ability to go through a recipe, experience the process, and then post my reactions, good and bad, and try to help others not make the same mistakes. Or, in this case, say flat out: I will not make this recipe again. Don't get me wrong; another baker might look at it and decide it'll be worth the trouble. I can only say that from my standpoint, it's not.
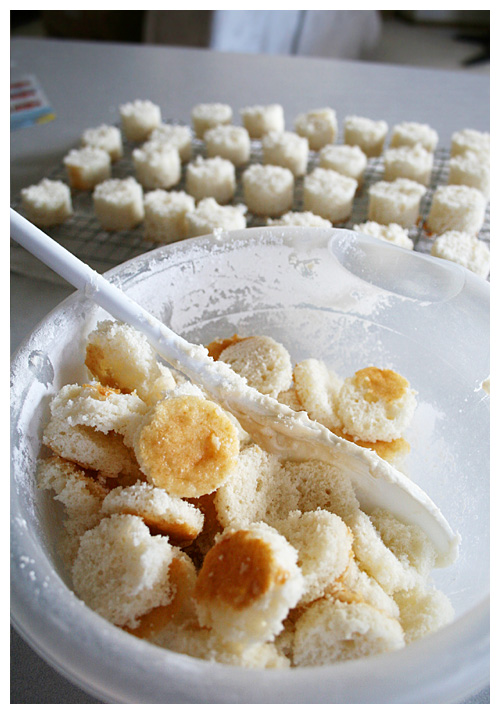
I devised a few shortcuts from the word go that I thought would help me out. I'd bake the cake and freeze it so a hard (and not pillowy soft) cake would cut through easier when using the small biscuit round cutter. Yeah, no. Turns out, the cold cake stuck to the metal cutter and subsequently couldn't cut the third and fourth rounds neatly at all. There was much cleaning, cutting, cleaning, cutting.

I then saw that the pan made the cake too tall for the stumpy little ghosts. I had to go through and cut all the tops off the cylinders although this did provide me with a fun little sampler disk of cake. Mmm.

And that's another thing: this recipe WASTES so much cake. There's just something in me that cringes at having leftover bits with nothing to do with. I froze the trimmings and have yet to decide their fate.

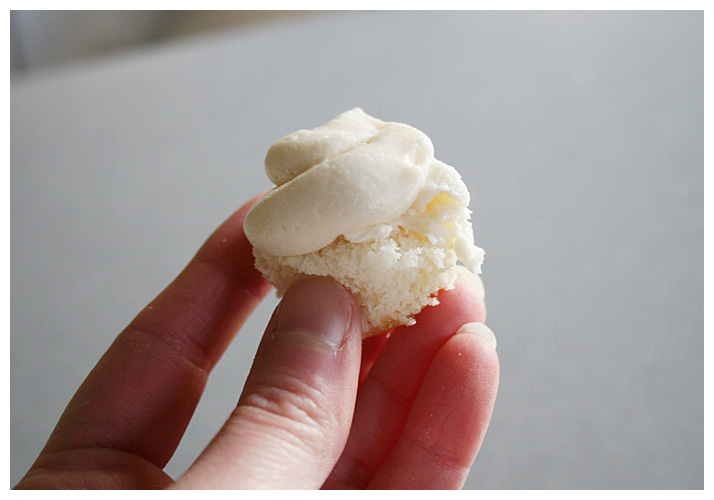
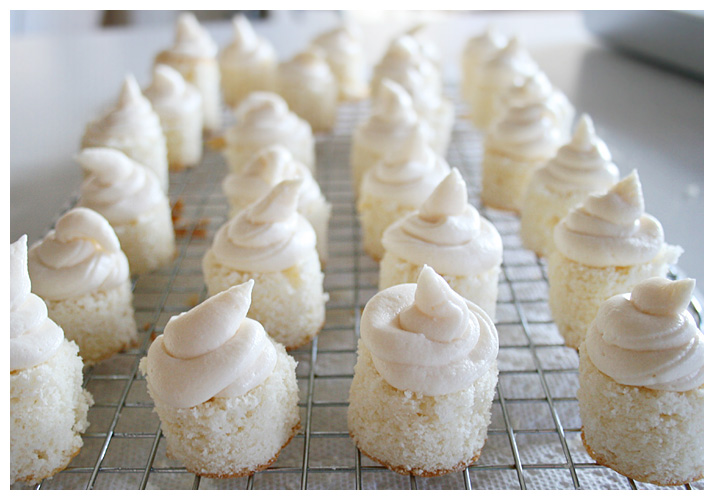
So I piped the little cones of buttercream on top and froze that as well. There's always an issue of exposed cake drying out so I had to do a quick freeze for the frosting to set up then went back and lightly covered a hollow cake pan with plastic wrap so only the tops were touching. Froze them again so I could glaze the day of the shower.
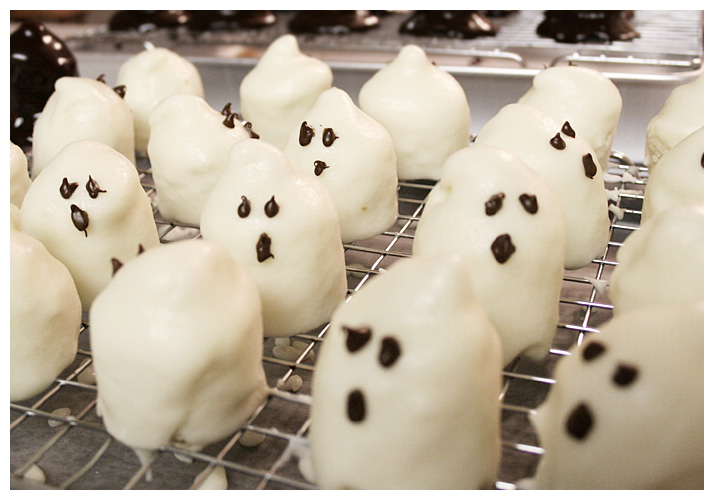
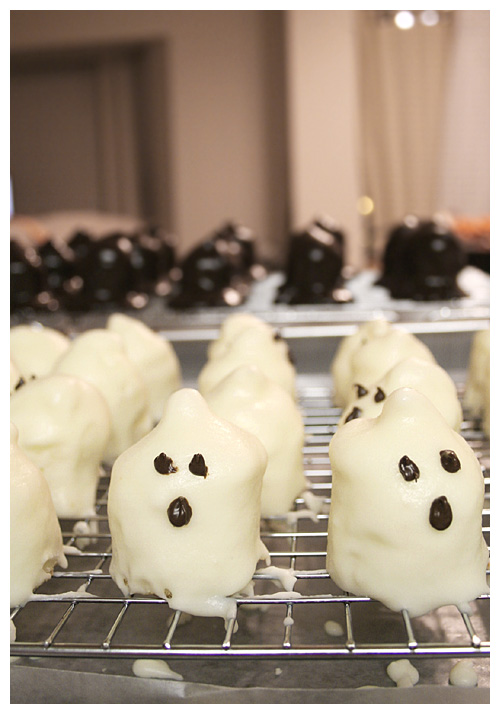
Now. The glaze. Perhaps a more experienced petits-fours-making-person would've thinned it out further but there were two issues: #1. I didn't know if a thinner glaze would set up or if it would remain too liquid, and #2. Would a thinner glaze show the imperfections of the cake/frosting instead of being a smooth, ghosty outside? I don't know the answer to either still because I was too chicken to try thinning the glaze. As it is, it's kind of thick and VERY sweet. The ghosts came out okay but not great. The witch hats, however, were a small disaster. The chocolate "glaze" is nothing more than a ganache that completely smothers the tiny round of delicate cake. With the buttercream cone on top of that, you've got a giant helping of chocolate and frosting and not much else. I wanted to throw them away but, again, felt uneasy wasting food. They were an unadulterated failure, though.
One last thing: the chocolate piping. I wish I'd read Bakerella's notes on piping chocolate for faces in which she instructs to add a little vegetable oil to make the substance more fluid because MARTHA sure didn't. So, thanks to Martha Stewart, the chocolate was too thick, hard to manage and came out looking junky. Bakerella's, on the other hand, came out looking great (that's the pumpkin coming up next). Thanks for nothing, Martha!
The guests at the party were extremely nice and said they really liked the little ghosts but I was disappointed. I will absolutely never make these again but I'm glad I went through the experience and could pass it on to you guys. Attempt at your own risk!

GHOULISH PETITS FOURS
Martha Stewart
For witch hats, make petits fours through step two. Then create a brim using a dab of icing: Affix each petit four to a 2-to-2 1/2-inch chocolate wafer cookie. Proceed to step three, coating with Chocolate Glaze instead of Butter Glaze. In lieu of step four, wrap one or two pieces of licorice lace around the base of the hat immediately after glazing.
Makes about 40
White Sheet Cake
Confectioners' Sugar Icing
Butter Glaze
4 ounces semisweet chocolate, for eyes and mouth
Using a 1 1/2-inch cookie cutter, cut out circles from cake. Brush off any crumbs with a pastry brush.
Fit a pastry bag with a plastic coupler, and top cake rounds with icing in a ghost or hat shape, about 1 inch high.
Place a wire rack over a rimmed baking sheet; set aside. Set an iced cake round on a fork; hold over bowl of glaze. Using a large spoon, drizzle glaze evenly over cake and icing until completely covered. Transfer to wire rack. Repeat with remaining rounds. Let set, about 5 minutes.
Place chocolate in a heatproof bowl microwave at 50% power, stirring chocolate every 30 seconds until melted. Add small amount of vegetable oil to make more fluid. Transfer to a disposable pastry bag or resealable plastic bag; snip off tip with scissors. Pipe eyes and a mouth onto ghosts.
WHITE SHEET CAKE
Makes one 12-by-17-inch cake
1 cup (2 sticks) plus 2 tablespoons unsalted butter, room temperature, plus more for baking sheet and wire rack
4 1/2 cups sifted cake flour (not self-rising), plus more for baking sheet
2 tablespoons baking powder
3/4 teaspoon salt
1 1/2 cups milk
1 1/2 tablespoons pure vanilla extract
2 1/4 cups sugar
7 large egg whites
Preheat oven to 350 degrees. Butter a 12-by-17-by-1-inch rimmed baking sheet. Line bottom with parchment paper. Butter parchment, and dust with flour, tapping off any excess. Set sheet aside.
Into a medium bowl, sift together flour, baking powder, and salt; set aside. In a measuring cup, combine milk and vanilla; set aside. In the bowl of an electric mixer fitted with the paddle attachment, cream butter until very smooth. With mixer on medium speed, add sugar in a slow, steady stream; beat until mixture is light and fluffy, about 3 minutes.
Reduce speed to low. Add reserved flour mixture in three batches, alternating with reserved milk mixture, and starting and ending with flour. Mix until just combined; do not overmix. Set aside.
In a clean bowl, beat egg whites until stiff but do not let dry peaks form. Fold one-third of the egg whites into batter to lighten, then gently fold in remaining whites in two batches.
Scrape batter into prepared sheet; smooth top with an offset spatula. Bake in oven until cake is springy to the touch and a cake tester inserted in the center comes out clean, about 30 minutes. Transfer to a wire rack, and let cool 15 minutes. Loosen sides of cake with a small metal spatula or paring knife; invert onto a buttered wire rack. Peel off parchment. To prevent splitting, reinvert cake so top is facing up. Let cake cool completely.
CONFECTIONERS' SUGAR ICING
(I would HALVE this; it made WAY too much)
Makes about 7 cups
1 1/2 cups unsalted butter (3 sticks), room temperature
3 pounds confectioners' sugar
3/4 teaspoon salt
3 tablespoons pure vanilla extract
3/4 cup milk, plus more if needed
In the bowl of an electric mixer fitted with the paddle attachment, beat together the butter and sugar until well combined. Add salt, vanilla, and milk; beat until icing is smooth and creamy. The icing should be thick enough to pipe and hold its shape. If icing seems too thick, add 1 tablespoon milk at a time until proper consistency is reached. Use immediately, or refrigerate in an airtight container up to 2 days. If refrigerating, bring icing to room temperature before using, and lightly beat until creamy if necessary.
BUTTER GLAZE
Makes about 1 1/2 cups
2 1/2 cups sifted confectioners' sugar
1/2 cup (1 stick) unsalted butter
5 tablespoons milk
Place sugar in a medium bowl, and set aside. In a small saucepan, melt butter over medium heat. Immediately pour the melted butter into the bowl with the sugar. Add the milk, and whisk until mixture is smooth. Cover bowl, and store at room temperature until ready to use.
CHOCOLATE GLAZE (for witch hats)
Makes 1 1/2 cups
6 ounces best-quality bittersweet or semisweet chocolate
1 cup heavy cream
Chop the chocolate into small pieces, and place in a medium bowl. In a small saucepan, heat cream over medium-high heat until just simmering, and pour it over the chocolate. Let mixture stand 5 minutes, then stir until smooth. Let stand at room temperature about 10 minutes before using.
Thursday, September 17, 2009
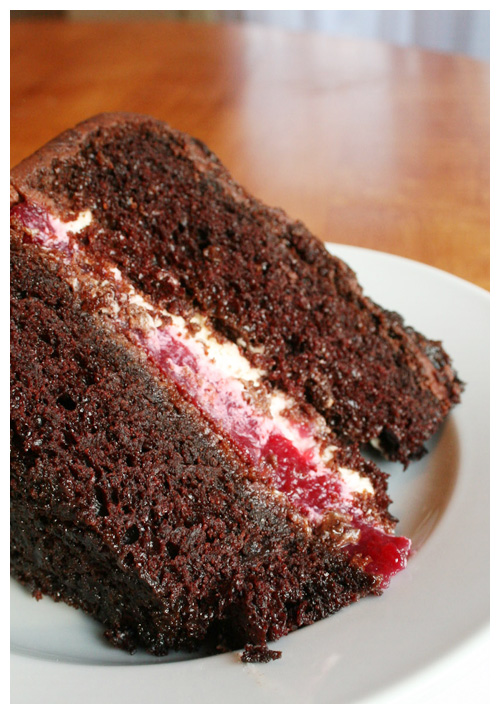
Chocolate & Raspberry always works

I saw the movie Hot Fuzz the other day and while it was awesome, one moment stuck out: Nick Frost's character was munching away on a chocolate cake with some sort of red filling. I was asked to make a cake for my friend's birthday and that's the first thing I proposed.
This was another one of those collecting pieces of recipes from all over to create something. I get nervous when I do this; it feels like creating a Frankenstein monster. Who knows if it'll be okay or such a disaster, the townsfolk start gathering their pitchforks. Thankfully, it was the former.
I went with the trusty Ina Garten but, more importantly, a chocolate cake she'd featured in her show from a "Beatty", that had unheard-of positive reviews. 5 stars, almost across the board. And I could very well go to Food Network.com and add my own rave review because this cake was phenomenal. It was moist but not too dense, perfectly chocolately without being overpowering. Absolutely terrific.

Now, for the red filling, I had to start scouring the web in search of what existed in my mind but which I wasn't sure I'd seen materialized outside of a Simon Pegg movie. A few came up that never sounded exactly right but then I finally stumbled on a straightforward Raspberry Filling recipe from Wilton.com, strangely enough. I'd never used any of their recipes before but this appeared so easy and I was going for a simple taste that wouldn't complicate the cake. It came out exactly as I'd hoped, thickened by the corn starch and tart but still sweet and seriously hard to stop eating.
To even out the tartness of the raspberry filling and the richness of the chocolate, I added a layer of whipped cream. Chocolate ganache topped it off and voila! Chocolate raspberry cake! It was a hit with the birthday girl and my family. I was honestly surprised at how much I enjoyed it. It took some time to prepare all the components but it was absolutely worth it!

BEATTY'S CHOCOLATE CAKE WITH RASPBERRY FILLING
Source: Ina Garten
Butter, for greasing the pans
1 3/4 cups all-purpose flour, plus more for pans
2 cups sugar
3/4 cups good cocoa powder
2 teaspoons baking soda
1 teaspoon baking powder
1 teaspoon kosher salt
1 cup buttermilk, shaken
1/2 cup vegetable oil
2 extra-large eggs, at room temperature
1 teaspoon pure vanilla extract
1 cup freshly brewed hot coffee
Chocolate Ganache (recipe follows)
Raspberry Filling (recipe follows)
Whipped cream (recipe follows)
Preheat the oven to 350 degrees F. Butter 2 (8-inch) round cake pans. Line with parchment paper, then butter and flour the pans.
Sift the flour, sugar, cocoa, baking soda, baking powder, and salt into the bowl of an electric mixer fitted with a paddle attachment and mix on low speed until combined. In another bowl, combine the buttermilk, oil, eggs, and vanilla. With the mixer on low speed, slowly add the wet ingredients to the dry. With mixer still on low, add the coffee and stir just to combine, scraping the bottom of the bowl with a rubber spatula. Pour the batter into the prepared pans and bake for 35 to 40 minutes, until a cake tester comes out clean. Cool in the pans for 30 minutes, then turn them out onto a cooling rack and cool completely.
Assemble the bottom of the cake, flat side up, with a layer of raspberry filling then whipped cream (recipes follow). Set top cake layer on the filling layers. Refrigerate to set filling layers to cakes.
Make chocolate ganache then let come to room temperature. You may need to let it sit in the fridge as well (continue stirring every five minutes or so to allow to chill evenly). When it is a thick, spreading consistency, spread evenly over cake. It will be a thin layer (ganache is dense and strong) so it is easiest to pour all ganache in the center and slowly work out and down the sides with a flat spatula.
Serve soon or refrigerate if storing. Whipped cream will not keep long.
RASPBERRY FILLING
Adapted from: Wilton.com
1 pkg (16 ounces) frozen raspberries packed in sugar thawed
1/3 cup granulated sugar
3 tablespoons cornstarch
1 teaspoon lemon juice
Makes: Filling serves 2 cups.
Drain raspberries, reserving liquid. Add enough water to liquid to equal 1 1/4 cups.
In large saucepan, combine liquid, sugar, cornstarch and lemon juice; mix well. Heat and stir until mixture boils and thickens. Cool completely.
WHIPPED CREAM
1/2 cup heavy cream, well chilled
1 tbsp confectioners' sugar
1/4 tsp vanilla extract
Place a mixing bowl and beaters from electric mixer in the freezer or refrigerator until well chilled, about 15 minutes.
Combine the heavy cream, confectioners' sugar, and vanilla extract in the mixing bowl.
With an electric mixer on low speed, begin beating the cream, gradually increasing the speed to high as cream thickens. (Do this slowly, or the cream will splatter.)
Beat until the cream is thickened, past soft peaks. It should have some structure so it can stand on its own as a layer under the top of the cake.
CHOCOLATE GANACHE
Source: Ina Garten
1/2 cup heavy cream
8 ounces good semisweet chocolate chips
1/2 teaspoon instant coffee granules
Friday, June 5, 2009
Tres!
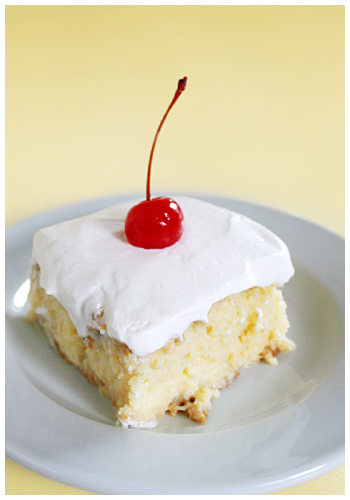
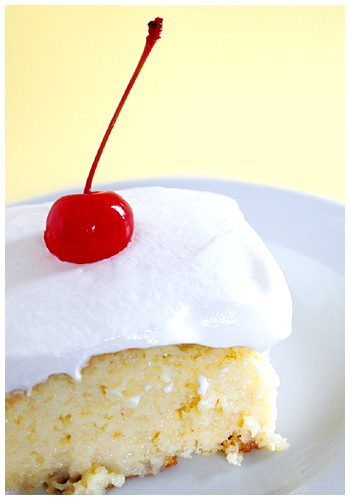
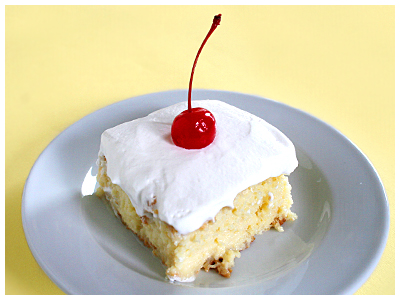
I visited Puerto Rico with family and friends last year for the first time and had many foods I'd never even heard of. Some were familiar (because I'm Mexican and we have common recipes) and some were not (the pervasiveness of plantains was impressive).We were treated to some desserts one night and I had tres leches for the first time. Now. I've done some research and the origins are widely disputed though most argue it is from Mexico. I was a little ashamed I'd never had it before but on further investigation, it's also considered a holiday (Christmas) dish so it's not an everyday sweet like pan dulce or anything. My shame was slightly alleviated.
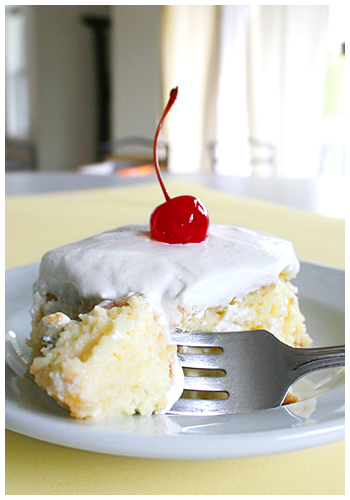
I found a well-reviewed recipe from Emeril Lagasse and got to it. His recipe says to bake this deep, super wet cake for "25 minutes". At 25 minutes, it was 80% still solid liquid. I think my total bake time came out closer to 45-50 minutes so be prepared to let it go and start checking with a cake tester as you go along.I did a little shortcut and used Cool Whip for the top because I'd heard it was just as good and it totally was! And the whole thing was terribly addictive and yummy. The leches made the cake nice and moist but not so much that it was falling apart. It was a lovely consistency that was sweet (thanks to the condensed milk) but not TOO sweet.
However. The version I had in Puerto Rico was less rich; more milky. It even left behind a little milkiness on the plate when you took a bite. I'm not sure if it was the relative density of this cake that soaked it all up or the thickness of the leches (evaporated milk, condensed milk and CREAM), but this one didn't bleed milkiness at all. It was delicious but not exactly the same as the one I had. And this was VERY rich. One piece (with a glass of milk because, clearly, there isn't enough in a cake called Tres Leches) and you're all good!This is one easy recipe I know I'll be making again!

TRES LECHES
Adapted from Emeril Lagasse
Cake:
6 large eggs, separated
2 cups granulated sugar
2 cups all-purpose flour
2 teaspoons baking powder
1/2 cup whole milk
1 teaspoon vanilla extract
Cream topping:
1 14-ounce can evaporated milk
1 14-ounce can sweetened condensed milk
1 cup heavy cream
Icing:
1 tub Cool Whip
maraschino cherries for decoration
To make the cake: Preheat the oven to 350 degrees F. Lightly grease and flour a 9 by 13-inch baking dish and set aside.
In the bowl of a mixer, beat the egg whites on low speed until soft peaks form. Add the sugar gradually with the mixer running and peak to stiff peaks. Add the egg yolks 1 at a time, beating well after the addition of each.
Sift together the flour and baking powder and add to the egg mixture, alternating with the milk. (Do this quickly so the batter does not lose volume.) Add the vanilla. Bake until golden, 40-50 minutes.
To make the cream topping: In a blender, combine the evaporated milk, condensed milk, and heavy cream and blend on high speed.
Remove the cake from the oven and while still warm, pour the cream mixture over it. Let sit and cool to room temperature. Cover and refrigerate until well chilled, at least 4 hours or overnight.
To assemble: Remove the cake from the refrigerator and spread the icing evenly across the top. Add cherry to individual slices.
Friday, April 17, 2009
I'm back, baby
After my last disappointing baking venture, I took a week or so off then decided to try something new. I settled on something easy but good, fresh for spring and pretty: lemon madeleines. I got everything set up, turned on the oven to preheat, mixed all the dry ingredients, had the eggs broke in a bowl and at room temperature. I'm just about to mix the wet and dry ingredients together when I notice the oven has never beeped that it's preheated. Curiously, I open the door and see that it's dead cold. :-O WUT.Long story short, two weeks later a new (expensive) part is shipped in and the repair guy restores old [not-so] faithful! IT'S BACK. And I've been DYING to bake for the past two weeks like crazy. Well, tomorrow's the day!!
But before all this happened (the day before, to be exact), I got my mom's birthday cake baked. She wanted something chocolatey and I remembered this cake from last year as rather intense. What I DIDN'T remember was that it calls for deeper pans than I had because it expands a lot. Thankfully, I remembered before the pans went into the oven (I made a mini 6" cake with the extra batter). So. Beware, if you make this. It makes a lot of cake. But moist and yummy! Good the next few days too!
Monday, November 3, 2008
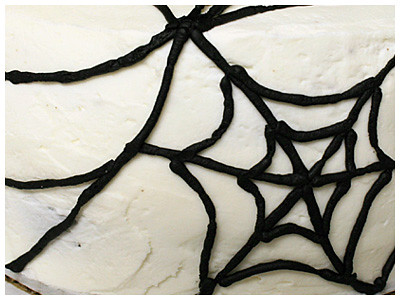
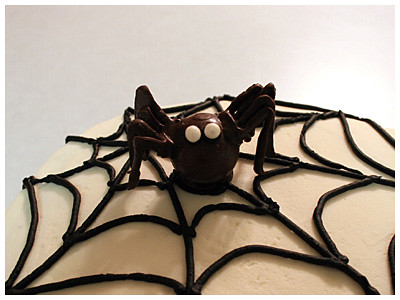
Spider Cake
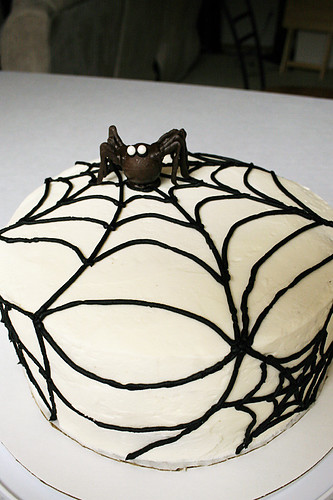
This is getting to be a THING, methinks...I made this for the cake walk at my work and the woman who picked it was very pleased! She had a gathering the next night and said all her friends enjoyed it and asked for the recipe! It was awesome!

It was just my usual chocolate cake in two layers and vanilla buttercream (recipe here). The lady who took it really liked the frosting. lol. I thought, who doesn't??
The black is the premade Wilton tube frosting; I didn't want to mess with trying to color my own because black is never as good as Wilton's makes it. And it tasted fine!
It didn't come out perfect; if I were to do it again, I'd use a thinner tip for the web and I'd make a GIANT spider (possibly with balloons...)


Thursday, July 17, 2008
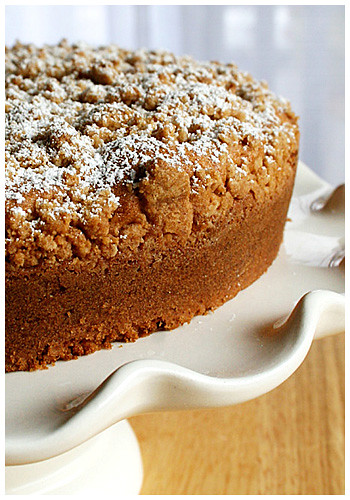
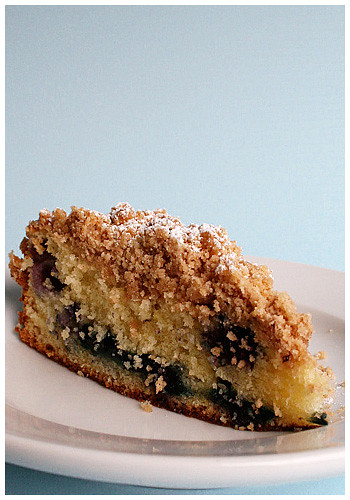
Blueberries Better With Crumbs
I had these blueberries left from my massive fruit buying bonanza a few weeks ago, so I quickly froze them before they went bad and went in search of a recipe. I was thisclose to making blueberry pie but backed out; I was told they're just not that good.One can never go wrong with blueberries and streusel topping, though. I found this out last year when I made blueberry muffins. This was very nice as well; moist and perfectly sweet with the combination of the streusel top. It's definitely a serve-the-day-of dessert, though. It goes dry pretty fast. But right after cooling completely? Perfectly soft and delicious!
BLUEBERRY CRUMB CAKESource: Ina Garten
For the streusel:
1/4 cup granulated sugar
1/3 cup light brown sugar, lightly packed
1 teaspoon ground cinnamon
1/8 teaspoon ground nutmeg
1/4 pound (1 stick) unsalted butter, melted
1 1/3 cups all-purpose flour
For the cake:
6 tablespoons unsalted butter, at room temperature (3/4 stick)
3/4 cup granulated sugar
2 extra-large eggs, at room temperature
1 teaspoon pure vanilla extract
1/2 teaspoon grated lemon zest
2/3 cup sour cream
1 1/4 cups all-purpose flour
1 teaspoon baking powder
1/4 teaspoon baking soda
1/2 teaspoon kosher salt
1 cup fresh blueberries
Confectioners' sugar for sprinkling
Preheat the oven to 350 degrees F. Butter and flour a 9-inch round baking pan.
For the streusel:
Combine the granulated sugar, brown sugar, cinnamon, and nutmeg in a bowl. Stir in the melted butter and then the flour. Mix well and set aside.
For the cake:
Cream the butter and sugar in the bowl of an electric mixer fitted with the paddle attachment on high speed for 4 to 5 minutes, until light. Reduce the speed to low and add the eggs 1 at a time, then add the vanilla, lemon zest, and sour cream. In a separate bowl, sift together the flour, baking powder, baking soda, and salt. With the mixer on low speed, add the flour mixture to the batter until just combined. Fold in the blueberries and stir with a spatula to be sure the batter is completely mixed.
Spoon the batter into the prepared pan and spread it out with a knife. With your fingers,
crumble the topping evenly over the batter. Bake for 40 to 50 minutes, until a cake tester comes out clean. Cool completely and serve sprinkled with confectioners' sugar.
Sunday, April 27, 2008
Birthday de Moi!
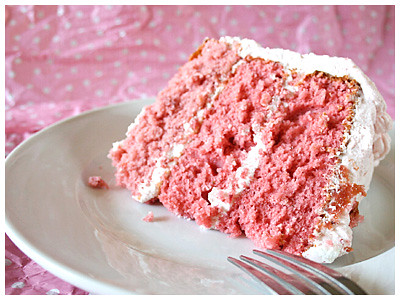
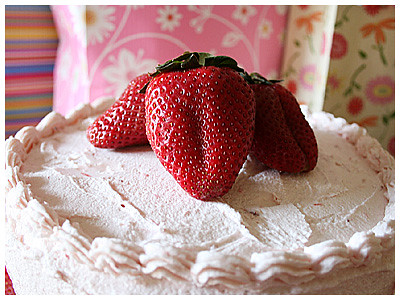
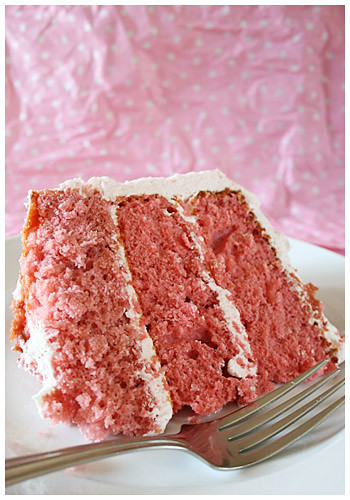
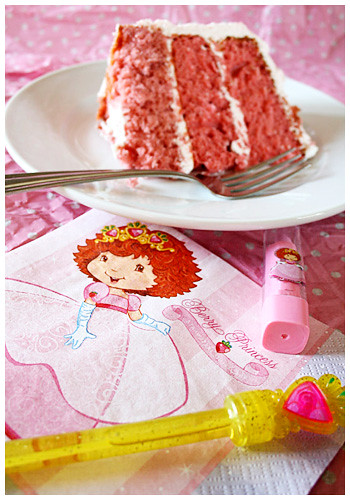
I have an obsession with strawberries, it would seem, since they make me unreasonably happy. I'm sure it stems from childhood stuff (see user pic of Strawberry Shortcake birthday) but I don't care. I asked my mom for a strawberry cake for my birthday last week and this beautiful creation is what she produced. I didn't make it myself so I could exclude it from my food blog but I can't keep the pretty away. PINK!

STRAWBERRY CAKE- 1 package white cake mix
- 1 package (3 ounces) strawberry-flavored gelatin powder
- 3/4 cup vegetable oil
- 4 eggs, lightly beaten
- 1/4 cup water
- 3/4 cup mashed strawberries or sweetened frozen strawberries
Combine cake mix and gelatin powder in a large bowl. Beat in oil, eggs, water, and strawberries. Pour into 2 9-inch round greased and floured cake pans. Bake in a 350 degree oven for 30 minutes, until a toothpick inserted in center comes out clean.
Cool completely before icing.
STRAWBERRY FROSTING
- 1/4 cup butter
- dash of salt
- 1/4 cup shortening
- 1 pound confectioners' sugar
- 1/4 cup mashed strawberries or remaining sweetened frozen strawberries (drain juice)
Beat the butter/shortening and confectioners' sugar together until smooth and fluffy. Add strawberries. Spread between cake layers, then frost top and sides.
Subscribe to:
Posts (Atom)