skip to main |
skip to sidebar
Boy, have I got a lot to catch up on. The holidays are always crazy for me and then I was out of town just after for another two weeks! But all is well and I'm back, ready to share what went down over the last two months.
First, I made a new pumpkin pie recipe from a highly repinned Pintrest note... You know, I can't decide about Pintrest. There's pretty pictures, yes, but then I see people that try a recipe or craft and bemoan how misleading or awful it turned out! You go in thinking these are reliable, tested ideas! Alas it's just people promoting their own stuff a lot of the time so I guess I have to train my eye to recognize what's legit and what's not.
This one turned out to be a Cook's Illustrated adaptation and while it was okay, I dunno. The cream and milk diluted the pumpkin a bit and I like a looooot of pumpkin in my pie. My family liked it but, meh. For Christmas I went back to good ol' Libby's and it was way better, IMHO.
This recipe actually made too much for my pretty deep dish pie plate so I made a mini one extra - which I enjoyed by myself days later. mwha. Mini pie!
Pumpkin Pie
Cook's Illustrated, 2008
1 recipe for single pie crust (I used Williams-Sonoma's Basic Pie Dough)
1 cup heavy cream
1 cup whole milk
3 eggs plus 2 egg yolks
1 teaspoon vanilla extract
1 (15-ounce) can pumpkin
1 cup drained candied yams (from 15-ounce can)
3/4 cup granulated sugar
1/4 cup maple syrup
2 teaspoons grated fresh ginger
1/2 teaspoon ground cinnamon
1/4 teaspoon ground nutmeg
1 teaspoon salt
1. Prepare the crust and refrigerate for at least 1 hour.
2. Adjust the oven rack to the lowest position, place a rimmed baking sheet on the rack, and heat the oven to 400 degrees F. Remove the dough from the refrigerator and roll it out on a lightly floured work surface to a 12-inch circle about 1/8 inch thick. Roll dough loosely around rolling pin and unroll into pie plate, leaving at least 1-inch overhang on each side. Working around circumference, ease dough into plate by gently lifting edge of dough with one hand while pressing into plate bottom with other hand. Refrigerate 15 minutes.
3. Trim overhang to ½ inch beyond lip of pie plate. Fold overhang under itself; folded edge should be flush with edge of pie plate. using thumb and forefinger, flute edge of dough. Use a fork to prick the dough all over the bottom and sides of the pie plate. Refrigerate dough-lined plate until firm, about 15 minutes.
4. Remove pie pan from refrigerator, line crust with aluminum foil or parchment paper, and fill with pie weights or dried beans, filling the whole way up to the rim of the pie plate. Bake on rimmed baking sheet 15 minutes. Remove foil/parchment and weights, rotate plate, and bake 5 to 15 additional minutes until crust is golden brown and crisp. Remove pie plate and baking sheet from oven.
5. While the pie shell is baking, whisk cream, milk, eggs, yolks and vanilla together in a medium bowl. Combine the pumpkin, yams, sugar, maple syrup, ginger, cinnamon, nutmeg and salt in a large heavy-bottomed saucepan; bring to a sputtering simmer over medium heat, 5 to 7 minutes. Continue to simmer pumpkin mixture, stirring constantly and mashing yams against sides of pot, until thick and shiny, 10 to 15 minutes.
6. Remove the pan from heat and whisk in the cream mixture until fully incorporated. Strain the mixture through a fine-mesh strainer set over a medium bowl, using the back of a ladle or spatula to press solids through strainer. Rewhisk mixture and transfer to warm prebaked pie shell. Return pie plate with baking sheet to oven and bake pie for 10 minutes. Reduce heat to 300 degrees and continue baking until edges of pie are set and the center looks firm but jiggles slightly (instant-read thermometer inserted in center registers 175 degrees), 20 to 35 minutes longer. Transfer pie to wire rack and cool to room temperature, 2 to 3 hours. Serve with whipped cream.
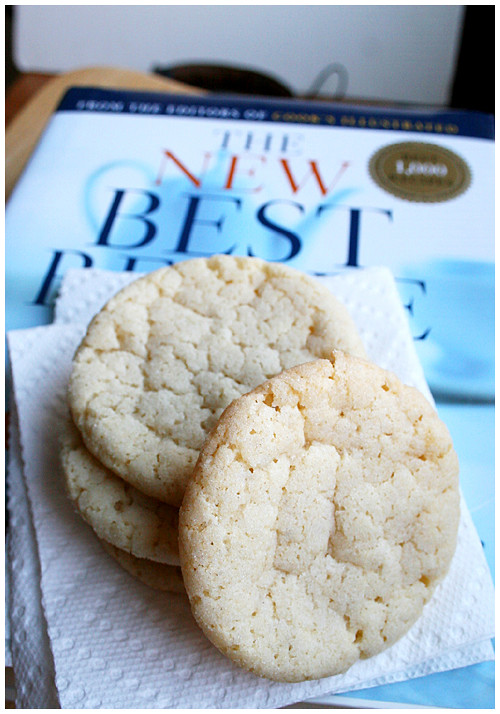 One can never have too many sugar cookie recipes. I've discovered this on my neverending journey to find the absolute best. Because I stumbled on a problem: there is no BEST. Sometimes you want chewy sugar cookies and sometimes you want sturdy but tasty ones for decorating and sometimes you want crispy, etc. Old Reliable (Cook's Illustrated) has taken care of one of these categories: the Chewy Sugar Cookie.
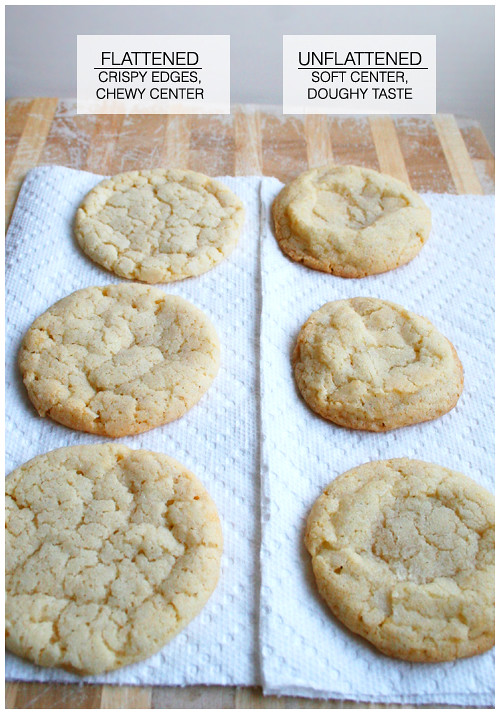
There's a few different techniques you can use to make each batch of these different and just a little alteration will affect them dramatically. Just a little more bake time and a perfectly crisp outer ring with chewy center turns into a full-on crunch show. So tread carefully with the first batch and see what works for you.
You can also press the ball of dough with the bottom of a glass to get the aforementioned perfect crisp/chew OR you can leave the dough in balls which results in a chewier, more raw taste (but it's cooked; trust). You can see the difference in appearance as well.
 Personally, I like the flatter cookies because they came out with that chewy, soft center every time. I had family over for the holidays as I made these and they were served warm, fresh from the oven. An instant hit! (They keep really well too.)
CHEWY SUGAR COOKIES
Source: Cook's Illustrated
Note: The final dough will be slightly softer than most cookie dough. For the best results, handle the dough as briefly and gently as possible when shaping the cookies. Overworking the dough will result in flatter cookies.
2 1/4 cups (11 1/4 ounces) unbleached all-purpose flour
1/2 teaspoon baking soda
1 teaspoon baking powder
1/2 teaspoon table salt
1 1/2 cups (10 1/2 ounces) sugar, plus 1/3 cup for rolling
2 ounces cream cheese, cut into 8 pieces
6 tablespoons (3/4 stick) unsalted butter, melted and still warm
1/3 cup vegetable oil
1 large egg
1 tablespoon milk
2 teaspoons vanilla extract
1. Adjust oven rack to middle position and heat oven to 350 degrees. Line 2 large rimmed baking sheets with parchment paper. Whisk flour, baking soda, baking powder, and salt together in medium bowl. Set aside.
2. Place 1 1/2 cups sugar and cream cheese in large bowl. Place remaining 1/3 cup sugar in shallow baking dish or pie plate and set aside. Pour warm butter over sugar and cream cheese and whisk to combine (some small lumps of cream cheese will remain but will smooth out later). Whisk in oil until incorporated. Add egg, milk and vanilla; continue to whisk until smooth. Add flour mixture and mix with rubber spatula until soft homogeneous dough forms.
3. Divide dough into 24 equal pieces, about 2 tablespoons each (or use #40 portion scoop). Using hands, roll dough into balls. Working in batches, roll balls in reserved sugar to coat and evenly space on prepared baking sheet, 12 dough balls per sheet. Using bottom of drinking glass, flatten dough balls until 2 inches in diameter (or a little less than 1/2 inch tall).
4. Bake, 1 tray at a time, until edges are set and just beginning to brown, 11 to 13 minutes, rotating tray after 7 minutes. Cool cookies on baking sheets 5 minutes. Using wide metal spatula, transfer cookies to wire rack and cool to room temperature.
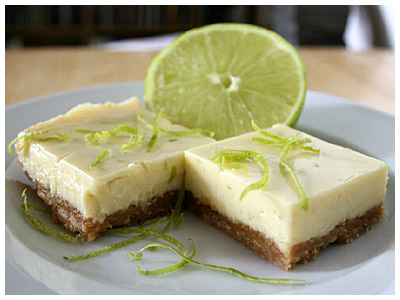
 All right, limes. You and me need a break. It's not a break up. Just... a break, okay? I need some space.
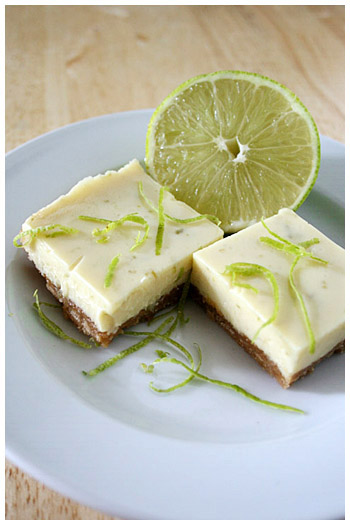
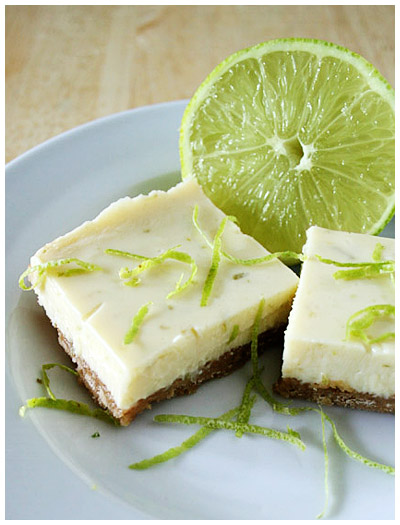
A friend of mine suggested this recipe after I mentioned I'd made the key lime pie and I still had leftover limes. She noted the differences and said I should give it a try. Man, am I glad she did. The filling was so much better than the pie! It was stronger, more tart, more LIME. Maybe it was the 1 egg yolk compared to the 4 in the pie. Whatever it was, it worked.
The crust was so-so (graham cracker crust is hard to beat with lime; this one was a duller animal cracker crumb) but one could replace it easily. It's also imparative that it's served close to room temperature; when cold, the crust is like a tasteless brick. So that's what directions are for...
KEY LIME BARS
Adapted from Cook's Illustrated magazine
Makes sixteen 2-inch bars
CRUST
5 ounces animal crackers
3 tablespoons packed brown sugar (light or dark)
Pinch table salt
4 tablespoons unsalted butter , melted and cooled slightly
FILLING
2 ounces cream cheese , room temperature
1 tablespoon grated lime zest , minced
Pinch table salt
1 (14-ounce) can sweetened condensed milk
1 egg yolk
1/2 cup fresh lime juice , either Key lime or regular
1. Adjust oven rack to middle position and heat oven to 325 degrees. Cut about 12-inch length extra-wide heavy-duty foil; fold cut edges back to form 7 1/2-inch width. With folded sides facing down, fit foil securely into bottom and up sides of 8-inch-square baking pan, allowing excess to overhang pan sides. Spray foil with nonstick cooking spray.
2. TO MAKE THE CRUST: In workbowl of food processor, pulse animal crackers until broken down, about ten 1-second pulses; process crumbs until evenly fine, about 10 seconds (you should have about 1 1/4 cups crumbs). Add brown sugar and salt; process to combine, ten to twelve 1-second pulses (if large sugar lumps remain, break them apart with fingers). Drizzle butter over crumbs and pulse until crumbs are evenly moistened with butter, about ten 1-second pulses. Press crumbs evenly and firmly into bottom of prepared pan. Bake until deep golden brown, 18 to 20 minutes. Cool on wire rack while making filling. Do not turn off oven.
3. TO MAKE THE FILLING: While crust cools, in medium bowl, stir cream cheese, zest, and salt with rubber spatula until softened, creamy, and thoroughly combined. Add sweetened condensed milk and whisk vigorously until incorporated and no lumps of cream cheese remain; whisk in egg yolk. Add lime juice and whisk gently until incorporated (mixture will thicken slightly).
4. TO ASSEMBLE AND BAKE: Pour filling into crust; spread to corners and smooth surface with rubber spatula. Bake until set and edges begin to pull away slightly from sides, 15 to 20 minutes. Cool on wire rack to room temperature, 1 to 1 1/2 hours. Cover with foil and refrigerate until thoroughly chilled, at least 2 hours.
5. Loosen edges with paring knife and lift bars from baking pan using foil extensions; cut bars into 16 squares. Sprinkle with toasted coconut, if using, and serve. (Leftovers can be refrigerated up to 2 days; crust will soften slightly. Let bars stand at room temperature about 15 minutes before serving.)