Every Christmas, since I've been living on my own, I've picked a very rigid color theme to decorate my tree and home. At first, my family snickered at me because I couldn't have anything but the Designated Color/Theme wrapping paper under my tree. And I don't know WHY I started doing this. Probably because I'm a control freak. But start I did. The first year was relatively easy: silver and gold. The second year, I had this magnificent idea: turquoise and lime green! My mom balked at me and my enthusiasm deflated and I settled on red, white and silver. I will never go against my instinct again; I regretted it the whole time and the next season, all the stores had those turquoise and green decorations! But the draw to it had passed. If only I'd followed my gut! ARGH.
The year after, 2007, was my Houston Oiler's colors, red and light blue. It was lovely! Then 2008 was inspired by the Pottery Barn garden theme so it was all naturals and greens and golds! I think that one was my favorite because there were birds and butterflies and adorableness. Of course, with all that natural greenery, I went the opposite in 2009 and was all winter: blues and silvers and whites and snow. And that was okay but nothing that I was crazy about.

This year, like every year I'm crazy about a theme, I see one thing and cling to it and make my entire theme around it. This year, it was a wreath from Williams-Sonoma: simple evergreen with dried oranges and pinecones. Orange and chocolate. It hooked me immediately. And the thing is, I don't even really like oranges in general. But they're such a wonderful Christmas tradition that I never even knew about. My theme evolved to winter fruits, oranges and cranberries, so there's splashes of red color mixed in!
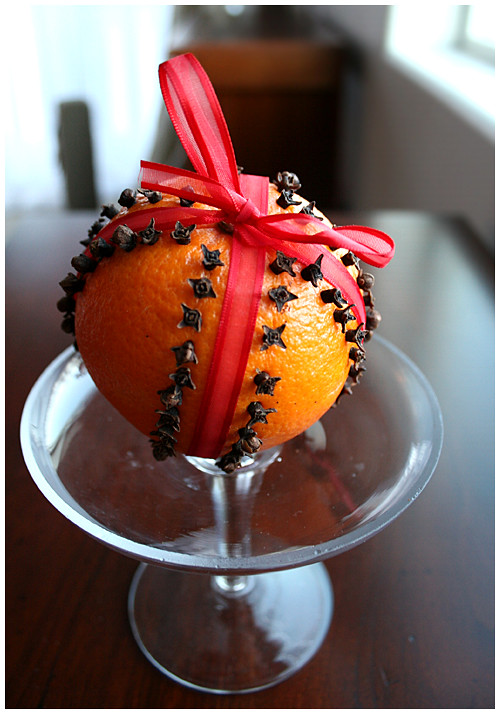
First, I made dried orange slices for Christmas ornaments and, dude! They came out WAY better than I could've hoped for! So vibrant and natural and purdy! And EASY. I also made a clove orange pomander (as seen above) that came out lovely! Probably my favorite thing this season so far!
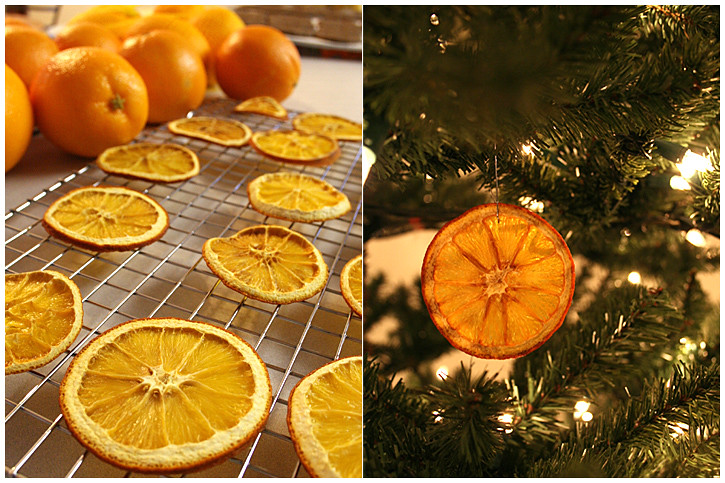
DRIED ORANGE SLICES
1. Preheat oven to 250. Slice oranges 1/4" thick. Dip in mixture of half fresh lemon juice, half water. Place on wire rack set above rimmed cookie sheet. (Or you can place slices directly on your oven rack as some instructions say, but I was afraid of juices dripping in my oven.)
2. Let dry out at 250 for 1 hour, turning slices over every 30 minutes for even drying. Lower oven temperature to 225 and dry for another 2 hours, again, turning every 30 minutes.
3. Take out of oven and let cool to room temperature. I did not even store the dried slices in an air-tight container because I was afraid moisture would build up in it; I WANT them dry and preserved! So I hung them right away and it's been two weeks! So far, so good!
Then I started looking for orange or orange/chocolate recipes. I found a few and, long story short (too late), none have blown my skirt up. I made Cranberry Orange Muffins from Williams-Sonoma that were thoroughly disappointing with fresh cranberries. They were unbearably tart and the recipe called for too many! Then there was an orange-flavored chocolate ganache tart. Mreh. Too simplistic and nothing amazing. I'm waiting for that awesome dessert to wow me and this year, I'm just not feeling it.
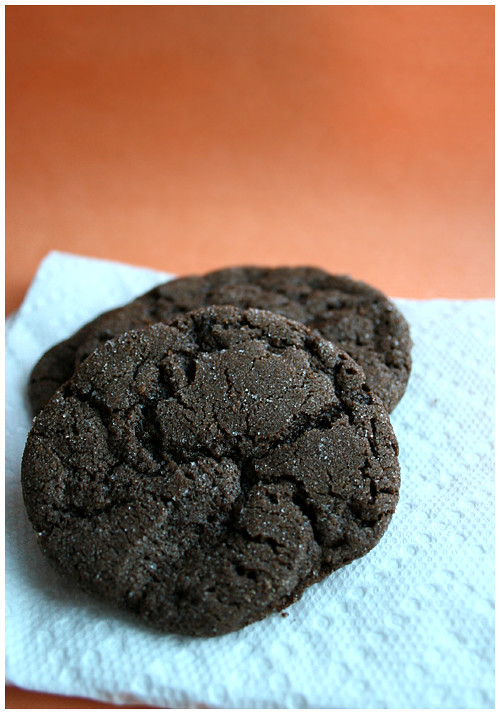
I did, however, catch these cookies on Paula Deen's cookie exchange episode. They've been quite finicky for me so I say, watch carefully: since they're chocolate, there's no way of judging their doneness by how dark they are! So the first batch, I followed the Food Network recipe of 10 minutes bake time and they came out as goopy messes. The second batch I went about 13-15 minutes and they were sturdy and had a nice soft chewiness in the center. Perfect! The THIRD batch, I let go for about 15-17 minutes and wow they came out completely crunchy and hard. ARGH. Curse you, brown colored cookies!
So know your oven and make a few batches to find out how you want your cookies. I think it also made a difference in the shape: the first batch, I rolled into balls as I saw the woman do on the show. The second, which came out perfect, I left as round discs and just pat the rough edges down before sugar dusting. That gave them the nice edges and chewy center!
Overall, these are a very chocolatey and delish cookie! They're keepers!
TOP SECRET CHOCOLATE COOKIES
Source: Christy Hyer
2 1/2 sticks unsalted butter, at room temperature
2 cups sugar
2 large eggs
1 tablespoon vanilla extract
3/4 cup Dutch process cocoa powder
2 cups all-purpose flour
1 teaspoon baking soda
1/2 teaspoon salt
White Sanding sugar, for garnish
1. In a large bowl, add the butter and sugar and cream together with mixer. Add the eggs and vanilla extract to the creamed mixture and mix until combined. In a medium bowl, mix the cocoa powder, flour, baking soda, and salt. Slowly add the dry ingredients and continue mixing until incorporated.
2. Roll the dough into 2 logs that are about 2-inches high and 1-foot long. Wrap them in waxed paper and place in the refrigerator for 2 hours.
3. Preheat oven to 350 degrees F
Once thoroughly chilled, slice the cookies into 1/2-inch thick rounds and cover with sanding sugar. Place on a parchment paper lined cookie sheet and bake for 10 minutes.
Remove to a wire rack to cool.
And there's more orange and chocolateness to come! HAPPY HOLIDAYS, EVERYONE!!