Showing posts with label Best Recipe. Show all posts

Wednesday, January 30, 2008

Everyone likes Brownies

A woman at my work, who I'm confident in saying is hardly more than a casual acquaintance, loaned me an entire TV series on DVD this past month. Now, I take my DVDs very seriously and when you loan them to someone - even family and friends - sometimes you don't see them again for many many months (brother! oh, wait, I still have his Transformers DVDs...)

ANYWAY.
I was terribly grateful she put that trust in me and I rushed through about 65 hours of TV in three weeks flat. I wanted to make her a little thank you goodie and figured brownies were pretty universally liked, yes?


I, foolishly, tried the top brownie recipe from All Recipes.com first.
And it was all right but nothing to write home about and certainly not something I'd give as a gift. It used cocoa as opposed to melted chocolate. Then I tried the Best Recipe's Basic Brownie and, once again, they came through. Their brownie was moist and rich, fluffy but not airy. It falls apart with softness but isn't gooey (although I love gooey but that's a personal preference; these were supposed to be universal).

If I were making them again for myself, I'd add some walnuts and maybe even caramel (mmm, extra gooey!) but otherwise, they were perfect. A definite keeper!
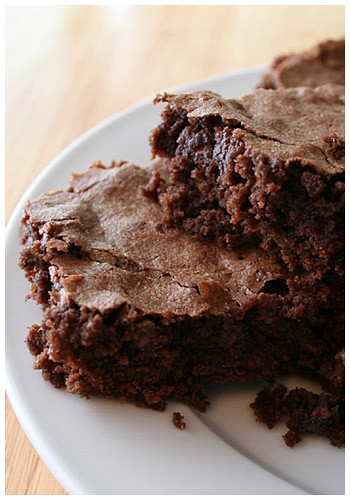
BASIC BROWNIES
Source: The Best Recipe

To melt the chocolate and butter in a microwave oven, microwave chocolate alone at 50 percent power for 2 minutes. Stir chocolate, add butter, and continue microwaving at 50 percent for another 2 minutes, stopping to stir the mixture after 1 minute. If chocolate is not entirely melted, microwave an additional 30 seconds at 50 percent power. Make sure to cool the melted chocolate and butter for about 10 minutes - it can be warm to the touch but not hot. Batter can be doubled and divided evenly between two 8-inch pans or poured into one 13 x 9-inch pan. If using one large pan, bake for about 26 minutes.
  • 8 tablespoons (1 stick) unsalted butter
  • 2 ounces unsweetened chocolate
  • 2/3 cup cake flour
  • 1/2 teaspoon baking powder
  • 1/4 teaspoon salt
  • 1 cup sugar
  • 2 large eggs
  • 1 teaspoon vanilla extract
  • (optional) 1/2 cup chopped nuts
1. Adjust oven rack to middle position and heat oven to 350 degrees. In medium, heatproof bowl set over a pan of almost simmering water, melt chocolate and butter, stirring occasionally until mixture is smooth. (Alternatively, melt chocolate and butter in microwave oven. See instructions above.) Set mixture aside to cool.

2. Whisk flour, baking powder, and salt together in small bowl; set aside.

3. Whisk sugar into cooled chocolate mixture. Whisk in eggs and vanilla, then fold in flour mixture (and nuts if using) until just combined.

4. Pour batter into greased 8-inch-square baking dish; bake until toothpick inserted halfway between center and edge of pan comes out with a few fudgy crumbs, about 20 minutes. If batter coats toothpick, return pan to oven and bake 2 to 4 minutes more. Cool brownies completely in pan set on wire rack. Cut into squares and serve. (Pan can be wrapped in plastic, then foil, for up to 2 days. To preserve moistness, cut and remove brownies only as needed.)
Sunday, September 23, 2007

Snickerdoodles are my FAVORITE


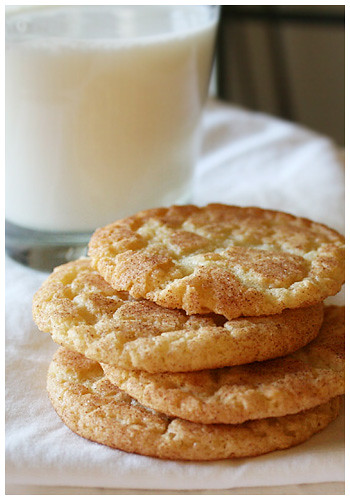
Out of all the cookies there are, snickerdoodles are my absolute favorite. That's why I decided on them the other day when I wanted a quick, familiar treat. Maybe I shouldn't have; I sat down and ate half the batch without blinking an eye. ack. So good.

One thing I will note that I adjusted during the recipe was the size of the cookies themselves. The recipe calls for 2 tablespoons of dough to be rolled into a ball but once baked, they spread way too much into thin discs. Now, they tasted fine (and chewy so, yay!) but if you want something a little more presentable and traditional-sized, I'd cut the cookie size in about half and watch the baking time (unless you like crunchy cookies which snickerdoodles traditionally are not). (BTW, pictured above are the smaller, normal-sized ones.)

I've had better snickerdoodles but in a pinch, these are pretty good.


SNICKERDOODLES
Source: The Best Recipe by Cook's Illustrated
  • 2 1/4 cups all-purpose flour
  • 2 teaspoons cream of tartar
  • 1 teaspoon baking soda
  • 1/2 teaspoon salt
  • 12 tablespoons (1 1/2 sticks) unsalted butter, softened
  • 1/4 cup vegetable shortening
  • 1 1/2 cups granulated sugar, plus 3 tablespoons for rolling cookies
  • 2 large eggs
  • 1 tablespoon ground cinnamon for rolling cookies

1. Adjust oven racks to upper- and lower-middle positions and heat oven to 400 degrees. Grease cookie sheets or line with parchment paper.


2. Whisk flour, cream of tartar, baking soda, and salt together in a medium bowl; set aside.

3. Either by hand or electric mixer, cream butter, shortening, and 1 1/2 cups sugar until combined, 1 to 1 1/2 minutes with electric mixer set at medium speed. Scrape down sides of bowl with rubber spatula. Add eggs. Beat until combined, about 30 seconds.

4. Add dry ingredients and beat at low speed until just combined, about 20 seconds.

5. Mix remaining 3 tablespoons sugar with cinnamon in shallow bowl. Working with scant 2 tablespoons of dough each time, roll dough into 1 1/2-inch balls. Roll balls in cinnamon sugar and place on cookie sheet, spacing them 2 to 2 1/2 inches apart.

6. Bake, reversing position in oven halfway through baking time (from top rack to bottom and front to back), until edges of cookies are beginning to set and centers are soft and puffy, 9 to 11 minutes. Let cookies cool on cookie sheet 2 to 3 minutes before transferring them to cooling rack with wide spatula.

Saturday, September 15, 2007

Bread Pudding for Fall


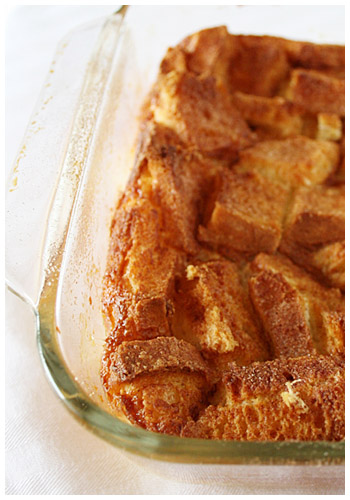
Okay, so I proclaimed it fall about a month ago when it got chilly one day mostly as wishful thinking. Autumn is my favorite season. Not only for the holidays (yay Halloween!) but the comfy, warm foods it inspires. Bread pudding has always been one of those enigmas I'd hear about but never tried. With this new baking thing I got going, I took the plunge and made it.


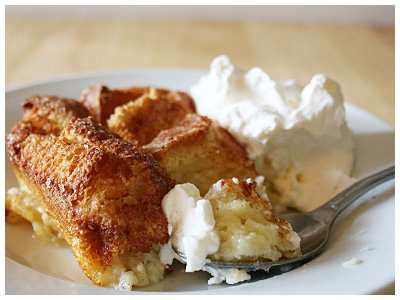
Now, here's the problem: I've never had bread pudding before so I don't know if this tastes like "typical" bread pudding. I only know it was pretty-really-quite good. It was the perfect combination of a pudding bottom with a lightly toasted top of cinnamon sugar. The whipped cream is a must and the fresh dollop by it's side was the perfect compliment.


I used an 8x8 pan (and halved the recipe) so I had to adjust the baking time to a little longer (15 minutes) since it was deeper than the 13x9 would have been. But everything else I did by the book, complete with the bit of bourbon. Again, I don't know how this compares with other bread puddings but it was definitely a success. I'm eager to try a chocolate bread pudding now (but it's going to be hard-to-damn-near-impossible to beat the one from Pappasito's).


RICH BREAD PUDDING WITH CRISP CINNAMON-SUGAR TOPPING

Source: The Best Recipe by Cook's Illustrated

A firm, white American-style bakery loaf gives the best texture to this pudding. In a pinch, however, use Pepperidge Farm Hearty White Bread. Avoid chewy, crusty European-style breads because they do not soften properly in the custard. If desired, serve this pudding with softly whipped cream.

CINNAMON SUGAR

2 tablespoons sugar
1/2 teaspoon ground cinnamon


BREAD PUDDING

4 large eggs, plus 1 large yolk
3/4 cup sugar
2 1/2 cups whole milk
2 1/2 cups heavy cream
3 tablespoons bourbon
1 tablespoon vanilla extract
3/4 teaspoon fresh ground nutmeg
1/4 teaspoon salt
12 ounces (about 1/2 loaf) good quality American-style white bread, sliced 3/8 inch thick and cut into 1 1/2-inch-square pieces (about 8 cups)
1 1/2 tablespoons unsalted butter, melted, plus extra for greasing pan


1. FOR THE CINNAMON SUGAR: Mix sugar and cinnamon in small bowl; set aside.

2. FOR THE PUDDING: Adjust oven rack to lower-middle position and heat oven to 325 degrees. Butter 13 x 9-inch baking dish.

3. Whisk eggs, yolk, and sugar in large bowl to blend well. Whisk in milk, cream, bourbon, vanilla extract, nutmeg, and salt. Stir in 6 cups bread cubes; mix thoroughly to moisten. Let stand 20 minutes.

4. Pour mixture into prepared baking dish. Scatter remaining 2 cups bread pieces on top, pushing down gently to partially submerge. Brush exposed bread with melted butter and sprinkle with cinnamon sugar. Bake until pudding is deep golden brown, is beginning to rise up sides of baking dish, and jiggles very slightly at the center when shaken, about 45 to 50 minutes. Let cool until set but still warm, about 45 minutes. Serve.

Sunday, August 19, 2007

"I Like PIE."

Sometimes you make things because you bought the ingredients on impulse and you've really got to use them before they go bad. Sometimes it's a bag of limes. This would be one of those times. I really wanted to try the Key Lime Bars from Cook's Illustrated but didn't have all ingredients. I might make it to the store for those but I only had stuff for PIE. And what's more fun than PIE, I ask you. Or, at least, saying "PIE".

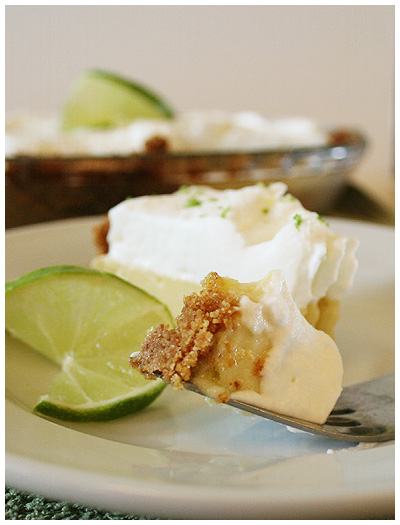
I was informed, afterwards, that you can put a bit of green food coloring in the filling to make it, you know. Green. Since it's not. It's yellow-ish. It tastes like lime, sure, but I have to admit, there's a little disappointment. I know for future reference.

Being a relative beginner to cooking, I was pleased with how easy this was. Whip up some filling, plop it into a crust then throw some cream in the standing mixer and voila. There was a lot of cooling time in between each step so it took a while in that regard but the actual prep was easy. It's not as tart as I expected but I suspect that's because I didn't use real Key Limes. It's mild and quite nice but I think in the future, I'd use the real deal to get that punch of flavor.


KEY LIME PIE

Source: The Best Recipe, Cook's Illustrated

LIME FILLING

4 teaspoons grated zest plus 1/2 cup strained juice from 3 to 4 limes
4 large egg yolks
1 14-ounce can sweetened condensed milk

GRAHAM CRACKER CRUST

11 full-size graham crackers, processed to fine crumbs (1 1/4 cups)
3 tablespoons granulated sugar
5 tablespoons unsalted butter, melted

WHIPPED CREAM TOPPING

3/4 cup heavy cream, chilled
1/4 cup confectioners' sugar
1/2 lime, sliced paper thing and dipped in sugar (optional)


1. FOR THE FILLING: Whisk zest and yolks in medium bowl until tinted light green, about 2 minutes. Beat in milk, then juice; set aside at room temperature to thicken.

2. FOR THE CRUST: Adjust oven rack to center position and heat oven to 325 degrees. Mix crumbs and sugar in medium bowl. Add butter; stir with fork until well blended. Scrape mixture into 9-inch pie pan; press crumbs over bottom and up sides of pan to form even crust. Bake until lightly browned and fragrant, about 15 minutes. Transfer to wire rack; cool to room temperature, about 20 minutes.

3. Pour lime filling into crust; bake until center is set, yet wiggly when jiggled, 15 to 17 minutes. Return pie to wire rack; cool to room temperature. Refrigerate until well chilled, at least 3 hours. (Can be covered with lightly oiled or oil-sprayed plastic wrap laid directly on filling and refrigerated up to 1 day.)

4. FOR THE WHIPPED CREAM: Up to 2 hours before serving, whip cream in medium bowl to very soft peaks. Adding confectioners' sugar 1 tablespoon at a time, continue whipping to just-stiff peaks. Decoratively pipe whipped cream over filling or spread evenly with rubber spatula. Garnish with optional sugared lime slices and serve.


Sunday, August 12, 2007

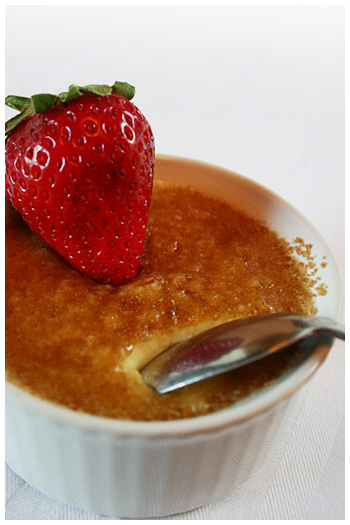
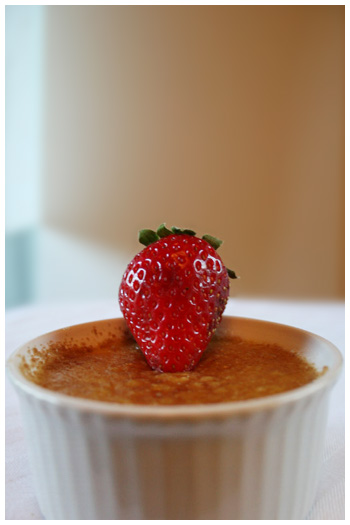
Crème Brûlée! HounHounHoun!

Someday I'm going to stop with the French desserts. Subject lines are getting a smidge pretentious, no? On a completely related note, I am the boys from Flight of the Conchords with their song en Français. "Voila mon passport! Ahhh, Gerard Depardieu. Baguette!"

Anyway. I made crème brûlée a few years ago and it turned out so well, I was pretty confident in this second attempt. And then I screwed it up (and used deeper ramekins than the recipe anticipated so they didn't set all the way through and then they 'sploded in the center. Just follow the directions completely and wait for the thing to
set; don't just go by the recommended time). So the THIRD attempt yielded better results. It was a bit plain, however, and I'd like to try various flavors in the future.

In any event, it's a very easy and straightforward recipe so, points for that!


PERFECT CRÈME BRÛLÉE

From The Best Recipe, Cook's Illustrated

1 tbsp unsalted butter, softened
6 large egg yolks, chilled
6 tbsp white sugar
1 1/2 cups whipping cream, chilled
4 tbsp dark brown sugar

1. Adjust oven rack to center position and heat oven to 275 degrees. Buter six 1/2-cup ramekins or 2/3-cup custard cups and set them in a glass baking pan.

2. Whisk yolks in medium bowl until slightly thickened. Add white sugar and whisk until dissolved. Whisk cream, then pour mixture into prepared ramekins.

3. Set baking pan on oven rack and pour warm water into pan to come halfway up the ramekins. Bake uncovered until custards are just barely set, about 45 minutes.

4. Remove baking pan from oven, leaving ramekins in the hot water; cool to room temperature. Cover each ramekin with plastic wrap and refrigerate until chilled, at least 2 hours. (Can be covered and refrigerated overnight.)

5. While custards are cooling, spread brown sugar in a small baking pan; set in turned-off (but still warm) oven until sugar dries, about 20 minutes. Transfer sugar to a small zipper-lock freezer bag; seal bag and crush sugar fine with rolling pin. Store sugar in an airtight container until ready to top custards.

6. Adjust oven rack to the next-to-the-highest position and heat broiler. Remove chilled ramekins from refrigerator, uncover, and even spread each with 2 teaspoons dried sugar. Set ramekins in a baking pan. Broil, watching constantly and rotating pan for even caramelization, until toppings are brittle, 2 to 3 minutes, depending on heat intensity.

7. Refrigerate crème brûlées to rechill custard, about 30 minutes. Brown sugar topping will start to deteriorate in about 1 hour.

Wednesday, August 1, 2007

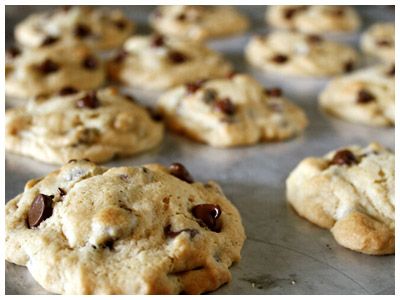
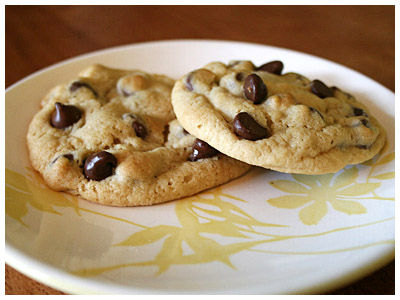
Chocolate Chip Cookies win!

I was in the mood for some easy comfort food after that last, complicated concoction so I turned immediately to the old staple: chocolate chip cookies. I recently got The Dessert Bible by Christopher Kimball, trusting the author as a contributer to Cook's Illustrated and, subsequently, The Best Recipe cookbook. Yeah. Not a great idea. I guess you never know about a recipe until you try it. His idea of the "best" chocolate chip cookie was bland, flour-y and tasteless. They quickly became Trash Cookies.

I compared his recipe to The Best Recipe and saw immediately he'd changed the fat (butter) content by half which explained why the ratio of flour was so off. The Best Recipe cookbook merely modifies the tried and true Tollhouse recipe (which, I agree, isn't perfect). Their modifications resulted in a perfectly shaped, textured and tasty cookie. Once again, The Best Recipe comes through. I really shouldn't be surprised anymore but any time I make something that comes out right, I really really am.


TRADITIONAL CHOCOLATE CHIP COOKIES
Source: The Best Recipe

2 1/4 cups all-purpose flour
1 teaspoon salt
1 teaspoon baking soda
1/2 pound (2 sticks) unsalted butter, softened
1 cup light or dark brown sugar, packed
1/2 cup granulated sugar
2 large eggs
1 teaspoon vanilla extract
1/2 teaspoon water
2 cups semisweet chocolate chips
1 cup coarsely chopped walnuts or pecans (optional)


1. Adjust oven racks to upper- and lower-middle positions and heat oven to 375 degrees. Whisk flour, salt and baking soda together in medium bowl; set aside.

2. Either by hand or with electric mixer, cream together butter and sugars until light and fluffy, about 3 minutes with mixer set at medium speed. Scrape sides of bowl with rubber spatula. Add eggs, vanilla and water. Beat until combined, about 40 seconds. Scrape sides of bowl.

3. Add dry ingredients and beat at low speed until just combined, 15 to 20 seconds. Add chocolate chips and nuts and stir until combined.

4. Drop batter by tablespoons onto ungreased cookie sheets, spacing pieces of dough about 1 inch apart. Bake, reversing position of cookie sheets halfway through baking (from top to bottom and front to back), until cookies are light golden brown and outer edges begin to crisp, 8 to 10 minutes. Cool cookies on sheets for 1 to 2 minutes before transferring to cooling racks with wide spatula.

Sunday, July 29, 2007

Flourless Chocolate Cake... (aux framboises?)

Whoops; I just discovered Blogger had some weird setting locking down comments previously. Long story short, they're open now for everyone. :)

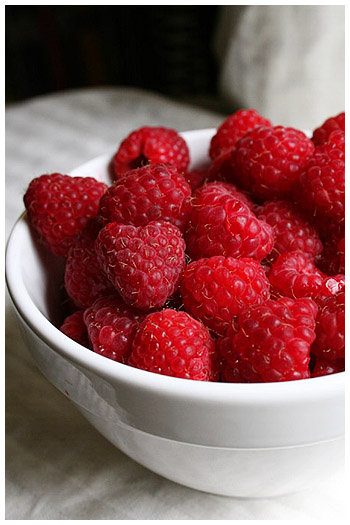
So, maybe I bit off a little more than I could chew which is funny (but not really) being written in a food blog. Nevertheless. It all started with raspberries...


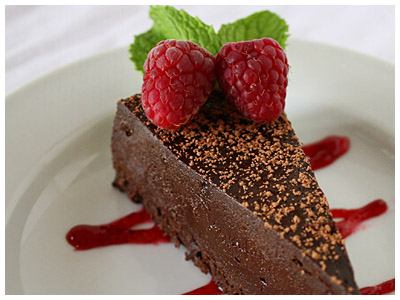
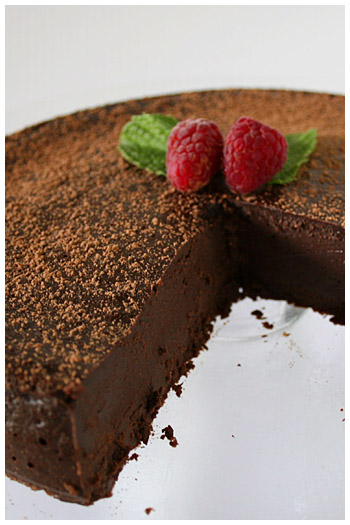
I found a good amount on sale at the grocery store and grabbed them promptly (sale!). When I got home, however, I realized I had no idea what to do with them. I racked my brain, trying to come up with something to make. It was quickly becoming a crummy week (therefore I wasn't in the mood for pink, happy, light and fluffy cupcakes) so something darker was definitely on my mind. The very first thing I thought of was a dark, smooth chocolate cake with the raspberries as a sweet and tangy sauce to contrast with the full chocolate flavor. I found exactly what I was looking for in The Best Recipe book in the Ultimate Flourless Chocolate Cake; described as a "dense, buttery" dessert with a creamy texture. Perfect.

The ingredients are deceptively simple. I guess it's that way to offset the intense preparation of the cake itself. Water baths, exact timing, careful extraction. All problems I simply never had with plain ol' cupcakes. But the cake part was, uh... cake compared to the sauces and I had decided were to accompany the dessert.

The raspberry was also way too much work (blending sugar to make it superfine, straining the overdone mix) and the recipe was annoyingly vague. If I were to try it again (unlikely), I would definitely trust my instincts and let it cook much less (a minute, maybe); just enough to let the sugar dissolve and marry with the raspberry juice. I let it cook too long, too much of the water cooked out and it was way too thick. In retrospect, I may have been able to add hot water and return it to the stove to dilute more juice from the pulpy leftovers but I didn't think of it at the time. Live and learn.

The Vanilla Custard Sauce was not what I was looking for but ended up tasting fine all the same. I'd never made a custard-y anything before so the prospect of adding warm cream to egg yolks was terrifying (ew, cooked egg!). It was a chore but the result was satisfactory. Although, again, I would hesitate when faced with making it once more. So much stress.

I will say this, however: the vanilla sauce definitely compliments the thick chocolatey "cake" and the cake is a bit overwhelming without SOMETHING to accompany it. Fresh berries would work well in contrast, especially strawberries. Ignore the pictures; I would drown the cake in the vanilla sauce. (It just wasn't as pretty.)

This really is exactly what I had in mind when I concocted this little (week-long-stress-a-thon) dessert but it was so involved, I don't see myself attempting fancy schmancy dishes like it often. I took a stab, it came out right (exhale) and now I'll return to our regularly scheduled program of comfort food like cakes and cookies.

ULTIMATE FLOURLESS CHOCOLATE CAKE
(From The Best Recipe by Cook's Illustrated)

Serves 12 to 16

8 large eggs, cold
1 pound bittersweet or semisweet chocolate, coarsely chopped
1/2 pound (2 sticks) unsalted butter, cut into 1/2-inch chunks

(1/4 cup strong coffee or liqueur optional)

Confectioners' sugar or cocoa powder for decoration


1. Adjust oven rack to lower-middle position and heat oven to 325 degrees. Line bottom of 8-inch springform pan with parchment and grease pan sides. Cover pan underneath and along sides with sheet of heavy-duty foil and set in large roasting pan. Bring kettle of water to boil.

2. Beat eggs with handheld mixer at high speed until volume doubles to approximately 1 quart, about 5 minutes. Alternatively, beat in bowl of electric mixer fitted with wire whip attachment at medium speed to achieve same result, about 5 minutes.

3. Meanwhile, melt chocolate and butter (adding coffee or liqueur, if using) in large heatproof bowl set over pan of almost simmering water, until smooth and very warm (about 115 degrees on an instant read thermometer), stirring once or twice. (For microwave, melt chocolate at 50 percent power for 2 minutes, stir, add butter, and continue heating at 50 percent power, stirring every minute, until chocolate and butter have melted and are smooth, another 2 to 3 minutes total.) Fold 1/3 of egg foam into chocolate mixture using large rubber spatula until only a few streaks of egg are visible; fold in half of remaining foam, then last of remaining foam until mixture is totally homogenous.

4. Scrape batter into prepared springform pan and smooth surface with rubber spatula. Set roasting pan on oven rack and pour in enough boiling water to come about halfway up side of springform pan. Bake until cake has risen slightly, edges are just beginning to set, a thin glazed crust (like a brownie) has formed on surface, and an instant-read thermometer inserted halfway through center of cake registers 140 degrees, 22 to 25 minutes. Remove cake pan from water bath and set on wire rack; cool to room temperature. Cover and refrigerate overnight to mellow (can be covered and refrigerated for up to 4 days).

5. About 30 minutes before serving, remove springform pan sides, invert cake on sheet of waxed paper, peel off parchment pan liner, and turn cake right side up on serving platter. Sieve light sprinkling of confectioners' sugar or unsweetened cocoa powder over cake to decorate, if desired.


VANILLA CUSTARD SAUCE
From Bon Appetit 1992 Yearbook

1 1/2 cups whipping cream
1 vanilla bean, split lengthwise
4 egg yolks
1/4 cup sugar

1. Place cream in a heavy saucepan over medium heat. Scrape in the seeds from the vanilla bean; add pod. Bring to simmer. Remove from heat. Cover and let stand 1 hour to let flavors marry.

2. Whisk yolks and sugar in medium bowl to blend. Bring cream mixture to simmer over medium-low heat. Gradually whisk hot cream into yolks.

3. Return mixture to saucepan and stir until the custard thickens and coats spoon (about 4 minutes). Do not boil. Strain into bowl. Cover and chill.

Makes 1 cup.


I was not impressed with the raspberry sauce but it does offer a sharp contrast to the smooth chocolate and vanilla so I do recommend some fruit sauce or fresh fruit to accompany the dessert, ultimately.


COULIS AUX FRAMBOISES - RASPBERRY SAUCE

1-1/2 cups raspberries
1/2 cup superfine sugar
1 vanilla bean


1. Put the raspberries and the sugar in a saucepan. Place the pan over med-high heat and bring to a boil.

2. Cut the vanilla bean in half lengthwise. When the raspberries have released some liquid, add the vanilla.

3. Cook, stirring and mashing the berries, until it is reduced by about 1/3.

4. Strain the raspberries through a strainer, pushing on the pulp.

Wednesday, July 18, 2007

Vanilla Cupcakes: The Best Recipe

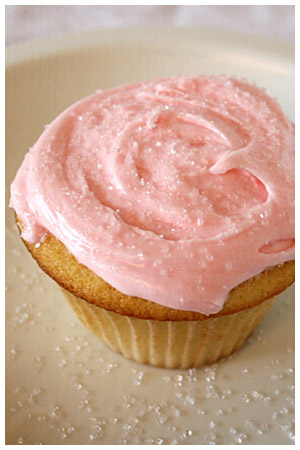
Man, CI wasn't kidding when they found The Best Recipe. I loved how the Magnolia cupcakes looked but to be perfectly honest, they didn't blow my skirt up. I just knew there had to be a better cake out there and with one final attempt on vanilla, I tried the one from my favorite recipe book (okay, only [legit] recipe book). These cakes came out so light and moist and completely melt-in-your-mouth quality. This is absolutely the best cake I've ever made.

I even lacked almond extract and so I added an extra tablespoon of vanilla (as opposed to the 1 called for) and it was delicious. The recipe in CI's book is for a white cake with raspberry-almond filling so the extract would certainly compliment the cake, no doubt, but that was not my intent. Simple vanilla was more than enough!


CLASSIC WHITE LAYER CAKE
Source: The Best Recipe, Cook's Illustrated

1 cu milk (room temperature)
3/4 cu egg whites (about 6 large or 5 extra large), room temperature
2 teaspoons almond extract
1 teaspoon vanilla extract
2 1/4 cups plain cake flour
1 3/4 cups sugar
4 teaspoons baking powder
1 teaspoon salt
12 tablespoons (1 1/2 sticks) unsalted butter, room temperature


FOR THE CAKE:
1. Adjust oven rack to middle position and heat oven to 350 degrees. Generously grease two 9 by 1 1/2-inch or 2-inch round cake pans with vegetable shortening and cover pan bottoms with rounds of parchment paper or wax paper. Grease parchment rounds, dust cake pans with flour and tap out excess. (Skip this and just throw some cupcake liners into a pan and you're set.)

2. Pour milk, egg whites and extracts into 2-cup glass measure, and mix with fork until blended.

3. Mix cake flour, sugar, baking powder and salt in bowl of electric mixer at slow speed. Add butter; continue beating at slow speed until mixture resembles moist crumbs, with no powdery ingredients remaining.

4. Add all but 1/2 cup of milk mixture to crumbs and beat at medium speed (or high speed if using handheld mixer) for 1 1/2 minutes. Add remaining 1/2 cup milk mixture and beat 30 seconds more. Stop mixer and scrape sides of bowl. Return mixer to medium (or high) speed and beat 20 seconds longer.

5. Divide batter evenly between two prepared cake pans; using rubber spatula, spread batter to pan walls and smooth tops. Arrange pans at least 3 inches from oven walls and 3 inches apart. (If oven is small, place pans on separate racks in staggered fashion to allow for air circulation.) Bake until cake needle or toothpick inserted in the center comes out clean, 23 to 25 minutes. (Adjust lesser for cupcakes, around 17-20 minutes.)

6. Let cakes rest in pans for 3 minutes. Loosen from sides of pans with a knife, if necessary, and invert onto greased cake racks. Reinvert onto additional greased racks. Let cool completely, about 1 1/2 hours.


VANILLA BUTTERCREAM ICING
Adapted from Magnolia's Buttercream

Makes enough for one 2-layer 9-inch cake or 2 dozen cupcakes

1 cup (2 sticks) unsalted butter, softened

6 cups confectioners’ sugar

1/3 cup milk

2 teaspoons vanilla extract

Place the butter in a large mixing bowl. Add 4 cups of the sugar and then the milk and vanilla. On the medium speed of an electric mixer, beat until smooth and creamy, about 3-5 minutes. Gradually add the remaining sugar, 1 cup at a time, beating well after each addition (about 2 minutes), until the icing is thick enough to be of good spreading consistency. If desired, add a few drops of food coloring and mix thoroughly. (Use and store the icing at room temperature because icing will set if chilled.) Icing can be stored in an airtight container for up to 3 days.