Sunday, April 15, 2012

April Showers!


So the cookie obsession continues and each time I'm trying new techniques (sugar coating, wet-on-wet flowers) and learning through trial and error.  I tried a new recipe (not these pictured) and they held their shape wonderfully but didn't taste great. They were kind of your typical bleh sugar cookie. I really like Sweet Sugar Belle's recipe however, as you can see (especially on the umbrella), they spread a bit.  Even in her notes, she acknowledges this issue and suggests adding a little more flour. I'll try that next time because I thought chilling the dough might help but it had no effect at all! Next time: more flour.

Sunday, April 8, 2012

Cookies, Part Deux


Happy Easter!

In case you missed my Game of Thrones cookies post, I am kind of crazy into the cooks these days. Like, researching best techniques, buying all the tools, finding designs, etc.  This week was crazy baking-wise but I knew after the relative failure of the GoT cookies, I wanted to try, try again.  Easter was the perfect excuse!

I had better success on these but still not perfect. At this point, it's just about practicing. New techniques, seeing what works and what doesn't. My biggest issue was definitely the consistency: I was gun shy this time after the GoT royal icing was way too thin so for these I went a smidge too thick. I mean, they leveled off eventually (most of them) but I've watched dozens of tutorials and some decorators just squeeze it out of the bottle and it makes a lovely roundness and sets perfect and fast. That was the thing; I had to work it into place too much.  So.  Consistency still needs work!

(Bunnies love clover!)

Also, I used the same cookie recipe from Sweet Sugar Belle and they taste great but mine spread a little bit too much. Might be an oven that runs too hot.  Will experiment and report back!

As for the royal icing, I tried a new recipe from Lizy B Bakes and found it dried and worked wonderfully. I may just make this my go-to recipe!

Lizy B makes kind of amazing things so I was inspired by her design work, Sugar Belle's and many others.  I can wholeheartedly admit my own designs were the ones I liked least. HOWEVER, I will get better as I practice more and get more ideas from the brilliant bakers who blog and share their gorgeous work! (Thank you, thank you for sharing!)


A small note about the watermarks/blog name on the pics: I've never marked my pictures in the past because I thought no one would really take anything of mine. There's two reasons I'm doing it now. #1. It's kind of heartbreaking to see a picture you worked on setting up and making junk for being reused without credit. Like, my stomach falls out when I see one of my pics just randomly somewhere. So avoiding that feeling is a good thing.

And #2. I've noticed a few other blogs doing the same and realized, as I saved the picture to study later, it was a GREAT way to remember whose it was! I was cruising blogs, right-clicking away and when I went to study the pictures, there's the name of the creator right there! Now I can credit them easy! It takes the hassle off me to remember who made what and making my life easier is always a bonus! So that's that!

And everyone in my family got personalized egg cookies so, since my dad is in Houston, here you go, Dad! Love ya!


(The little chicky was my favorite!)

Saturday, April 7, 2012

Birthday Season!

It's birthday season in my family! Well, I say that because of the immediate family, the coolest of us have April/May birthdays (that would be me, my mom and my fellow Taurus niece). WE'RE BOSS.

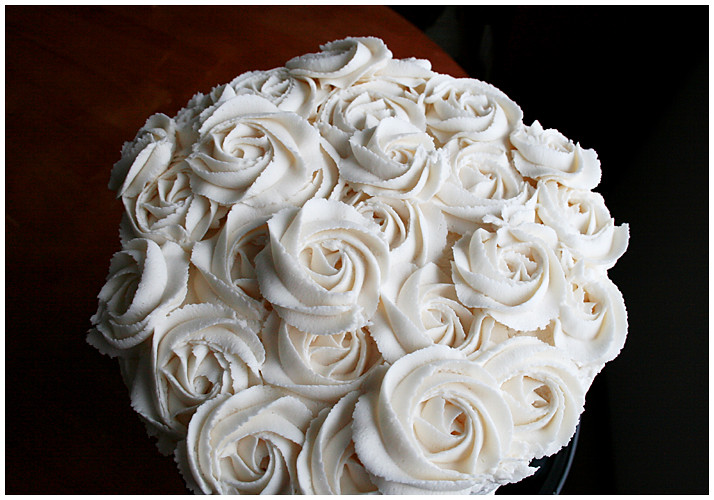
So my mom's birthday just passed and she requested an utterly boring vanilla cake mix with vanilla buttercream. yawn. But I made baby shower cupcakes for a coworker a few months ago with a new technique that I fell in love with.

Hey, look at this bouquet of roses I got for her birthday.

Tuesday, March 20, 2012

Game of Thrones: Winter is Coming!


Like most chefs I know, my cooking adventures too originate from seeing something and thinking, 'I wonder if I could do that...' I've seen hundreds of beautiful, intricate and amazing sugar cookies and I never thought twice about trying them. And one day it was just like, 'Hey... SUGAR cookies...'

Also, I'm crazy into Game of Thrones right now and I really wanted to geek out about it. Hence, decorated cookies. (The best part? At random intervals, such as coloring the red icing, I'd just suddenly think, "A Lannister always pays his debts." WEE!)

Wednesday, November 23, 2011

Fancied Up Chocolate Raspberry

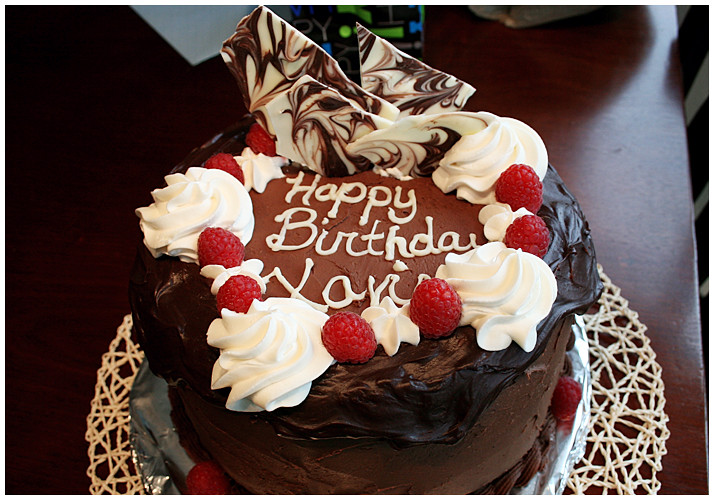
I have a 14 year old nephew that's kind of a foodie. He wants to be a chef. But he also likes a lot of different foods so when I asked him what kind of cake he wanted for his birthday and he said the same chocolate/raspberry one I'd made for another friend before, I wasn't challenged. It was a smidge disappointing. So I went in search of at least prettying it up. I found a beautiful picture on flickr of a chocolate raspberry cake that I've, regrettably, lost the link to. I attempted to duplicate it and didn't quite succeed but my nephew liked it a lot so that was my main goal.

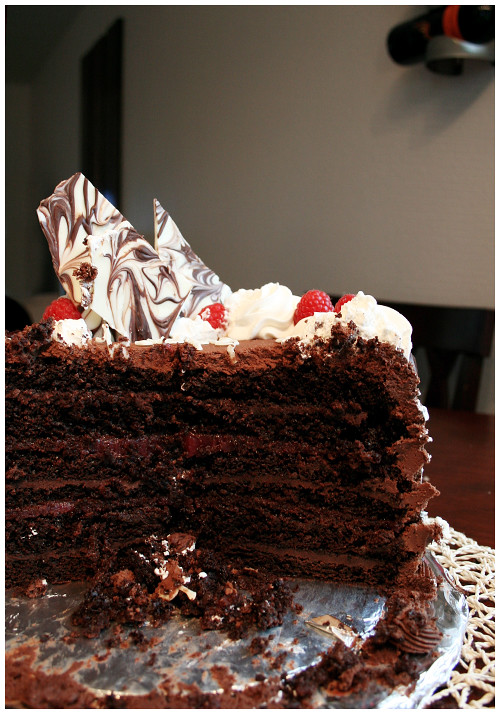
The thing I didn't prepare for was how time consuming every bit of this cake was. From the ganache to cutting the three layers to making the raspberry filling then chocolate buttercream then whipped cream THEN white chocolate marble decoration. so much work. But I'm glad it came out nice. And it was just as yummy as chocolate and raspberry always are. Win!

And it's six layers with three ganache fills and two raspberries. Mmmm!

Monday, November 7, 2011

More Halloween!

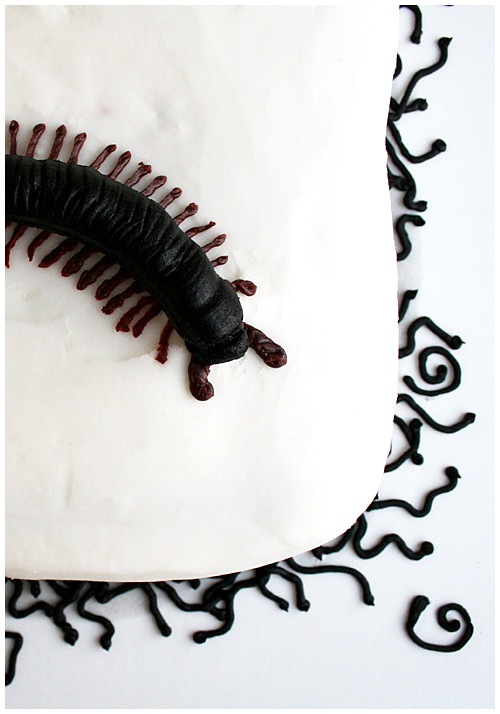
Every year, my office puts on a Halloween party and they usually ask for desserts to be contributed. This year they're doing a dessert contest but I was just excited to make something creepy. I saw this cake on I Am Baker and thought it was AWESOME so I went about trying to replicate.

She mentions she uses Americolor for the buttercream coloring but I couldn't get my hands on it before the due date so I cheated (again) and used the Wilton bottle of black icing. Now, the legs, on hers, are red and almost gel-looking so I was stumped. I bought the little red gel bottle and that was way too bright. I added black coloring to it and it plunged into darkness; too dark! So I ended up using the leftover red Wilton bottle icing from the little vampire cupcake fangs of last week! Added a little black to darken it and voila! Kind of reddish/black legs!

Thanks to this from I Am Baker to this awesomely creepy design!!


Sunday, October 30, 2011

This is Halloween

woo boy, I've been slacking, right? Well HAPPY HALLOWEEN! All is forgiven??

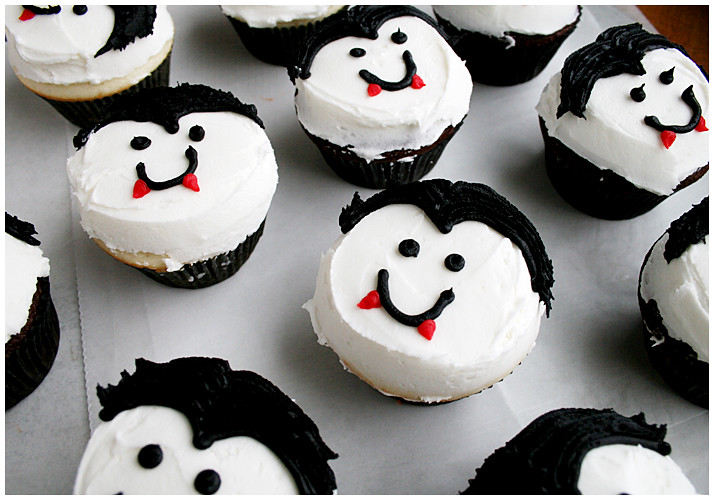
I made these for the family the other day and completely cheated on the black (I bought the Wilton tubes). I have little patience with getting colors dark but I've heard good things about the AmeriColor brand so I'm going to give them a try when I need a black or red coloring! For now, here are my happy little bloodsuckers!

Have a wonderful holiday, everyone!

Sunday, June 12, 2011

Going even more Green

Soooooo, it's fun lying to kids, isn't it? I'm joking! sort of. My future children can blame MY mom for lying to me as I was growing up, and OFTEN. My mom was notorious for sneaking things into seemingly innocent desserts like brownies and would taunt us AFTER we had sampled them with, "GUESS WHAT'S IN THEM." She'd usually answer me and my brother's bafflement with "zucchini!" or "carrots!" I used to have generally unpleasant feelings from these sneaky vegetable revelations. However I know now why she did it. It is immensely satisfying to trick children into eating things that are good for them. Mwha ha ha haahahha.

Williams-Sonoma has a new catalog and a spread with smoothies that piqued my interest. Especially that attractive looking GREEN thing front and center. I went in search of green smoothies and found several variations. The beautiful thing about smoothies is, they're so versatile. You can almost throw anything in a blender and it'll come out good. But I was on a mission so I followed the one I found on All Recipes, and the highly rated adaptation, relatively close. (Next will be kale!)

Now, the kid in question is my 13 year old nephew who is like most kids his age: he usually recoils at the sight of real vegetables. Sure, he can have some iceberg lettuce or starchy potatoes but get into leafy greens and he gets a ~look on his face. Like he'd rather eat dirt. So I gave him an enticing "We're going to try a GREEN DRINK!" preview. He's generally agreeable but eventually he asked, "What makes it green?" And I said, with a straight face, "Oh, I color it." >)

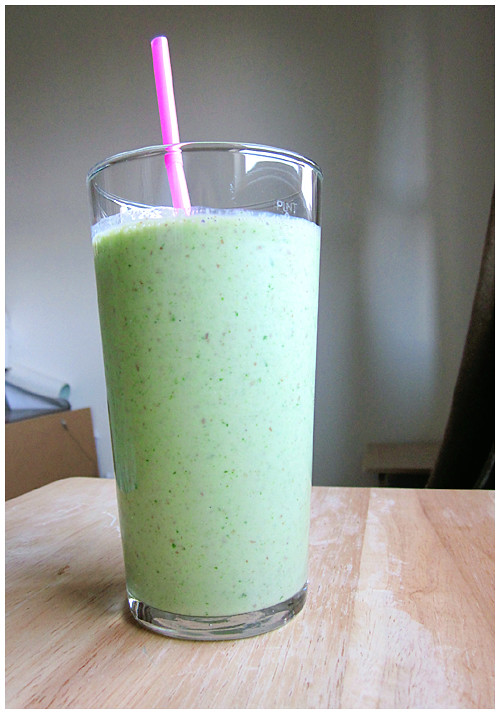
I sneaked the baby spinach leaves into the blender and kept it hidden behind me as I tossed in the yogurt, ground flax seed, frozen banana chunks and apple and voila! Beautiful green drink!

Now, the adapted comment on All Recipes used plain yogurt and agave syrup for sweetness. I used vanilla yogurt AND agave because, c'mon, I'm selling it to a kid. But only a teaspoon of syrup, so I didn't go crazy.

But you know who did go crazy? The nephew. He loved it. And I only kept it to myself long enough to enjoy the fact that he liked something that was sweet, yeah, but also protein-rich and good for him. He was even pleasantly surprised when I told him it was spinach and wanted to make more when he got home. :)

I can't wait to make this drink for a morning pick-me-up!

GROOVY GREEN SMOOTHIE
Adapted from All Recipes, mamaiscookin

1 frozen banana, cut in chunks
8 ounces vanilla yogurt
1 apple, cored and chopped
1 1/2 cups fresh spinach leaves
1 Tbsp ground flax seed
1 Tbsp agave syrup (optional)


Place the banana, yogurt, apple, spinach and flax into a blender. Cover, and blend until smooth, stopping frequently to push down anything stuck to the sides. Pour into glasses and serve.


Servings: 2

Saturday, February 19, 2011

Noodles so good

In an effort not to sound like a jerk, I restrain myself from talking about my relatively recent vegetarianism. But it's relevant here so, brace yourself; you're going to hear about it.

We had a holiday potluck at work, as usual, and I had a brilliant plan: pick over whatever raw veggies and breads I could scope out. Oh wait, did I say brilliant plan? I meant ~moronic plan. But the truth is, you never know what people put in their foods so it's hard to judge some dishes and it's better to be safe than sorry.

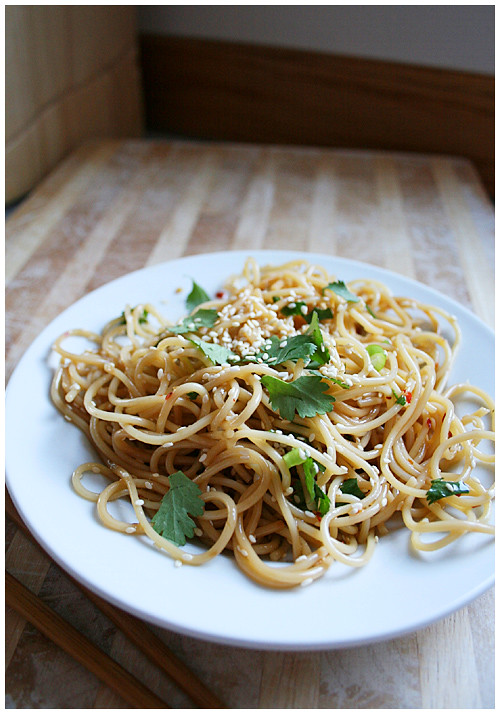
Well, as I strolled along the potluck line, I saw some noodles that, to the naked eye, looked simple and meatless. I took a bit and was surprised to find they were quite lovely; spicy, sesame-y and flavorful. I asked around then cold-called (cold-emailed?) the woman in the office that brought them in, asking for the recipe. She was happy to send it over and I giddily went to making them at home. Here's the thing with these noodles, though: they get better a day or two after they're made. The recipe even calls for letting the oils absorb into the noodles for 4 or more hours but overnight, it's even better!

Also, I didn't have roasted peanuts on hand when I made them and it was still delish (the green onions and cilantro are not as non-negotiable, though).

If you have plain sesame seeds, toasting them is just a matter of warming them up in fry pan until they become fragrant.

I love love love these noodles...


SESAME NOODLES

8 oz. capellini (or thin spaghetti)
1/4 cup vegetable oil
3 Tbsp dark sesame oil
1 tsp dry crushed red pepper
3 Tbsp honey
2 Tbsp soy sauce
1 tsp salt (may omit)
2 Tbsp. chopped cilantro
1/4 cup chopped green onion
2 Tbsp toasted sesame seeds
1/4 cup chopped roasted peanuts


1. Cook noodles, but don’t overcook, as they’ll soften with dressing. Set noodles aside.

2. Heat oil, sesame oil, and crushed red pepper over medium heat about 2 minutes. Stir in honey, soy sauce and salt and bring just to a simmer.

3. Toss warm dressing with pasta and refrigerate, covered for 4 hours or more for flavors to blend.

4. Just before serving, toss in cilantro, green onions, sesame seeds and peanuts.

Enjoy!


Sunday, February 13, 2011

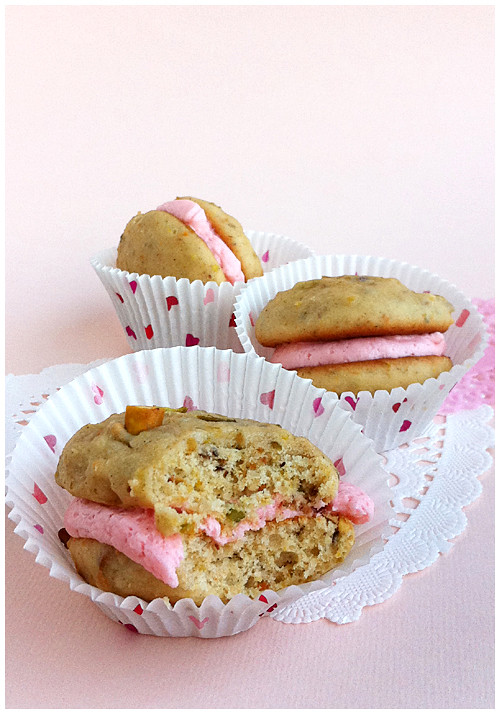
Whoopies on Valentines

I think I'm finally coming to the realization that I don't think things through. When I read a recipe that says, Pistachio Whoopie Pies with Rosewater buttercream, I think, Ooo pretty pink! I go through all the steps to make my first whoopie pies ever then take a bite and cringe. 'ugh it tastes like FLOWER.' Never in my many years have I smelled a rose and thought, Man, I wanna chow down on THAT. But I have no one to blame but myself. It's ROSEWATER. It's going to taste like roses.

That being said, I had some leftover vanilla buttercream from a baby shower cake I made a week or so ago and tried that in one of these instead of the rose flavored. It was very nice, I must say. So my rec, and this is just personal taste, is to go with vanilla for these. And if you're wondering if you might dig rosewater buttercream, just imagine stuffing a rose into your mouth. Good? Okay, then go for it.

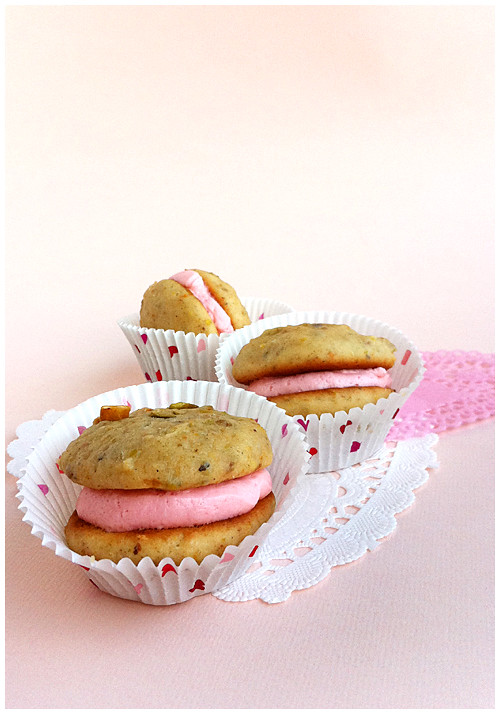
As previously mentioned, these are my first whoopie pies. They didn't look as poofy in the picture... Those are normal sized cupcake liners so you can see how big just a small ice cream scoop size produced. They're pretty filling when you smack two together with some flower-flavored buttercream. (Just color the vanilla pink! It'll look the same!!) I'd like to try some other flavors, though; they're a cute idea but have a short lifespan. The recipe recommends serving that day and after storing in a baggie over night, they had gone a little sticky from the moisture and such. So keep their shelf-life in mind!


PISTACHIO-CARDAMOM WHOOPIES
Source: Whoopie Pies by Sarah Billingsley and Amy Treadwell

3 cups all-purpose flour
1 1/2 teaspoons baking powder
1 teaspoon ground cardamom
1/2 teaspoon salt
1/2 cup (1 stick) butter, softened
3/4 cup granulated sugar
3/4 cup (packed) brown sugar
1 large egg
1 teaspoon vanilla extract
1 cup buttermilk
3/4 cup ground pistachios


Position a rack in the center of the over and preheat the oven to 350F. Line two baking sheets with parchment paper.

Sift together the flour, baking powder, cardamom and salt into a medium bowl.

In the work bowl of a stand mixer fitted with the paddle attachment, beat together the butter and both sugars on low speed until just combined. Increase the speed to medium and beat until fluffy and smooth, about 5 minutes. Add the egg, beating well. Add the vanilla.

Add half of the flour mixture and half of the buttermilk to the batter and beat on low until just incorporated. Scrape down the sides of the bowl. Add the remaining flour mixture and 1/2 cup buttermilk and beat until completely combined. Add the pistachios and mix just until combined.

Using a small ice cream scoop or 2-tablespoon scoop, drop about 2 tablespoons of batter onto one of the prepared baking sheets and repeat, spacing them at least 2 inches apart. Bake one sheet at a time for about 10 minutes each, or until the cakes begin to brown. Let the cakes cool on the sheet for at least 5 minutes before transferring them to a rack to cool completely.

Makes about 30 four-inch cakes.


ROSEWATER BUTTERCREAM

2 cups confectioners' sugar
4 tablespoons unsalted butter, at room temperature
3 tablespoons heavy whipping cream
1 teaspoon rosewater or rose essence
1 teaspoon vanilla extract
1/8 teaspoon salt
3 to 4 drops red food coloring


In the work bowl of a stand mixer fitted with the paddle attachment, beat together the confectioners' sugar and the butter, starting on low and increasing to medium speed, until mixture is crumbly, about 1 minute. Add the heavy cream, rosewater, vanilla, salt and red food coloring and beat on high until smooth, about 3 minutes.


OR!

VANILLA BUTTERCREAM
Source: Wilton

1/4 cup solid vegetable shortening
1/4 cup (1 stick) butter or margarine softened
1/2 teaspoon vanilla extract
2 cups sifted confectioners' sugar
1 tablespoon milk

Makes: About 1 1/2 cups of icing

In large bowl, cream shortening and butter with electric mixer. Add vanilla. Gradually add sugar, one cup at a time, beating well on medium speed. Scrape sides and bottom of bowl often. When all sugar has been mixed in, icing will appear dry. Add milk and beat at medium speed until light and fluffy. Keep bowl covered with a damp cloth until ready to use.

For best results, keep icing bowl in refrigerator when not in use. Refrigerated in an airtight container, this icing can be stored 2 weeks. Rewhip before using.


HAPPY VALENTINE'S DAY, EVERYBODY!