Saturday, July 10, 2010

Happy Birthday, AMERICA.


YES, I am a week late for the 4th of July festivities. But, no, these cookies were not late. I made these two weeks ago in anticipation of a week-long vacation from which I just returned. So I have a good excuse and it's better late than never!

Quick story on how these patriotic treats came to be. See, I'm a big football/soccer fan and have been since I got into it a few years back in London. It was great rooting for the Three Lions (England's national team) but once I got back to the States, it had to be Team USA all the way! (Especially since we were such underdogs and needed support.) So this World Cup, I went all out and, what do you know: America flags, shirts, beads, etc all pop up in stores, right in time for our big games (and July 4th, but whatever).


My 5 year old niece saw me with all this America bling. A few days went by and we were visiting at my mom's house where she proceeded to bring me a set of patriotic cookie cutters that she bought at the store. I said, "What's this?" and she replied, "They're for YOU ... to make cookies. For ME." Oooohhkay! So I kinda had to at that point. I mean, it was sort of an order.

But truth be told, I love doing this stuff. It's not that much work and the final product coming out cute is worth every minute!

I tried a new sugar cookie recipe because I'm always on the prowl for the perfect sugar cookie. These came out nice and soft, held their shape perfectly and were hard to mess up (even after re-rolling). They never browned but did get crisp (though light) if I rolled thin enough. Keep them at a respectable thickness and they'll be nice and soft!

Also, the icing is from those tubes of Wilton "frosting" you buy in the stores. I struggled with the thought of royal icing and in the end, just made do with what I had. Turns out, that sweet frosting is really good on cookies. Think of those Lofthouse soft sugar cookies you get in the store. Mmm. But I piped on the lines and just spread the rest with a knife! It's all about adapting with what you have!


SUGAR COOKIES
Source: Williams-Sonoma

16 Tbs. (2 sticks) unsalted butter, at room temperature

3/4 cup sugar
3 egg yolks
1 piece vanilla bean, about 2 inches long, or 1 1/2 tsp. vanilla extract
2 1/2 cups all-purpose flour
1 tsp. baking powder
1/2 tsp. salt

In the bowl of an electric mixer fitted with the flat beater, beat together the butter and sugar on medium speed until light and fluffy, about 4 minutes. Add the egg yolks one at a time, beating well after each addition. Cut the vanilla bean in half lengthwise and, using a small, sharp knife, scrape the seeds into the butter mixture. If using vanilla extract, add it now. Mix well.

In a sifter, combine the flour, baking powder and salt. Sift the flour mixture directly onto the butter mixture. Reduce the speed to low and beat until well mixed.

Turn the dough out onto a work surface and divide into 4 equal portions. Shape each portion into a ball, then flatten the balls into disks. Wrap in plastic wrap and refrigerate overnight. (The dough can be prepared up to 3 days ahead.) Let it soften slightly at room temperature before continuing.

Position a rack in the upper third of an oven and preheat to 350°F. Prepare 2 large baking sheets with parchment paper.

On a lightly floured work surface, roll out a dough disk 1/4 inch thick. Using cookie cutters, cut out desired shapes. Transfer the cutouts to the prepared baking sheets. Gather up and reroll the scraps and cut out more cookies. Repeat with the remaining dough disks

Bake until the cookies are golden on the edges, about 8 minutes. Transfer the cookies to wire racks and let cool completely. Decorate the cookies as desired with colored sugars and decorating pens. Store in an airtight container at room temperature for up to 1 week.

Makes 24 to 30 cookies, depending on cutter size.

And, P.S. I AM heartbroken by our results at the World Cup. But it doesn't lessen my love for our national team and players. They're still awesome and I love them!

Sunday, June 27, 2010

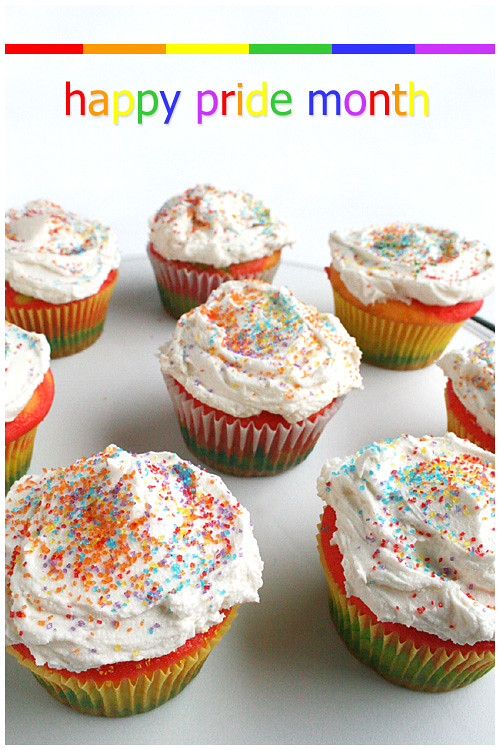
Rainbows Pride and Love!


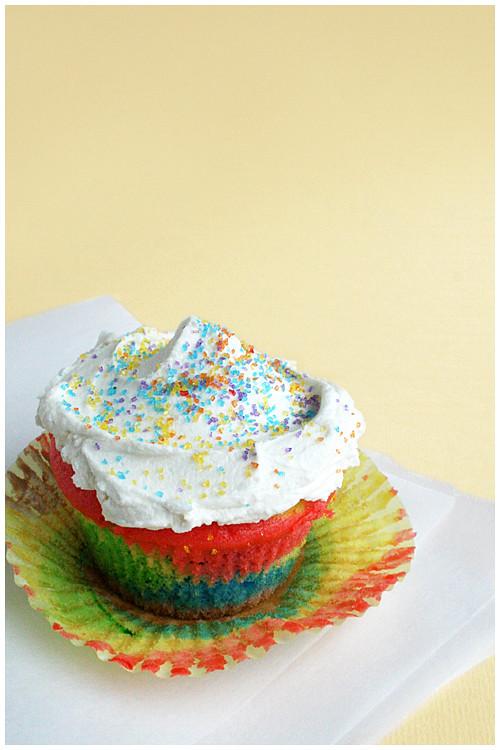
Happy Pride Month, peeps! I love rainbows and I love equality. Pride Month is right up my alley! In the interest of full disclosure, I saw this recipe on All Recipes as a "clown cake" and went, 'OOOoo, pretty rainbows!' And then I saw Yahoo's sweet Pride color bar and a light bulb went off. HEY, I can kill two birds with one stone: challenge of a new recipe and support my gay friends and family!

First thing's first, I used a box cake and went by it's specifications. The All Recipes one has it's own that I didn't think was necessary based on the fact that it was just food coloring basically. Second thing, and I can't stress this enough, USE TWO BOX MIXES. I used one and somehow made 12 cupcakes out of a box that insisted it would make 24... Like the other 12 got lost in a black hole somewhere. Gone for eternity... And doubling the recipe will just plain make handling the six separate colors easier.


Okay, so they look like a psychedelic trip from the outside which, when I first saw, got me a little heartbroken because I wanted beautiful layers. Then I bit into one:


HURRAH! I evened out some of the first layers with toothpick to the edges but after the first three, I knew it would come out fine when it started to cook down.


RAINBOW CUPCAKES
Adapted from All Recipes, submitted by lovestohost

2 boxes white cake mix
egg whites
water
oil
purple food coloring gel
blue food coloring gel
green food coloring gel
yellow food coloring gel
orange food coloring gel
red food coloring gel

1. Preheat an oven to 350 degrees F (175 degrees C). Prepare cupcake pans with liners or by greasing.

2. Use egg white option of cake box directions. Beat the egg whites with an electric mixer until frothy, about 1 minute. Add the cake mix, water, and canola oil; continue beating for 2 minutes on medium speed.

3. Divide the cake batter into six separate ziplock plastic bags. Use a toothpick to scoop a dab of food coloring into each bag. Seal and mix inside bag; add more food coloring, if necessary, to reach the desired shade. Repeat with the remaining colors and bags of batter.

4. Cut corner of bags and pipe 1/6 of the first color in the bottom of all liners. Repeat with the next colors (rainbow going purple, blue, green, yellow, orange and red) until cups are 2/3 full.

5. Bake in the preheated oven until a toothpick inserted into the cake comes clean, about 18-20 minutes. Cool in the pans for 5 minutes before removing to cool completely on a wire rack.


Top with your favorite icing (mine is vanilla buttercream)!


Thursday, June 17, 2010

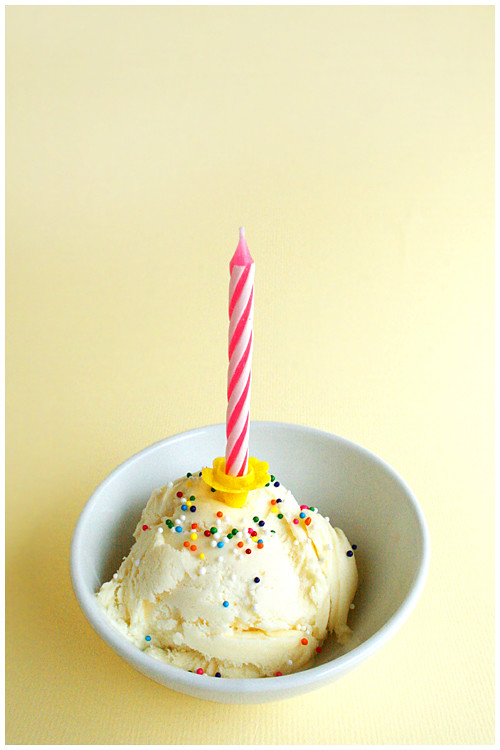
Happy Birthday, No One!


I've been in search of an awesome ice cream flavor because it's summer. Summer = ice cream, always. But over the last few years, I've made all my favorites: cinnamon, pistachio, coffee, coconut, German chocolate, bacon. I kid! The bacon wasn't just a favorite; it was THE favorite. kidding. So while I could make variations of these favorites, I kinda wanted something new. Well. This sounded awesome and while I never order cake batter ice cream at Cold Stone, it always seemed really good.

This is one of those ice creams that tastes like CREAM. Maybe that's the thing with homemade that I'm not used to. Some people like it. I'm on the fence... But it has actual cake mix in it so it's fine frozen but, man, don't let it melt because it becomes this mutant blob of non-solid, non-liquid goop. Not that you would let it melt but still. It's a weird concoction.

It's REALLY strong, though, and hard to eat much of. That's okay; this recipe doesn't make much. It's nice to have something novel to make/try but I don't think I'll be making it again.


CAKE BATTER ICE CREAM
Source: All Recipes, by Ekho

1 cup milk
1/2 cup white sugar
2 egg yolks, beaten
1 teaspoon vanilla extract
2 cups heavy whipping cream
3/4 cup white cake mix, sifted


Whisk together milk, sugar, egg yolks, vanilla, cream, and cake mix in a saucepan until well blended. Cook over medium-low heat until mixture reaches 160 degrees F (70 degrees C), stirring frequently. Remove from heat and place in the refrigerator or freezer until liquid is cold.

Pour the chilled mixture into an ice cream maker and freeze according to manufacturer's directions until it reaches "soft-serve" consistency. Transfer ice cream to a one- or two-quart lidded plastic container; cover surface with plastic wrap and seal. For best results, ice cream should ripen in the freezer for at least 2 hours or overnight.

Thursday, June 10, 2010

Pies for your hands!

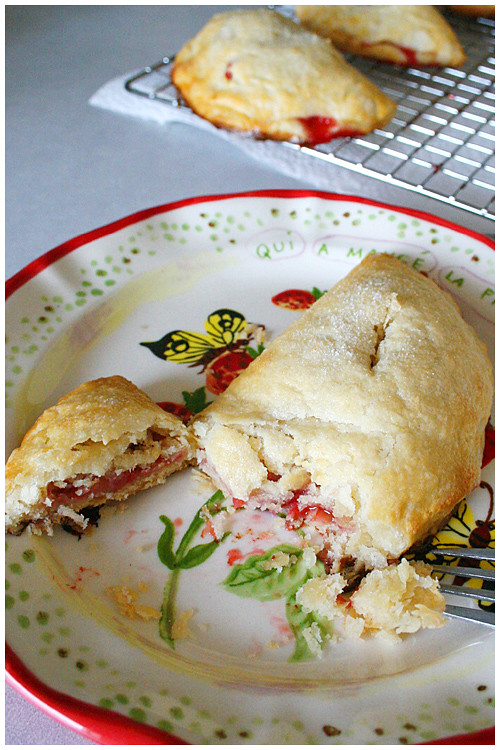
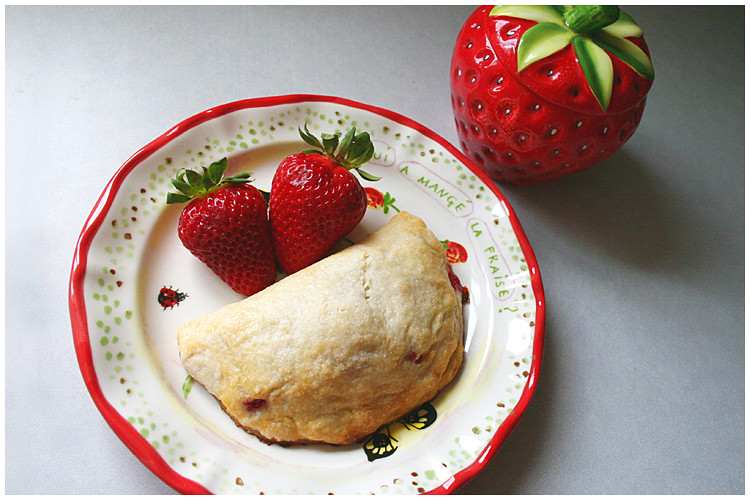
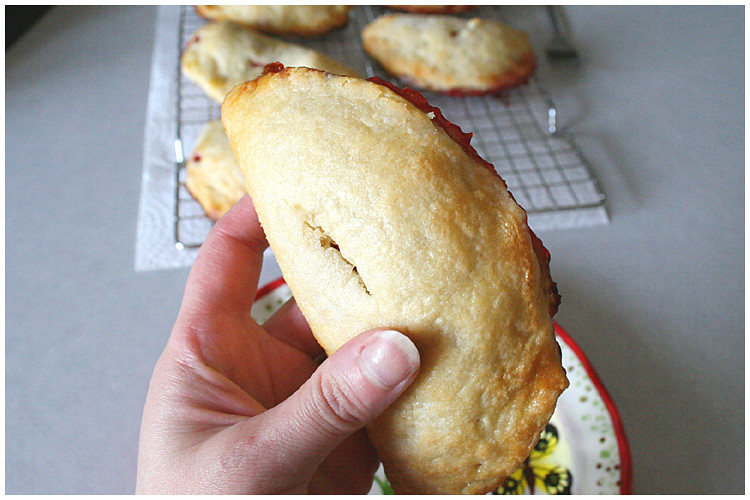
If y'all don't know by now, I'm here to tell you: I LOVE STRAWBERRIES. And I have some kind of physical compulsion to buy them when they're so beautiful and fresh in the store. So I get home and have a couple containers of strawberries and say, 'Now what?'

This time, the 'what' was hand pies. I'm in constant search of an awesome pie crust and I think my search may be over. I found the strawberry hand pie recipe from Good Things Catered but their dough recipe called for buttermilk which I did not have. So I found one from Epicurious and holy cow. It came out damn near perfect. Flaky and buttery! I don't even care about the filling as long as the crust is good!! To be honest, it's my favorite part of pie. Add a scoop of vanilla ice cream and it would've been perfect! I can't wait to make it in a whole sized pie and see if it comes out as good.

The recipe from Good Things Catered calls for 3 cups of strawberries and that was a little too much for the pie dough that I had. I cut that by a cup but kept the sugar content because my strawberries were actually a tad tart. I wish I would've tasted before I baked; I would have added more sugar. So TASTE YOUR BERRIES and then judge how much sweetness needs to be added. Mine needed a bit more.

But overall, this was a smashing success, mostly because I CONQUERED PIE CRUST. And they're so darn cute! Lookit the widdle hand pies!

PASTRY DOUGH
Adapted from: Epicurious (Original recipe for full pies here.)


2 1/2 cups all-purpose flour

1 1/2 sticks (3/4 cup) cold unsalted butter, cut into 1/2-inch cubes

1/4 cup cold vegetable shortening (preferably trans-fat-free)

1/2 teaspoon salt

5 to 7 tablespoons ice water


Freeze cubed butter and shortening until frozen; 15-30 minutes. Combine flour and salt in food processor to mix. Add butter and shortening and pulse until mixture resembles coarse meal with some small (roughly pea-size) butter lumps. Drizzle 5-7 tablespoons of ice water over mixture while lightly pulsing until just incorporated. Do not overwork dough, or pastry will be tough. (Personal note: I usually process until it forms a ball and this time, I decided not to. I used 6 tablespoons of water and the mixture did not pull together. Instead, it was clumpy but when I pressed with my fingers, it held. There were dots of butter visible in dough.)

Turn dough out onto a powdered sugar-dusted work surface and form together. Cut pie dough in half and form into two disks. Wrap both portions in plastic wrap and freeze. Pastry dough can be chilled up to 2 days ahead.


STRAWBERRY HAND PIES

2 cups fresh strawberries, hulled and quartered (or cubed; make small pieces)

2 Tbsp granulated sugar

2 tsp fresh lemon juice


2 large eggs, lightly beaten

Turbinado sugar for sprinkling


Preheat oven to 400 degrees and line baking sheets with parchment.

In medium bowl, combine strawberries, granulated sugar and lemon juice and set aside.

Let frozen pie dough disk defrost, 30 minutes to an hour. Dough should be very cold and hard to roll out. Roll onto a powered sugar-dusted work surface to about 1/8 in thickness, moving and turning over constantly to avoid sticking. Using round pastry cutter (or trace knife around small plate), cut out about 5-6 inch rounds.

Place round onto baking sheet and place about 2-3 Tbsp strawberry mixture into center.

Using pastry brush dipped in a small amount of egg, brush the edge of half of the round. Fold dry edge onto egg brushed half, forming semicircle shape, and press edges together to seal with the tines of a fork.

Brush the top of the pie with egg mixture and sprinkle with sugar. Use a small knife to make a 1 inch slit in the top of the pie for steam to escape. Repeat with remaining pastry dough.

Place in oven and bake until tops are beginning to turn golden brown, about 20 minutes. Let cool on sheets for 7-10 minutes and then transfer to wire rack to cool completely. Serve warm or at room temperature.

Monday, May 17, 2010

Summer Strawberry Season!


YOU GUISE. Seriously, you guys. SRSLY. I LOVE strawberries. Like, I would marry them if I could. They're perfection. And it's STRAWBERRY SEASON OMG.

Now, my mom made one of the best cakes I've ever had for my birthday and do you know what I did? I left my camera at home. And it was GORGEOUS. She made this Almond Chiffon Cake with mixed berries beautifully piled on top (it looked just like that pic) and it was DELISH. I'm really disappointed that I forgot my camera but it was a crazy-awesome birthday and I got caught up.


To continue on the OMG FRESH BERRIES kick, I picked up some strawberries this weekend and got right to using them! The first is this
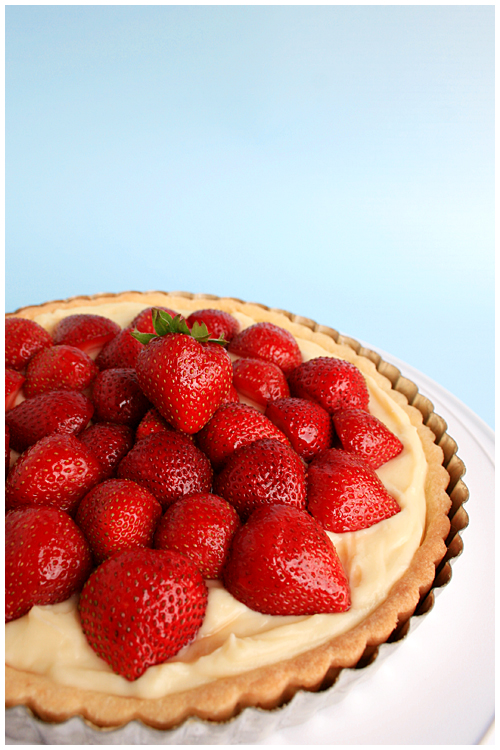
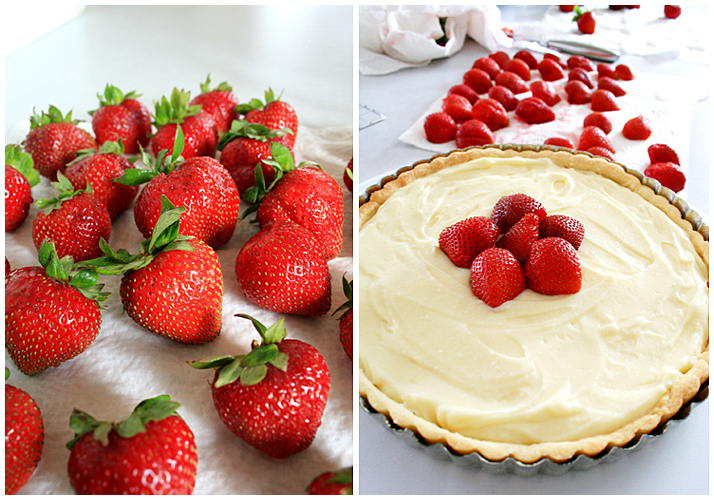
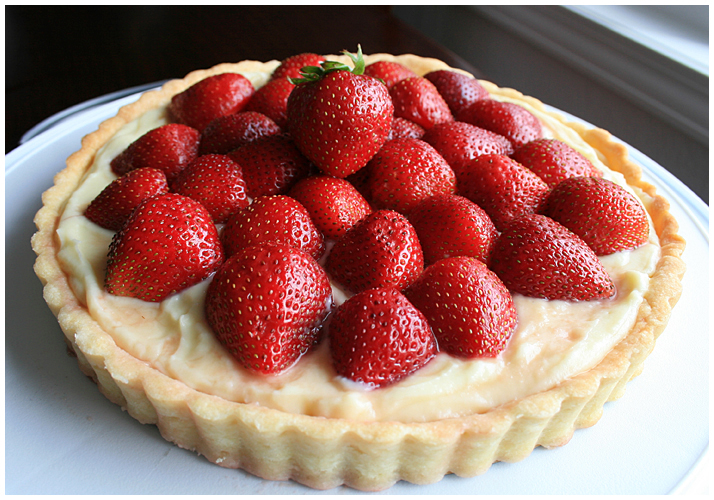
strawberry tart which, okay, tarts? They are TIME CONSUMING. You prepare the ingredients by laying some out to come to room temp (or freezing butter for the dough), then you assemble the dough and put that back in the freezer once it's in the pan. Make the pastry cream (which I'm getting better at with practice) then throw that in the fridge for a couple more hours. You bake the tart crust and set that out to cool. Once that's cool and then the cream is properly chilled, you can finally prep the strawberries and assemble everything! It took most of Saturday.

But it was TOTALLY worth it. I love fruit tarts. It was a hit with the family too! Success all around! I should make more tarts...


STRAWBERRY TART


SWEET TART DOUGH
Dorie Greenspan's Baking: From My Home To Yours

1 1/2 cups all-purpose flour
1/2 cup confectioner's sugar
1/4 teaspoon salt
1 stick plus 1 tablespoon (9 tablespoons; 4 1/2 ounces) very cold (or frozen) unsalted butter, cut into small pieces
1 large egg yolk

1. Put the flour, sugar and salt in the bowl of a food processor and pulse a few times to combine. Scatter the pieces of butter over the dry ingredients and pulse until the butter is coarsely cut in—you should have pieces the size of oatmeal flakes and some the size of peas. Stir the yolk, just to break it up, and add it a little at a time, pulsing after each addition. When the egg is in, process in long pulses—about 10 seconds each—until the dough, which will look granular soon after the egg is added, forms clumps and curds. If dough does not come together, add 1-2 Tbsp of cold water, 1 Tbsp at a time, until you can pinch dough together.

Turn the dough out onto a work surface and, very lightly and sparingly, knead the dough just to incorporate any dry ingredients that might have escaped mixing.


2. To roll or press the dough into the pan: Butter a 9-inch fluted tart pan with a removable bottom.

If you want to roll the dough, chill it for about 2 hours before rolling (unless you've used frozen butter and the dough comes out of the processor firm and cold, in which case you can roll it immediately). I find it easiest to roll this dough out between two sheets of plastic film – make sure to peel away the film frequently, so it doesn't get rolled into the dough.

If you want to use the press-in method, you can work with the dough as soon as it's processed. Just press the dough evenly over the bottom and up the sides of the pan. Don't be too heavy-handed – press the crust in so that the edges of the pieces cling to one another, but don't press so hard that the crust loses its crumbly texture.


PASTRY CREAM
Tartine

2 cups whole milk
1/2 cup + 1 tbsp sugar
2 large eggs
4 tbsp unsalted butter
1/4 tsp salt
3 tbsp cornstarch
1 tsp vanilla extract

Pour the milk into a heavy saucepan. Add the salt, place over medium-high heat, and bring to just under a boil, stirring occasionally. Meanwhile, whisk together the cornstarch and sugar. Add the eggs and whisk until smooth (don't let the eggs and sugar stand together for too long or else the sugar will cook the eggs *so I've heard*).

When the milk is ready, slowly drizzle about 1/3 of the hot milk into the egg mixture, whisking continuously. Pour the egg-milk mixture back into the hot milk and continue whisking until the custard is as thick as lightly whipped cream, about 2 minutes. The mixture must come just to the boiling point (slow bubbles, not boiling vigorously, or you will curdle the eggs, yuk). Remove from heat and immediately pour through a sieve into a bowl. Stir in the vanilla extract. Let cool for 10 minutes, stirring occasionally. Cut the butter into 1 tbsp pieces and whisk into pastry cream 1 tbsp at a time until smooth.

Cover the bowl with plastic wrap, pressing directly onto the top of the cream to prevent a skin from forming and put in the refrigerator to cool for 3 hours or up to 2 days.


Assemble tart inside pan to prevent crust breaking. Cover with desired fruit! (For a glossy coat, microwave about 1/4 cup apricot (or raspberry or strawberry) jam for 30 seconds or until liquid enough to brush over fruit.)

Friday, May 7, 2010

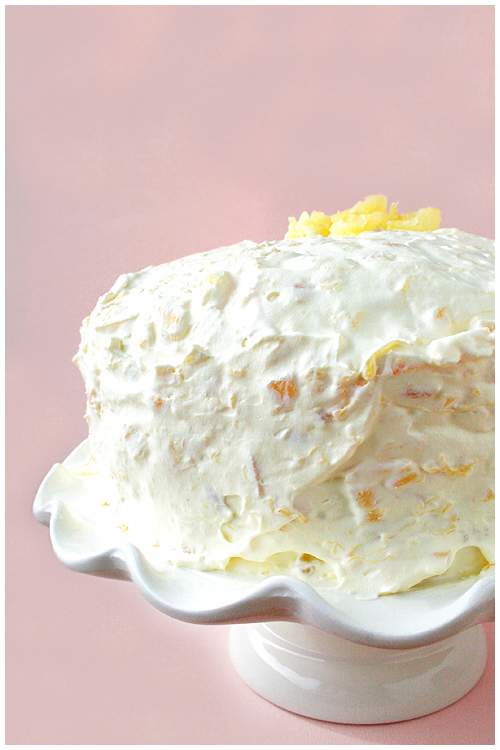
Pig Cake!

Every year I make my mom's birthday cake at the beginning of April and she makes mine at the end. We're both pretty easy to make happy - I like anything pink or with berries and she likes chocolate. This year, she felt like something different and she produced a recipe she'd cut out of the Houston Post over 20 years ago (1987 omg!). It was a cake she'd had at a potluck and *remembered* liking it a lot but couldn't exactly remember why. So she gave the recipe to me and said Make it so!

Personally, I'm a little offended by ~cake mixes. Mostly because sometimes cake mixes are just plain better than homemade. They're so soft and effortlessly fluffy... It's not FAIR. It's cheating! However. This recipe called for a mix which made it super easy to make.

It was also super easy to EAT. They say it's called "Pig Pickin' " because you make a pig of yourself. I will support this claim. We all went back for seconds. I'll keep this cake in rotation, no problem. Mmmm!


PIG PICKIN' CAKE
Adapted from: Ann Valentine

1 package yellow cake mix with pudding
1 11-ounce can mandarin oranges, UNDRAINED
4 eggs
1/2 cup vegetable oil
1/2 cup chopped walnuts
1 (20-ounce) can crushed pineapple, UNDRAINED
1 9-ounce carton frozen whipped topping thawed
1 (3.75-ounce) package vanilla instant pudding mix


Grease two 9-inch layer cake pans. Line bottoms with waxed paper; grease again; set aside. Combine cake mix, mandarin oranges, eggs and oil; beat 2 minutes at highest speed of electric mixer. Reduce speed to low; beat 1 minute. Stir in walnuts. Pour batter into prepared pans. Bake at 350 for 20 to 25 minutes or until a wooden pick inserted in center comes out clean. Cool in pans on racks 10 minutes; remove layers from pans, let cool completely.

Combine remaining 3 ingredients; beat 2 minutes at medium speed of electric mixer; let stand 5 minutes in refrigerator or until mixture is of spreading consistency. Spread pineapple mixture between layers and on top of cake - you may frost sides if desired. Chill at least 2 hours before serving. Store in the refrigerator.

Tuesday, March 23, 2010

Irish Cream tastes like Irish Cream


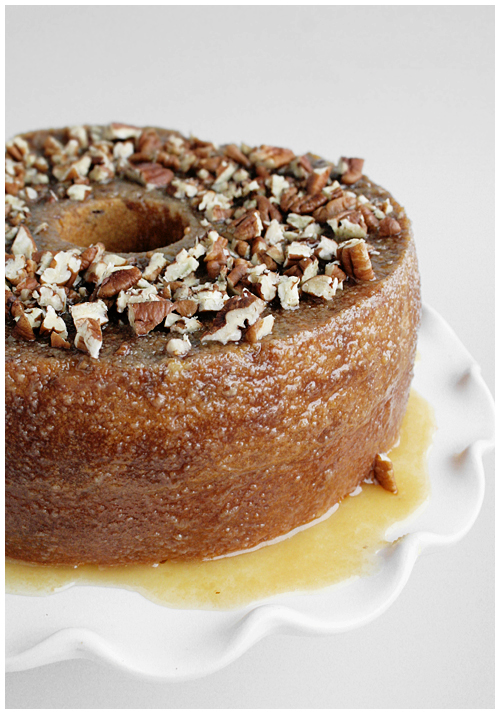
I've done better at baking, I HAVE. See this cake?? I made it almost two weeks ago as a tester for a work potluck! It was BEFORE St. Patty's, I promise. I just never got around to posting. It's been a busy few weeks.

So in my search for Irish and/or St. Patty's themed food, I came across an insanely high rated Irish Cream cake at All Recipes. Sounded promising. I made it with minor adjustments (an angel food pan instead of Bundt so the top was flat and could be dressed prettier) and dug in with high hopes. Yeah, it tasted like alcohol. Okay, not ENTIRELY. Actually, the second day, the alcohol in the glaze and cake was much more subtle and the cake had absorbed most of the glaze to make it nice and moist. But there was still Irish cream in it. I don't know what I was expecting; it's an IRISH CREAM CAKE. Now, I enjoy my liquor as much as the next gal but there's just something about mixing certain desserts and alcohol. I didn't love it. But those I tested it on thought it was quite nice. So maybe I'm a harsh critic.

If you like a little bite to a moist cake, this one will hit the spot.


IRISH CREAM BUNDT CAKE
Source: All Recipes, by Sue Haser


1 cup chopped pecans
1 (18.25 ounce) package yellow cake mix
1 (3.4 ounce) package instant vanilla pudding mix
4 eggs
1/4 cup water
1/2 cup vegetable oil
1 cup Irish cream liqueur
1/2 cup butter
1/4 cup water
1 cup white sugar
1/4 cup Irish cream liqueur


Preheat oven to 325 degrees F (165 degrees C). Grease and flour a 10 inch angel food (or bundt) pan. Sprinkle chopped nuts evenly over bottom of pan.


In a large bowl, combine cake mix and pudding mix. Mix in eggs, 1/4 cup water, 1/2 cup oil and 1 cup Irish cream liqueur. Beat for 5 minutes at high speed. Pour batter over nuts in pan.

Bake in the preheated oven for 60 minutes, or until a toothpick inserted into the cake comes out clean. Cool for 10 minutes in the pan, then invert onto the serving dish. Prick top and sides of cake; I used a chopstick for larger holes. Spoon glaze over top and brush onto sides of cake. Allow to absorb glaze repeat until all glaze is used up.

To make the glaze: In a saucepan, combine butter, 1/4 cup water and 1 cup sugar. Bring to a boil and continue boiling for 5 minutes, stirring constantly. Remove from heat and stir in 1/4 cup Irish cream. If it looks curdled, whisk quickly until glaze becomes smooth.

Sprinkle extra chopped pecans on top for decorative dressing.


Monday, March 8, 2010

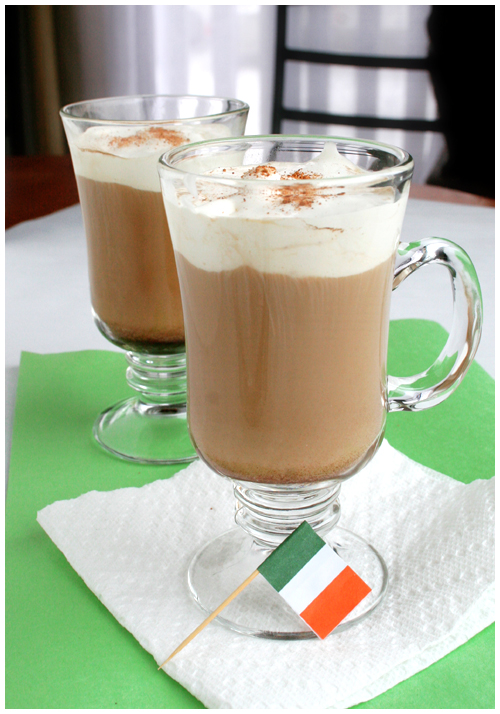
Making Coffee ~Irish

Okay, not REALLY. I mean, I could've added some whiskey to my coffee but, ew. Whiskey's not my scene. Not that this Bailey's Irish Cream coffee IS, but I had to try it, at least once. I envisioned something a little sweeter, I suppose (and added some sugar to it anyway). Alas, alcohol still tastes like alcohol in coffee. Now, I like coffee and I like drinking but, to me, the two shouldn't mix. It's just weird. I'm very picky about my coffee. ~Flavors in it (aside from the occasional mocha) just get in the way. I'll take my Americano, thank you very much.

But, for those wondering, this was simply a straight cup of fresh brew with Bailey's Irish Cream substituted for cream and a teaspoon of sugar. And whipped cream on top. To those of you who enjoy a kick to your coffee, I say, Go crazy!


March is rolling along nicely, isn't it? :)

Tuesday, March 2, 2010

Soft Sugar Cooks


OKAY, well, there's my green; my March obligation is fulfilled! I KID. I'm planning more, trust.

I like to bake junk to thank people for being awesome to me. Or just to give because I like them. Or if it's a day ending in Y. I like giving bakery to people, okay? So a friend loaned me a TV series on DVD some time LAST YEAR. It got shuffled around in my house and shelved and I never got around to it. I pine for my loaned out DVDs sometimes so I had to make her a thank you for putting up with my forgetfulness. You can't really go wrong with straight-forward sugar cookies.


I planned to make a recipe another friend gave me. Naturally, I misplaced it (hey, like the DVD!), so I started rifling around in my saved recipes. This one caught my eye, even though it's from All Recipes, because it proclaims it's a "State Fair Blue Ribbon winner". WELL. I'm intrigued.


I love soft cookies in general so I was on board for this. They never browned up so I worried a little as I watched them in the oven but the called for 12+ minutes past with nary an edge browning. Turns out, they were perfect: lightly crispy on the outside and soft/chewy near the middle. I passed them out and everyone loved them! I later warmed them up a little in the microwave at half power for 30 seconds and woo wee. WARM COOKIES ARE TEH BEST. With a glass of milk, these are kind of perfect!


SOFT SUGAR COOKIES IV
Submitted by Laura Stearns, All Recipes.com


2/3 cup shortening
2/3 cup butter
1 1/2 cups white sugar
2 eggs
2 teaspoons vanilla extract
3 1/2 cups all-purpose flour
2 teaspoons baking powder
1 teaspoon salt
1/3 cup granulated sugar for decoration


Preheat oven to 350 degrees F (175 degrees C).

In a medium bowl, cream together the butter, shortening and sugar. Stir in the eggs and vanilla. Combine the flour, baking powder and salt, stir into the creamed mixture until dough comes together. Roll dough into walnut sized balls and roll the balls in sugar. Place them on an unprepared cookie sheet about 2 inches apart. Flatten lightly with bottom of glass.

Bake cookies 10 to 12 minutes in the preheated oven, until bottom is light brown. Remove from baking sheets to cool on wire racks.

Sunday, February 28, 2010

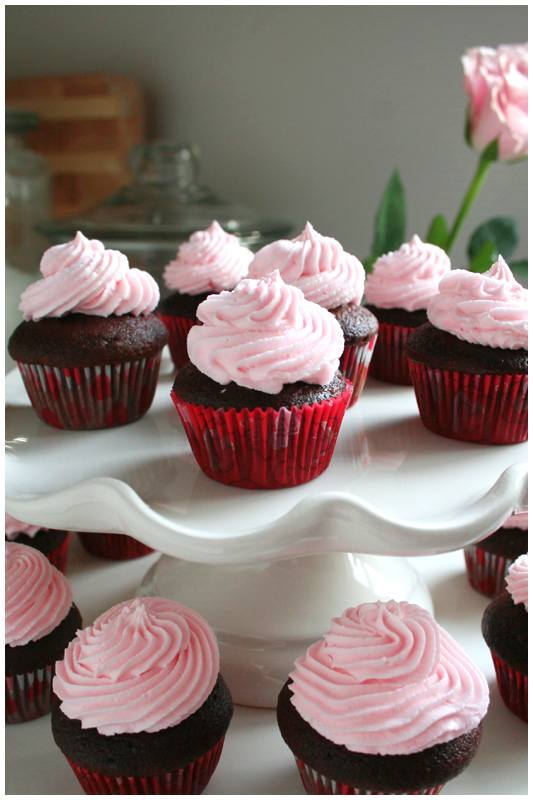
February and chocolate, CHECK

AH HA. I caught you, last day of February! Take THAT, procrastination!

These are just a few mini cupcakes I made in a hurry for Valentine's. They're a box mix. I know. I bring shame on my family. HOWEVER the buttercream icing is real! It's my favorite [because it's so terrible for you]. And they were serious good. Two quick bites of delish. :)


VANILLA BUTTERCREAM ICING

1 cup Crisco Shortening
1/2 stick butter, room temperature
2 tbsps heavy whipping cream
1 tsp vanilla
4 cups powdered sugar, sifted (measure then sift)


In your mixer bowl, beat the shortening until it's smooth, add the butter and beat together until smooth and light and fluffy. Add smaller amount of the heavy cream indicated in the recipe and the vanilla and mix well.

Add half the powdered sugar and mix for 5 minutes on low-med speed. Add remaining sugar and mix well. Add more cream or powdered sugar if necessary to adjust the consistency

Add coloring as desired.


I'm making a resolution here and now: MARCH is going to be my baking month. I always tell myself I'm going to make calendar-appropriate recipes like Irish soda bread and green stuff but I never do. Well, I'm putting the pressure on myself right now. SOMETHING GREEN IS GOING TO BE HAPPENING IN MARCH. Or at least have the spirit of Irish-ness.