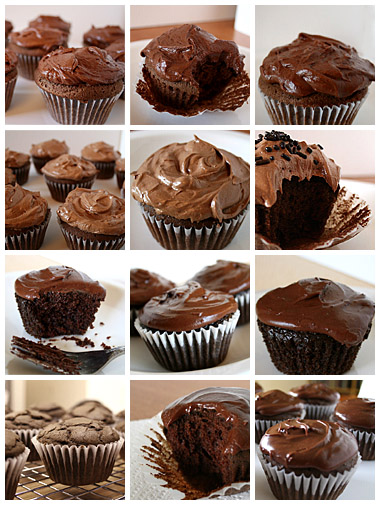
So, maybe I bit off a little more than I could chew which is funny (but not really) being written in a food blog. Nevertheless. It all started with raspberries...
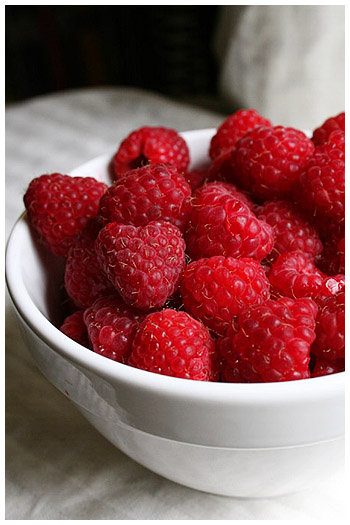 I found a good amount on sale at the grocery store and grabbed them promptly (sale!). When I got home, however, I realized I had no idea what to do with them. I racked my brain, trying to come up with something to make. It was quickly becoming a crummy week (therefore I wasn't in the mood for pink, happy, light and fluffy cupcakes) so something darker was definitely on my mind. The very first thing I thought of was a dark, smooth chocolate cake with the raspberries as a sweet and tangy sauce to contrast with the full chocolate flavor. I found exactly what I was looking for in The Best Recipe book in the Ultimate Flourless Chocolate Cake; described as a "dense, buttery" dessert with a creamy texture. Perfect.
The ingredients are deceptively simple. I guess it's that way to offset the intense preparation of the cake itself. Water baths, exact timing, careful extraction. All problems I simply never had with plain ol' cupcakes. But the cake part was, uh... cake compared to the sauces and I had decided were to accompany the dessert.
The raspberry was also way too much work (blending sugar to make it superfine, straining the overdone mix) and the recipe was annoyingly vague. If I were to try it again (unlikely), I would definitely trust my instincts and let it cook much less (a minute, maybe); just enough to let the sugar dissolve and marry with the raspberry juice. I let it cook too long, too much of the water cooked out and it was way too thick. In retrospect, I may have been able to add hot water and return it to the stove to dilute more juice from the pulpy leftovers but I didn't think of it at the time. Live and learn.
The Vanilla Custard Sauce was not what I was looking for but ended up tasting fine all the same. I'd never made a custard-y anything before so the prospect of adding warm cream to egg yolks was terrifying (ew, cooked egg!). It was a chore but the result was satisfactory. Although, again, I would hesitate when faced with making it once more. So much stress.
I will say this, however: the vanilla sauce definitely compliments the thick chocolatey "cake" and the cake is a bit overwhelming without SOMETHING to accompany it. Fresh berries would work well in contrast, especially strawberries. Ignore the pictures; I would drown the cake in the vanilla sauce. (It just wasn't as pretty.)
This really is exactly what I had in mind when I concocted this little (week-long-stress-a-thon) dessert but it was so involved, I don't see myself attempting fancy schmancy dishes like it often. I took a stab, it came out right (exhale) and now I'll return to our regularly scheduled program of comfort food like cakes and cookies.
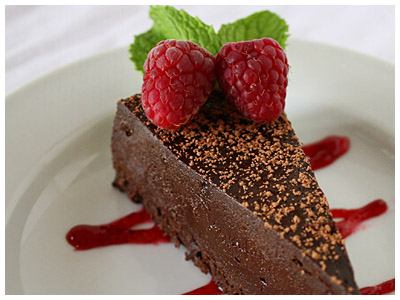
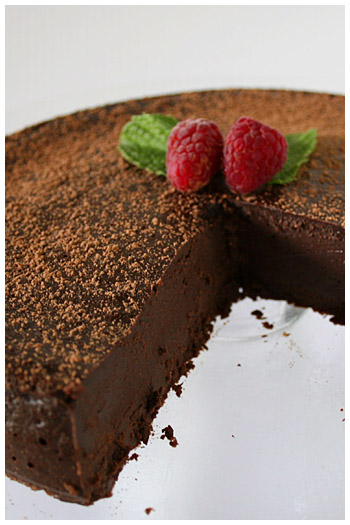 ULTIMATE FLOURLESS CHOCOLATE CAKE
(From The Best Recipe by Cook's Illustrated)
Serves 12 to 16
8 large eggs, cold
1 pound bittersweet or semisweet chocolate, coarsely chopped
1/2 pound (2 sticks) unsalted butter, cut into 1/2-inch chunks
(1/4 cup strong coffee or liqueur optional)
Confectioners' sugar or cocoa powder for decoration
1. Adjust oven rack to lower-middle position and heat oven to 325 degrees. Line bottom of 8-inch springform pan with parchment and grease pan sides. Cover pan underneath and along sides with sheet of heavy-duty foil and set in large roasting pan. Bring kettle of water to boil.
2. Beat eggs with handheld mixer at high speed until volume doubles to approximately 1 quart, about 5 minutes. Alternatively, beat in bowl of electric mixer fitted with wire whip attachment at medium speed to achieve same result, about 5 minutes.
3. Meanwhile, melt chocolate and butter (adding coffee or liqueur, if using) in large heatproof bowl set over pan of almost simmering water, until smooth and very warm (about 115 degrees on an instant read thermometer), stirring once or twice. (For microwave, melt chocolate at 50 percent power for 2 minutes, stir, add butter, and continue heating at 50 percent power, stirring every minute, until chocolate and butter have melted and are smooth, another 2 to 3 minutes total.) Fold 1/3 of egg foam into chocolate mixture using large rubber spatula until only a few streaks of egg are visible; fold in half of remaining foam, then last of remaining foam until mixture is totally homogenous.
4. Scrape batter into prepared springform pan and smooth surface with rubber spatula. Set roasting pan on oven rack and pour in enough boiling water to come about halfway up side of springform pan. Bake until cake has risen slightly, edges are just beginning to set, a thin glazed crust (like a brownie) has formed on surface, and an instant-read thermometer inserted halfway through center of cake registers 140 degrees, 22 to 25 minutes. Remove cake pan from water bath and set on wire rack; cool to room temperature. Cover and refrigerate overnight to mellow (can be covered and refrigerated for up to 4 days).
5. About 30 minutes before serving, remove springform pan sides, invert cake on sheet of waxed paper, peel off parchment pan liner, and turn cake right side up on serving platter. Sieve light sprinkling of confectioners' sugar or unsweetened cocoa powder over cake to decorate, if desired.
VANILLA CUSTARD SAUCE
From Bon Appetit 1992 Yearbook
1 1/2 cups whipping cream
1 vanilla bean, split lengthwise
4 egg yolks
1/4 cup sugar
1. Place cream in a heavy saucepan over medium heat. Scrape in the seeds from the vanilla bean; add pod. Bring to simmer. Remove from heat. Cover and let stand 1 hour to let flavors marry.
2. Whisk yolks and sugar in medium bowl to blend. Bring cream mixture to simmer over medium-low heat. Gradually whisk hot cream into yolks.
3. Return mixture to saucepan and stir until the custard thickens and coats spoon (about 4 minutes). Do not boil. Strain into bowl. Cover and chill.
Makes 1 cup.
I was not impressed with the raspberry sauce but it does offer a sharp contrast to the smooth chocolate and vanilla so I do recommend some fruit sauce or fresh fruit to accompany the dessert, ultimately.
COULIS AUX FRAMBOISES - RASPBERRY SAUCE
1-1/2 cups raspberries
1/2 cup superfine sugar
1 vanilla bean
1. Put the raspberries and the sugar in a saucepan. Place the pan over med-high heat and bring to a boil.
2. Cut the vanilla bean in half lengthwise. When the raspberries have released some liquid, add the vanilla.
3. Cook, stirring and mashing the berries, until it is reduced by about 1/3.
4. Strain the raspberries through a strainer, pushing on the pulp.


