Monday, May 17, 2010

Summer Strawberry Season!


YOU GUISE. Seriously, you guys. SRSLY. I LOVE strawberries. Like, I would marry them if I could. They're perfection. And it's STRAWBERRY SEASON OMG.

Now, my mom made one of the best cakes I've ever had for my birthday and do you know what I did? I left my camera at home. And it was GORGEOUS. She made this Almond Chiffon Cake with mixed berries beautifully piled on top (it looked just like that pic) and it was DELISH. I'm really disappointed that I forgot my camera but it was a crazy-awesome birthday and I got caught up.

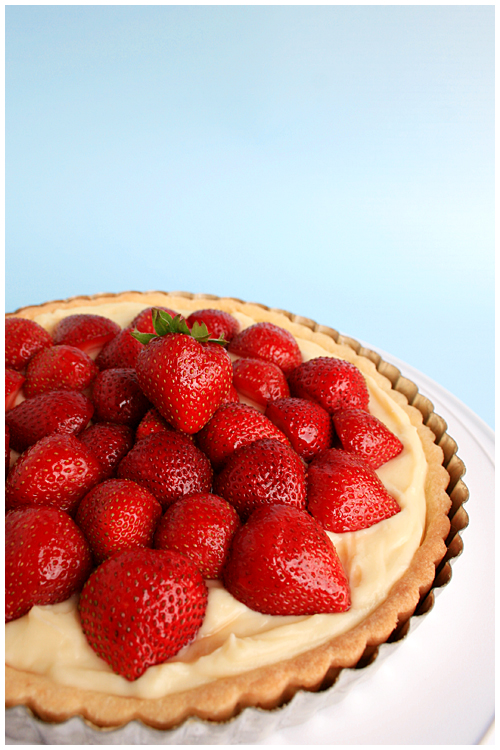
To continue on the OMG FRESH BERRIES kick, I picked up some strawberries this weekend and got right to using them! The first is this
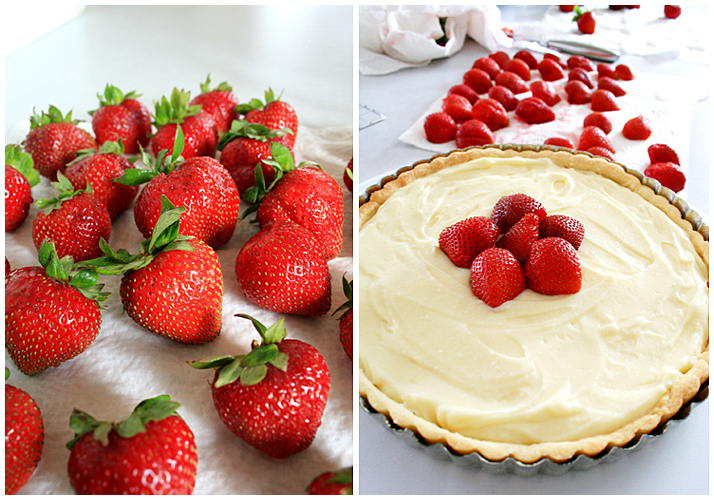
strawberry tart which, okay, tarts? They are TIME CONSUMING. You prepare the ingredients by laying some out to come to room temp (or freezing butter for the dough), then you assemble the dough and put that back in the freezer once it's in the pan. Make the pastry cream (which I'm getting better at with practice) then throw that in the fridge for a couple more hours. You bake the tart crust and set that out to cool. Once that's cool and then the cream is properly chilled, you can finally prep the strawberries and assemble everything! It took most of Saturday.

But it was TOTALLY worth it. I love fruit tarts. It was a hit with the family too! Success all around! I should make more tarts...
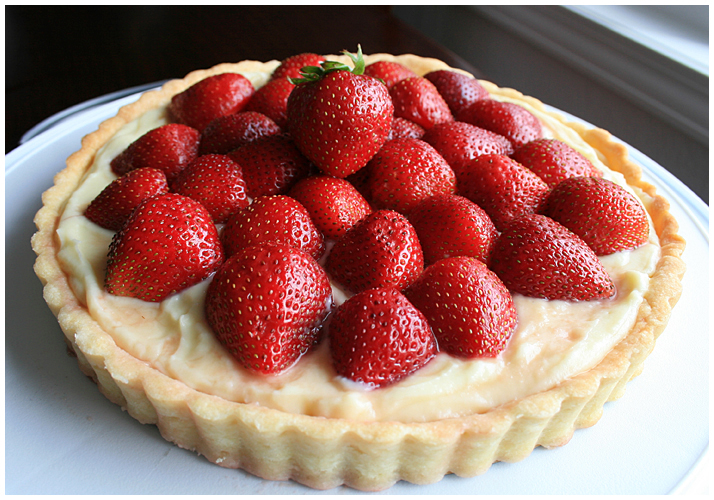

STRAWBERRY TART


SWEET TART DOUGH
Dorie Greenspan's Baking: From My Home To Yours

1 1/2 cups all-purpose flour
1/2 cup confectioner's sugar
1/4 teaspoon salt
1 stick plus 1 tablespoon (9 tablespoons; 4 1/2 ounces) very cold (or frozen) unsalted butter, cut into small pieces
1 large egg yolk

1. Put the flour, sugar and salt in the bowl of a food processor and pulse a few times to combine. Scatter the pieces of butter over the dry ingredients and pulse until the butter is coarsely cut in—you should have pieces the size of oatmeal flakes and some the size of peas. Stir the yolk, just to break it up, and add it a little at a time, pulsing after each addition. When the egg is in, process in long pulses—about 10 seconds each—until the dough, which will look granular soon after the egg is added, forms clumps and curds. If dough does not come together, add 1-2 Tbsp of cold water, 1 Tbsp at a time, until you can pinch dough together.

Turn the dough out onto a work surface and, very lightly and sparingly, knead the dough just to incorporate any dry ingredients that might have escaped mixing.


2. To roll or press the dough into the pan: Butter a 9-inch fluted tart pan with a removable bottom.

If you want to roll the dough, chill it for about 2 hours before rolling (unless you've used frozen butter and the dough comes out of the processor firm and cold, in which case you can roll it immediately). I find it easiest to roll this dough out between two sheets of plastic film – make sure to peel away the film frequently, so it doesn't get rolled into the dough.

If you want to use the press-in method, you can work with the dough as soon as it's processed. Just press the dough evenly over the bottom and up the sides of the pan. Don't be too heavy-handed – press the crust in so that the edges of the pieces cling to one another, but don't press so hard that the crust loses its crumbly texture.


PASTRY CREAM
Tartine

2 cups whole milk
1/2 cup + 1 tbsp sugar
2 large eggs
4 tbsp unsalted butter
1/4 tsp salt
3 tbsp cornstarch
1 tsp vanilla extract

Pour the milk into a heavy saucepan. Add the salt, place over medium-high heat, and bring to just under a boil, stirring occasionally. Meanwhile, whisk together the cornstarch and sugar. Add the eggs and whisk until smooth (don't let the eggs and sugar stand together for too long or else the sugar will cook the eggs *so I've heard*).

When the milk is ready, slowly drizzle about 1/3 of the hot milk into the egg mixture, whisking continuously. Pour the egg-milk mixture back into the hot milk and continue whisking until the custard is as thick as lightly whipped cream, about 2 minutes. The mixture must come just to the boiling point (slow bubbles, not boiling vigorously, or you will curdle the eggs, yuk). Remove from heat and immediately pour through a sieve into a bowl. Stir in the vanilla extract. Let cool for 10 minutes, stirring occasionally. Cut the butter into 1 tbsp pieces and whisk into pastry cream 1 tbsp at a time until smooth.

Cover the bowl with plastic wrap, pressing directly onto the top of the cream to prevent a skin from forming and put in the refrigerator to cool for 3 hours or up to 2 days.


Assemble tart inside pan to prevent crust breaking. Cover with desired fruit! (For a glossy coat, microwave about 1/4 cup apricot (or raspberry or strawberry) jam for 30 seconds or until liquid enough to brush over fruit.)

Friday, May 7, 2010

Pig Cake!

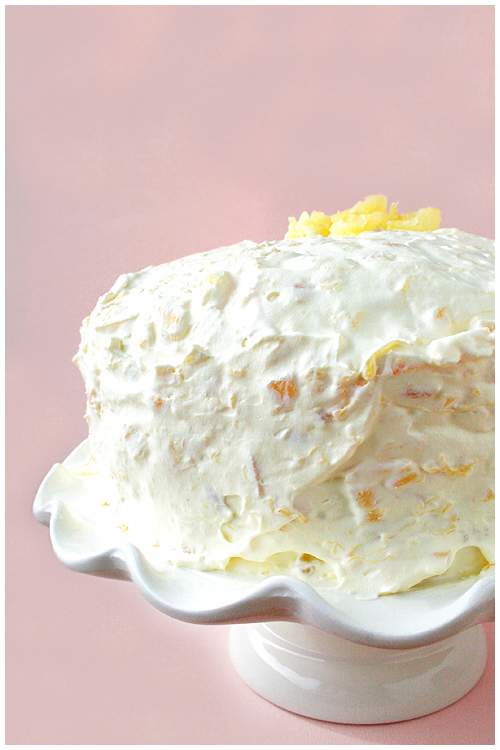
Every year I make my mom's birthday cake at the beginning of April and she makes mine at the end. We're both pretty easy to make happy - I like anything pink or with berries and she likes chocolate. This year, she felt like something different and she produced a recipe she'd cut out of the Houston Post over 20 years ago (1987 omg!). It was a cake she'd had at a potluck and *remembered* liking it a lot but couldn't exactly remember why. So she gave the recipe to me and said Make it so!

Personally, I'm a little offended by ~cake mixes. Mostly because sometimes cake mixes are just plain better than homemade. They're so soft and effortlessly fluffy... It's not FAIR. It's cheating! However. This recipe called for a mix which made it super easy to make.

It was also super easy to EAT. They say it's called "Pig Pickin' " because you make a pig of yourself. I will support this claim. We all went back for seconds. I'll keep this cake in rotation, no problem. Mmmm!


PIG PICKIN' CAKE
Adapted from: Ann Valentine

1 package yellow cake mix with pudding
1 11-ounce can mandarin oranges, UNDRAINED
4 eggs
1/2 cup vegetable oil
1/2 cup chopped walnuts
1 (20-ounce) can crushed pineapple, UNDRAINED
1 9-ounce carton frozen whipped topping thawed
1 (3.75-ounce) package vanilla instant pudding mix


Grease two 9-inch layer cake pans. Line bottoms with waxed paper; grease again; set aside. Combine cake mix, mandarin oranges, eggs and oil; beat 2 minutes at highest speed of electric mixer. Reduce speed to low; beat 1 minute. Stir in walnuts. Pour batter into prepared pans. Bake at 350 for 20 to 25 minutes or until a wooden pick inserted in center comes out clean. Cool in pans on racks 10 minutes; remove layers from pans, let cool completely.

Combine remaining 3 ingredients; beat 2 minutes at medium speed of electric mixer; let stand 5 minutes in refrigerator or until mixture is of spreading consistency. Spread pineapple mixture between layers and on top of cake - you may frost sides if desired. Chill at least 2 hours before serving. Store in the refrigerator.

Tuesday, March 23, 2010

Irish Cream tastes like Irish Cream


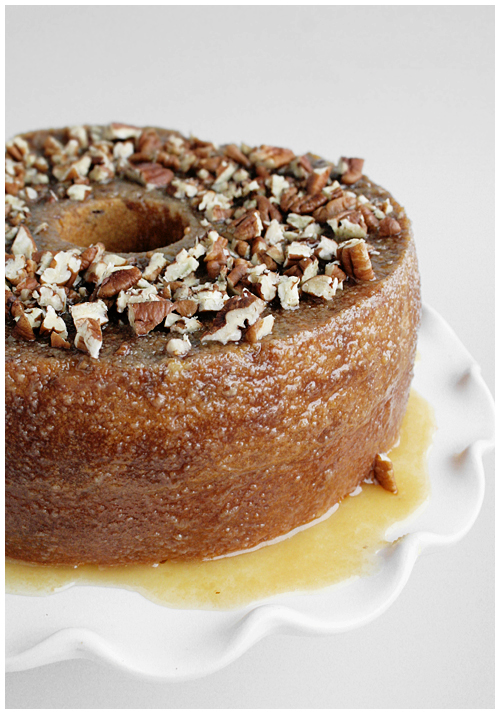
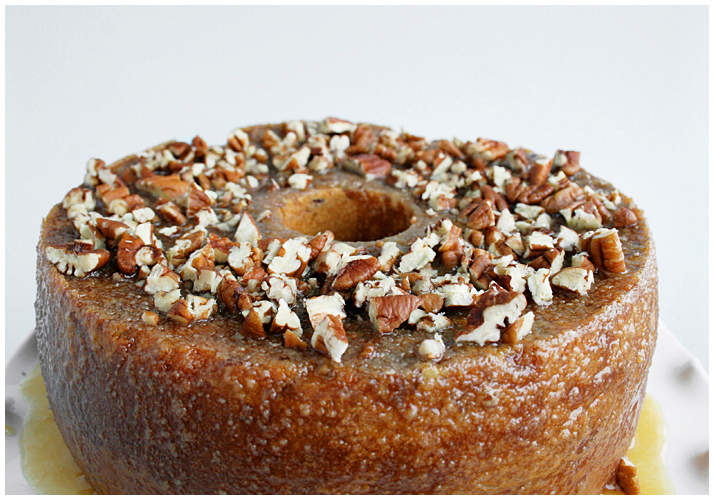
I've done better at baking, I HAVE. See this cake?? I made it almost two weeks ago as a tester for a work potluck! It was BEFORE St. Patty's, I promise. I just never got around to posting. It's been a busy few weeks.

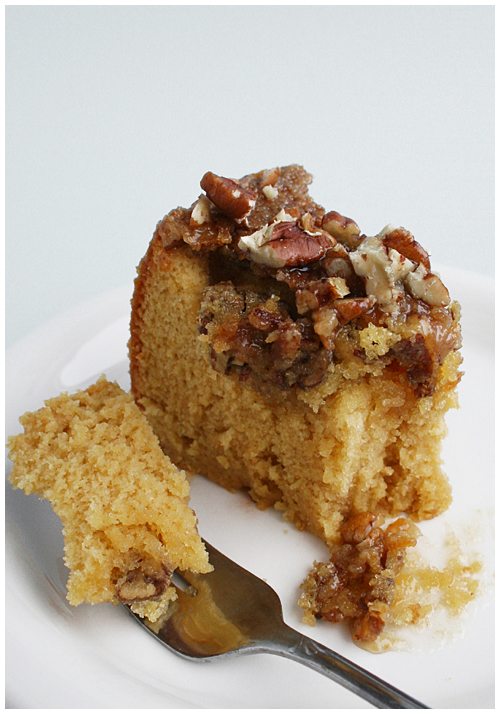
So in my search for Irish and/or St. Patty's themed food, I came across an insanely high rated Irish Cream cake at All Recipes. Sounded promising. I made it with minor adjustments (an angel food pan instead of Bundt so the top was flat and could be dressed prettier) and dug in with high hopes. Yeah, it tasted like alcohol. Okay, not ENTIRELY. Actually, the second day, the alcohol in the glaze and cake was much more subtle and the cake had absorbed most of the glaze to make it nice and moist. But there was still Irish cream in it. I don't know what I was expecting; it's an IRISH CREAM CAKE. Now, I enjoy my liquor as much as the next gal but there's just something about mixing certain desserts and alcohol. I didn't love it. But those I tested it on thought it was quite nice. So maybe I'm a harsh critic.

If you like a little bite to a moist cake, this one will hit the spot.


IRISH CREAM BUNDT CAKE
Source: All Recipes, by Sue Haser


1 cup chopped pecans
1 (18.25 ounce) package yellow cake mix
1 (3.4 ounce) package instant vanilla pudding mix
4 eggs
1/4 cup water
1/2 cup vegetable oil
1 cup Irish cream liqueur
1/2 cup butter
1/4 cup water
1 cup white sugar
1/4 cup Irish cream liqueur


Preheat oven to 325 degrees F (165 degrees C). Grease and flour a 10 inch angel food (or bundt) pan. Sprinkle chopped nuts evenly over bottom of pan.


In a large bowl, combine cake mix and pudding mix. Mix in eggs, 1/4 cup water, 1/2 cup oil and 1 cup Irish cream liqueur. Beat for 5 minutes at high speed. Pour batter over nuts in pan.

Bake in the preheated oven for 60 minutes, or until a toothpick inserted into the cake comes out clean. Cool for 10 minutes in the pan, then invert onto the serving dish. Prick top and sides of cake; I used a chopstick for larger holes. Spoon glaze over top and brush onto sides of cake. Allow to absorb glaze repeat until all glaze is used up.

To make the glaze: In a saucepan, combine butter, 1/4 cup water and 1 cup sugar. Bring to a boil and continue boiling for 5 minutes, stirring constantly. Remove from heat and stir in 1/4 cup Irish cream. If it looks curdled, whisk quickly until glaze becomes smooth.

Sprinkle extra chopped pecans on top for decorative dressing.


Monday, March 8, 2010

Making Coffee ~Irish

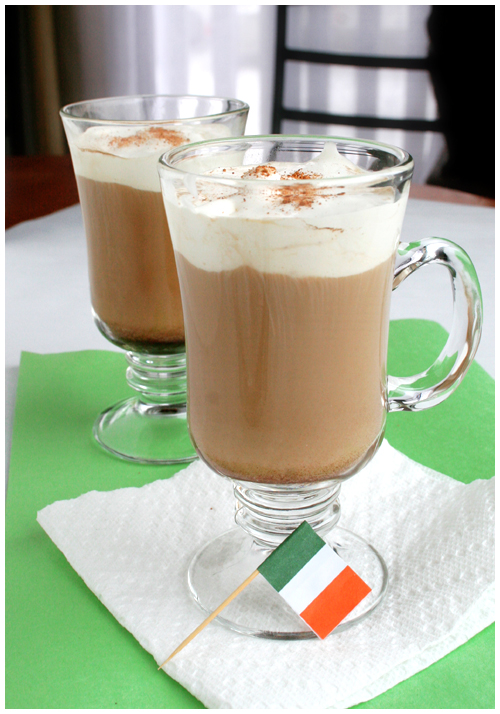
Okay, not REALLY. I mean, I could've added some whiskey to my coffee but, ew. Whiskey's not my scene. Not that this Bailey's Irish Cream coffee IS, but I had to try it, at least once. I envisioned something a little sweeter, I suppose (and added some sugar to it anyway). Alas, alcohol still tastes like alcohol in coffee. Now, I like coffee and I like drinking but, to me, the two shouldn't mix. It's just weird. I'm very picky about my coffee. ~Flavors in it (aside from the occasional mocha) just get in the way. I'll take my Americano, thank you very much.

But, for those wondering, this was simply a straight cup of fresh brew with Bailey's Irish Cream substituted for cream and a teaspoon of sugar. And whipped cream on top. To those of you who enjoy a kick to your coffee, I say, Go crazy!


March is rolling along nicely, isn't it? :)

Tuesday, March 2, 2010

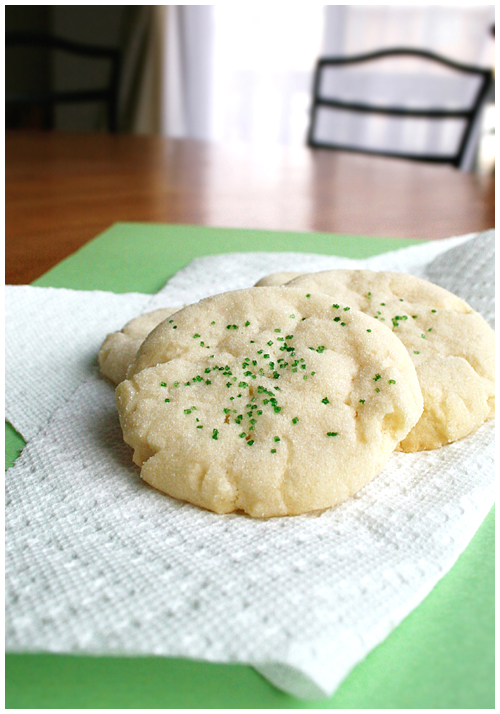
Soft Sugar Cooks


OKAY, well, there's my green; my March obligation is fulfilled! I KID. I'm planning more, trust.

I like to bake junk to thank people for being awesome to me. Or just to give because I like them. Or if it's a day ending in Y. I like giving bakery to people, okay? So a friend loaned me a TV series on DVD some time LAST YEAR. It got shuffled around in my house and shelved and I never got around to it. I pine for my loaned out DVDs sometimes so I had to make her a thank you for putting up with my forgetfulness. You can't really go wrong with straight-forward sugar cookies.


I planned to make a recipe another friend gave me. Naturally, I misplaced it (hey, like the DVD!), so I started rifling around in my saved recipes. This one caught my eye, even though it's from All Recipes, because it proclaims it's a "State Fair Blue Ribbon winner". WELL. I'm intrigued.


I love soft cookies in general so I was on board for this. They never browned up so I worried a little as I watched them in the oven but the called for 12+ minutes past with nary an edge browning. Turns out, they were perfect: lightly crispy on the outside and soft/chewy near the middle. I passed them out and everyone loved them! I later warmed them up a little in the microwave at half power for 30 seconds and woo wee. WARM COOKIES ARE TEH BEST. With a glass of milk, these are kind of perfect!


SOFT SUGAR COOKIES IV
Submitted by Laura Stearns, All Recipes.com


2/3 cup shortening
2/3 cup butter
1 1/2 cups white sugar
2 eggs
2 teaspoons vanilla extract
3 1/2 cups all-purpose flour
2 teaspoons baking powder
1 teaspoon salt
1/3 cup granulated sugar for decoration


Preheat oven to 350 degrees F (175 degrees C).

In a medium bowl, cream together the butter, shortening and sugar. Stir in the eggs and vanilla. Combine the flour, baking powder and salt, stir into the creamed mixture until dough comes together. Roll dough into walnut sized balls and roll the balls in sugar. Place them on an unprepared cookie sheet about 2 inches apart. Flatten lightly with bottom of glass.

Bake cookies 10 to 12 minutes in the preheated oven, until bottom is light brown. Remove from baking sheets to cool on wire racks.

Sunday, February 28, 2010

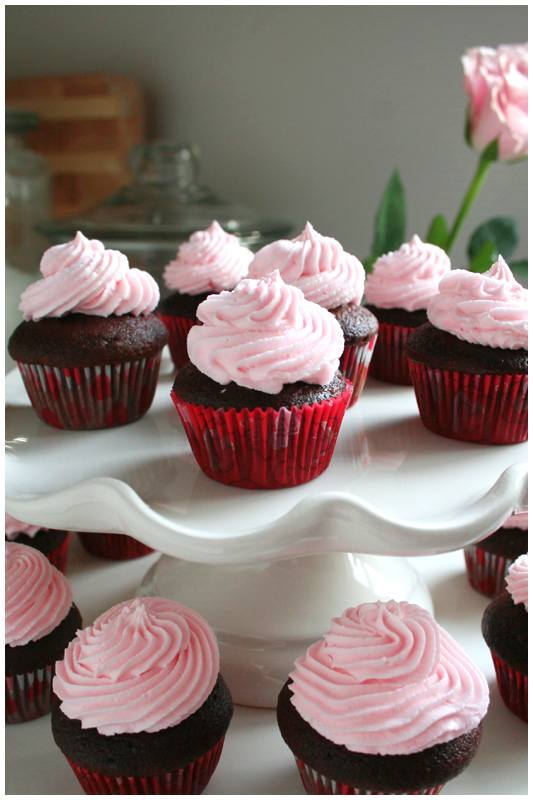
February and chocolate, CHECK

AH HA. I caught you, last day of February! Take THAT, procrastination!

These are just a few mini cupcakes I made in a hurry for Valentine's. They're a box mix. I know. I bring shame on my family. HOWEVER the buttercream icing is real! It's my favorite [because it's so terrible for you]. And they were serious good. Two quick bites of delish. :)


VANILLA BUTTERCREAM ICING

1 cup Crisco Shortening
1/2 stick butter, room temperature
2 tbsps heavy whipping cream
1 tsp vanilla
4 cups powdered sugar, sifted (measure then sift)


In your mixer bowl, beat the shortening until it's smooth, add the butter and beat together until smooth and light and fluffy. Add smaller amount of the heavy cream indicated in the recipe and the vanilla and mix well.

Add half the powdered sugar and mix for 5 minutes on low-med speed. Add remaining sugar and mix well. Add more cream or powdered sugar if necessary to adjust the consistency

Add coloring as desired.


I'm making a resolution here and now: MARCH is going to be my baking month. I always tell myself I'm going to make calendar-appropriate recipes like Irish soda bread and green stuff but I never do. Well, I'm putting the pressure on myself right now. SOMETHING GREEN IS GOING TO BE HAPPENING IN MARCH. Or at least have the spirit of Irish-ness.

Monday, February 1, 2010

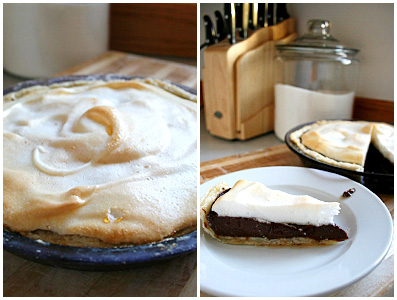
Chocolate and failure

You know, when I started this blog, it was not to be Niki's Baking Triumphs or anything. It was meant to chronicle the ups and downs, the successes and failures, of my baking adventures. I guess I lost sight of that, only wanting to publish my wins and sweep the failures under the rug. I got the impression that people reading might be taking my posts as an endorsement of the recipes I attempted instead of reading through and discovering I found it lacking or ho-hum.


I would be lying if I said I hadn't baked since those little pumpkin pies, way back in October. I've baked plenty. The holidays always bring out the excitement in me so I made my annual peanut butter blossoms, sweet potatoes for Thanksgiving and a bread pudding for my dad visiting. So baking was going on, I simply didn't have the time (or natural lighting of daylight to take pictures thanks to living in this eternal night wasteland called Alaska; DEAR MIDNIGHT SUN SUMMER, WHERE ARE YOU). But I digress. There's been baking but no posting. Which brings me to now.


I got another idea in my head that I couldn't shake. A pie. A chocolate pie. And Julie & Julia was no help; just as Keri Russell's pie maker in Waitress whipped up a dark chocolate pie, so too did Amy Adams in that flick and both immediately inspired me to want one of my own. But this idea was very specific; it was of a dense but soft, almost cheesecake-consistency but not. Something you could cut into but would melt in your mouth with a not too overpowering taste. Almost a flourless chocolate cake but not so strong. Anyway, I went on the hunt.


The first chocolate pie I found was a "grandma's" recipe so I thought, hey, that might work. I don't understand why they're not just called chocolate PUDDING pie because that's what they are. Or is that assumed? I don't know; I've never had someone else's chocolate pie. I imagined something dark and rich and solid and that certainly wasn't. Also, the crust called for oil as the fat and after reading The Best Recipe book, it explains that oil makes for a hard crust because it holds no water that can evaporate during the cooking process and release air that makes crusts usually pocketed and flaky. Yeah, I'm never using oil in pie crust again.


The next I tried was from a friend from work who I often discuss cooking techniques with. She has a wealth of experience and she's an awesome source of help. She gave me a Fudge Pie recipe and I thought, Ooo, that sounds promising! Thick like fudge! I made it and it wasn't quite as thick as fudge. My version was definitely thicker than the pudding pie and it tasted lovely but it was still pretty soft (more like a soft cheese consistency) and not exactly what I was searching for.


Then I started rifling through my mom's old newspaper cut-out recipes and booklets. I found a Fudge Brownie Pie in an old Eagle Brand recipe booklet and figured a thicker, brownie consistency might be just what I'm looking for. Yeah, no. It tasted like a brownie in a completely unnecessary pie crust. Disappointment continued.

Upon talking it over more with my mom, I began to realize I was really in search of one thing: a silk pie. And not a FRENCH silk pie because those seemed to be more airy and light and with whipped cream and such. But a silk pie like the kind we used to get all the time from one business that pulled up stakes and moved out of town: the Alaska Silk Pie Company. Yeah, they're not in Alaska anymore and they charge around $40 to send about a 6" pie here. But their pies are
heavenly. That can't be denied.


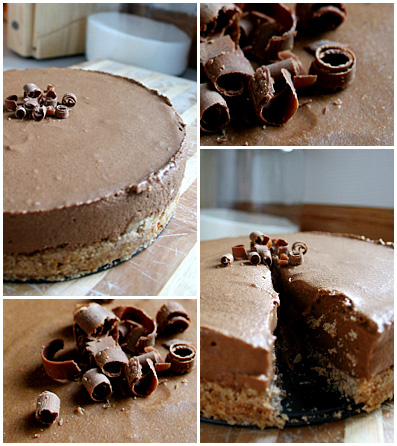
So I went looking for silk pie recipes. The thing about silk pies is they're not baked and raw eggs are used. On their cooking channel special, the creator of the Alaska silk pies said she used 'pasteurized eggs'. Well, the only thing we could come up with was Egg Beaters. (I've since discovered techniques for home pasteurizing that are intriguing...) I found a seemingly simple French Silk pie recipe I figured I could weigh down with less beating and went to using Egg Beaters. It curdled up on me about 2/3 of the way through. I freaked out and called Mom for advice. She said throw it in the blender and that did the trick perfectly: it went back to a nice, smooth consistency. It called for refrigeration but when I uncoiled the spring form pan, it barely held together and it was, unfortunately a true French Silk filling; it was meant for a pie crust and meant to be soft. The other thing that bothers me a little is the fact that Egg Beaters is mostly egg whites which have a higher water content than whole eggs. Did that have something to do with the consistency? Perhaps.


So here I am. Four failures in and nothing to show for the quest. My mom caved and ordered an Alaska silk pie just to have a reminder and it was just as good as we remember. I'm afraid I'm going to have to try again because it was just so lovely.


As for posting, I will attempt to keep up here too; even when my kitchen is a den of failure. This blog is to chronicle ALL my adventures. Especially the losses so I won't make the same mistakes. NEVER FORGET.


Saturday, October 31, 2009

Happy Halloween!

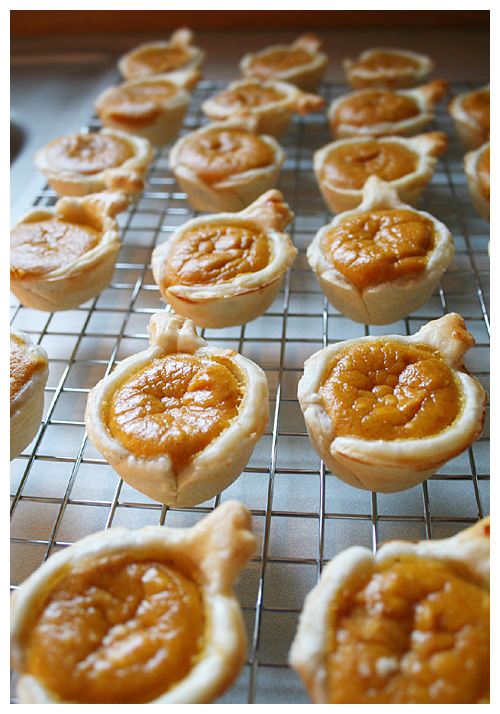
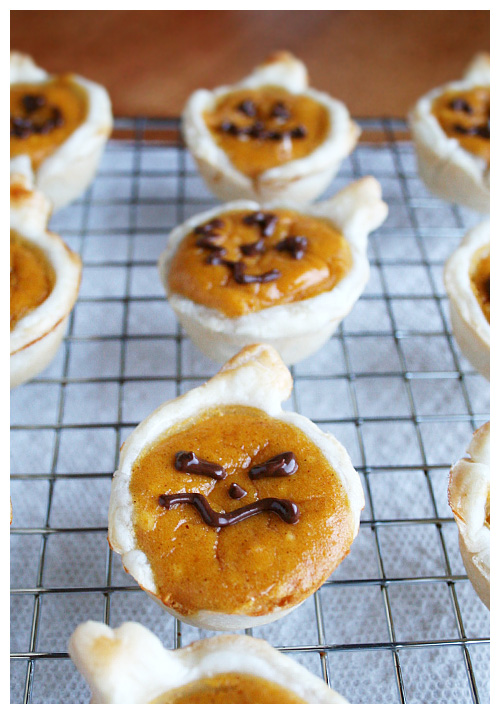
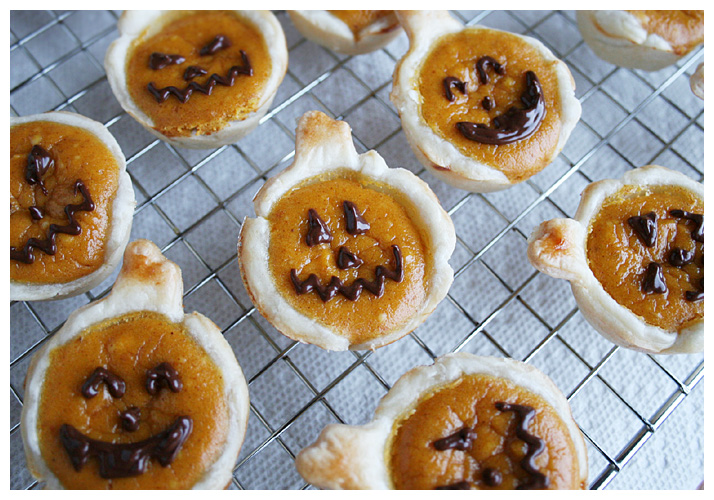
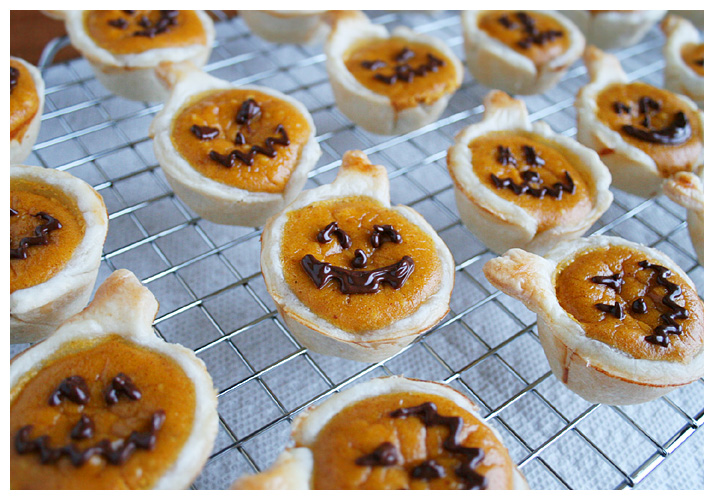
I think these are kind of perfect in every way. Cute, Halloween-y, pumpkin, bite size; the list of their attributes goes on and on! I found them posted on Facebook by a friend and was shocked to find I'd never heard of Bakerella before. Her blog is AMAZING. It's such a treat to find a baker that is both creative and imaginative in their recipes. I want to thank Bakerella for sharing such darling ideas with the world!


I took these little cuties to work for the Halloween bake sale and they went like hot cakes! I was a little sad to see them go so fast, to be honest; I would've made more if I had known two pie crusts (a top and bottom) made only 24 little pies and that they tasted so yummy. And 24 seemed like a lot until I took them in and they disappeared! Needless to say, they were well received!

This is a definite keeper recipe!!


MINI PUMPKIN PIES
Source: Bakerella

2 refrigerated ready-to roll pie crusts

8 oz. cream cheese, room temperature
1/2 cup sugar
1 cup canned pumpkin
2 eggs + 1 egg white
1 teaspoon vanilla
1 teaspoon pumpkin pie spice
Pumpkin-shaped cookie cutter

Optional
1/2 cup chocolate morsels
vegetable oil
re-sealable plastic bags

Preheat oven to 350 degrees.

Use cookie cutter to cut 12 pumpkin shapes from each pie crust. You will need to roll the dough thinner than it comes out of the box.

Press dough shapes into a 24 cup mini muffin tray. (Make 12 at a time, alternating cups to make sure pie crusts don’t overlap each other.)

Brush egg whites from one egg to the top edges of each pie. Mix cream cheese, sugar, canned pumpkin, remaining 2 eggs, vanilla and pumpkin pie spice together until thoroughly combined. Spoon mixture into each pumpkin-shaped pie crust. Bake for 12-15 minutes.

Remove pies to cool and repeat with second pie crust. Place the muffin tray in the freezer to cool it quickly for re-use.

Makes 24 pies. Keep refrigerated.


To decorate, melt chocolate in a heat-proof bowl in the microwave on medium. Heat in 30 second intervals, stirring in between until melted. Add a little vegetable oil to make the chocolate more fluid. Transfer to a re-sealable plastic bag and cut the corner off. Drizzle or draw faces on pies.


Thursday, October 29, 2009

Boo, ghosts. Boo.


Halloween is, by far, my favorite holiday. I'm not sure why because I've never been big on costumes or being scared at haunted houses or even trick-or-treating. But I guess it's fall and cute/spooky treats and decorations. Pumpkins were sent from Jesus as the greatest food stuff known to man. This is not a pumpkin entry; that's coming up next.

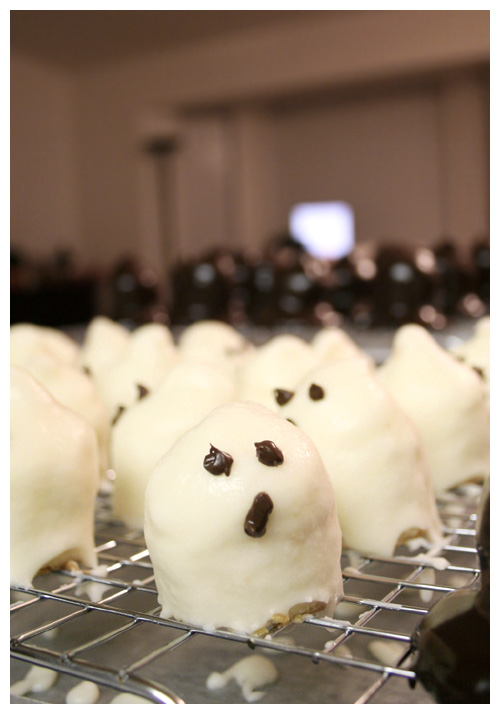
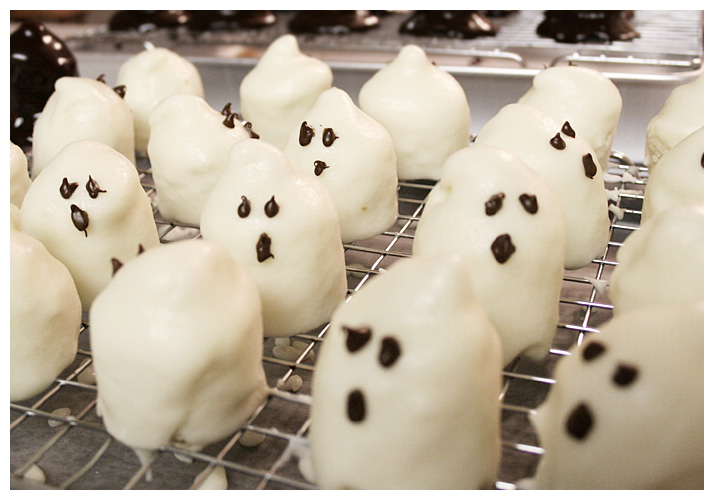
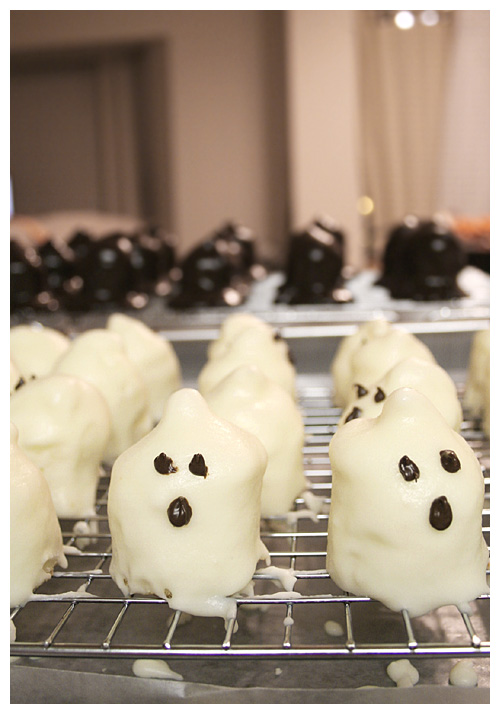
THIS is a Halloween cake entry because I seem to have those every other year. My best friend has a fall baby on the way (due late November) and she loves Halloween just as much and so decided the baby shower would be a perfect opportunity to have the best of both worlds. Hallo-baby party-shower! I'd seen these petits fours on Martha Stewart last year and almost died of the cute. I HAD to make them. But the holiday rolled around and went and I missed the chance. When this shower came up, I knew it would be the perfect occasion.

The thing about this blog I think I've found most fulfilling is the ability to go through a recipe, experience the process, and then post my reactions, good and bad, and try to help others not make the same mistakes. Or, in this case, say flat out: I will not make this recipe again. Don't get me wrong; another baker might look at it and decide it'll be worth the trouble. I can only say that from my standpoint, it's not.

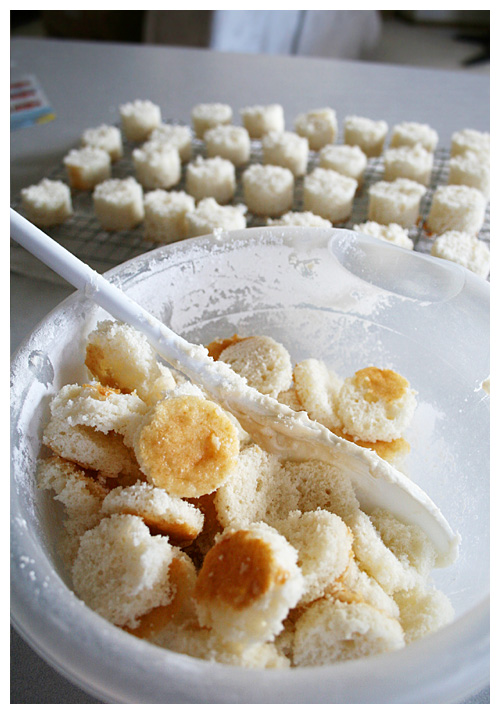
I devised a few shortcuts from the word go that I thought would help me out. I'd bake the cake and freeze it so a hard (and not pillowy soft) cake would cut through easier when using the small biscuit round cutter. Yeah, no. Turns out, the cold cake stuck to the metal cutter and subsequently couldn't cut the third and fourth rounds neatly at all. There was much cleaning, cutting, cleaning, cutting.


I then saw that the pan made the cake too tall for the stumpy little ghosts. I had to go through and cut all the tops off the cylinders although this did provide me with a fun little sampler disk of cake. Mmm.


And that's another thing: this recipe WASTES so much cake. There's just something in me that cringes at having leftover bits with nothing to do with. I froze the trimmings and have yet to decide their fate.


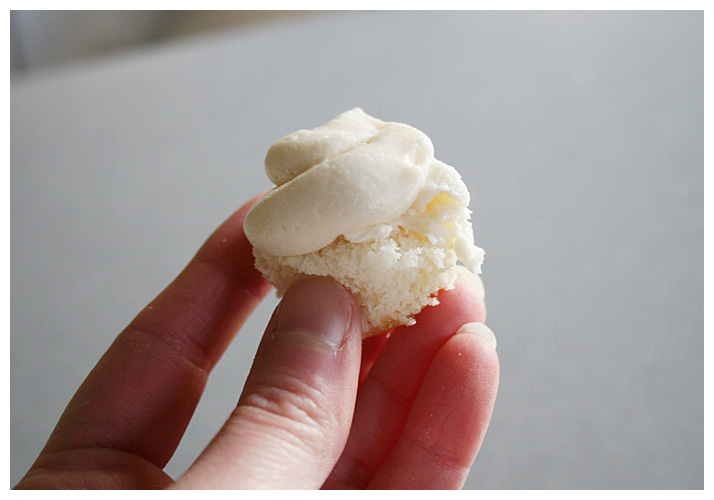
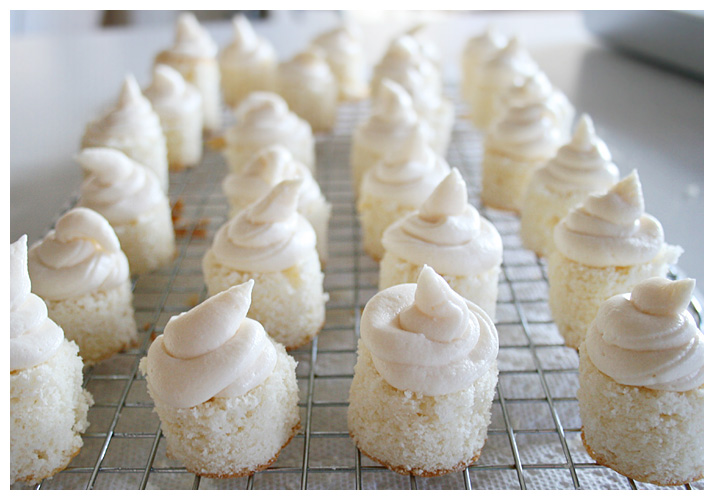
So I piped the little cones of buttercream on top and froze that as well. There's always an issue of exposed cake drying out so I had to do a quick freeze for the frosting to set up then went back and lightly covered a hollow cake pan with plastic wrap so only the tops were touching. Froze them again so I could glaze the day of the shower.


Now. The glaze. Perhaps a more experienced petits-fours-making-person would've thinned it out further but there were two issues: #1. I didn't know if a thinner glaze would set up or if it would remain too liquid, and #2. Would a thinner glaze show the imperfections of the cake/frosting instead of being a smooth, ghosty outside? I don't know the answer to either still because I was too chicken to try thinning the glaze. As it is, it's kind of thick and VERY sweet. The ghosts came out okay but not great. The witch hats, however, were a small disaster. The chocolate "glaze" is nothing more than a ganache that completely smothers the tiny round of delicate cake. With the buttercream cone on top of that, you've got a giant helping of chocolate and frosting and not much else. I wanted to throw them away but, again, felt uneasy wasting food. They were an unadulterated failure, though.

One last thing: the chocolate piping. I wish I'd read Bakerella's notes on piping chocolate for faces in which she instructs to add a little vegetable oil to make the substance more fluid because MARTHA sure didn't. So, thanks to Martha Stewart, the chocolate was too thick, hard to manage and came out looking junky. Bakerella's, on the other hand, came out looking great (that's the pumpkin coming up next). Thanks for nothing, Martha!

The guests at the party were extremely nice and said they really liked the little ghosts but I was disappointed. I will absolutely never make these again but I'm glad I went through the experience and could pass it on to you guys. Attempt at your own risk!


GHOULISH PETITS FOURS
Martha Stewart

For witch hats, make petits fours through step two. Then create a brim using a dab of icing: Affix each petit four to a 2-to-2 1/2-inch chocolate wafer cookie. Proceed to step three, coating with Chocolate Glaze instead of Butter Glaze. In lieu of step four, wrap one or two pieces of licorice lace around the base of the hat immediately after glazing.


Makes about 40
White Sheet Cake
Confectioners' Sugar Icing
Butter Glaze
4 ounces semisweet chocolate, for eyes and mouth


Using a 1 1/2-inch cookie cutter, cut out circles from cake. Brush off any crumbs with a pastry brush.

Fit a pastry bag with a plastic coupler, and top cake rounds with icing in a ghost or hat shape, about 1 inch high.

Place a wire rack over a rimmed baking sheet; set aside. Set an iced cake round on a fork; hold over bowl of glaze. Using a large spoon, drizzle glaze evenly over cake and icing until completely covered. Transfer to wire rack. Repeat with remaining rounds. Let set, about 5 minutes.

Place chocolate in a heatproof bowl microwave at 50% power, stirring chocolate every 30 seconds until melted. Add small amount of vegetable oil to make more fluid. Transfer to a disposable pastry bag or resealable plastic bag; snip off tip with scissors. Pipe eyes and a mouth onto ghosts.


WHITE SHEET CAKE

Makes one 12-by-17-inch cake

1 cup (2 sticks) plus 2 tablespoons unsalted butter, room temperature, plus more for baking sheet and wire rack
4 1/2 cups sifted cake flour (not self-rising), plus more for baking sheet
2 tablespoons baking powder
3/4 teaspoon salt
1 1/2 cups milk
1 1/2 tablespoons pure vanilla extract
2 1/4 cups sugar
7 large egg whites

Preheat oven to 350 degrees. Butter a 12-by-17-by-1-inch rimmed baking sheet. Line bottom with parchment paper. Butter parchment, and dust with flour, tapping off any excess. Set sheet aside.

Into a medium bowl, sift together flour, baking powder, and salt; set aside. In a measuring cup, combine milk and vanilla; set aside. In the bowl of an electric mixer fitted with the paddle attachment, cream butter until very smooth. With mixer on medium speed, add sugar in a slow, steady stream; beat until mixture is light and fluffy, about 3 minutes.

Reduce speed to low. Add reserved flour mixture in three batches, alternating with reserved milk mixture, and starting and ending with flour. Mix until just combined; do not overmix. Set aside.

In a clean bowl, beat egg whites until stiff but do not let dry peaks form. Fold one-third of the egg whites into batter to lighten, then gently fold in remaining whites in two batches.

Scrape batter into prepared sheet; smooth top with an offset spatula. Bake in oven until cake is springy to the touch and a cake tester inserted in the center comes out clean, about 30 minutes. Transfer to a wire rack, and let cool 15 minutes. Loosen sides of cake with a small metal spatula or paring knife; invert onto a buttered wire rack. Peel off parchment. To prevent splitting, reinvert cake so top is facing up. Let cake cool completely.


CONFECTIONERS' SUGAR ICING
(I would HALVE this; it made WAY too much)

Makes about 7 cups

1 1/2 cups unsalted butter (3 sticks), room temperature
3 pounds confectioners' sugar
3/4 teaspoon salt
3 tablespoons pure vanilla extract
3/4 cup milk, plus more if needed


In the bowl of an electric mixer fitted with the paddle attachment, beat together the butter and sugar until well combined. Add salt, vanilla, and milk; beat until icing is smooth and creamy. The icing should be thick enough to pipe and hold its shape. If icing seems too thick, add 1 tablespoon milk at a time until proper consistency is reached. Use immediately, or refrigerate in an airtight container up to 2 days. If refrigerating, bring icing to room temperature before using, and lightly beat until creamy if necessary.


BUTTER GLAZE
Makes about 1 1/2 cups

2 1/2 cups sifted confectioners' sugar
1/2 cup (1 stick) unsalted butter
5 tablespoons milk


Place sugar in a medium bowl, and set aside. In a small saucepan, melt butter over medium heat. Immediately pour the melted butter into the bowl with the sugar. Add the milk, and whisk until mixture is smooth. Cover bowl, and store at room temperature until ready to use.


CHOCOLATE GLAZE (for witch hats)
Makes 1 1/2 cups

6 ounces best-quality bittersweet or semisweet chocolate
1 cup heavy cream


Chop the chocolate into small pieces, and place in a medium bowl. In a small saucepan, heat cream over medium-high heat until just simmering, and pour it over the chocolate. Let mixture stand 5 minutes, then stir until smooth. Let stand at room temperature about 10 minutes before using.


Monday, October 12, 2009

Pumpkin Goes On


My life can go on: I found pumpkin. Correction: my mom found pumpkin. The not-that-long story is, I went in search of canned pumpkin to replenish my supply for the fall after making the pumpkin brownies. The first grocery store had an empty shelf where it SHOULD have been. I thought it was weird but whatever; I’d just go to another store. A week or so later, I hit another and WHAT- another empty shelf!? I mention the strange phenom to my mom who then discovers there’s word (on the web) that there’s a pumpkin shortage this year. I freak out a little and proceed to spread the word to family and friends to fall on a can of pumpkin like it’s the end of times and it’s the last food on the planet. Hit two more stores on separate sides of town and BOTH are empty shelves. Hope fades.

Then Mom calls Sunday afternoon from Wal-Mart of all places with the news. There’s tons! Fall/Halloween has been saved! I immediately turned on my oven to preheat, ready to use the only can I had in my cupboard RIGHT AWAY.


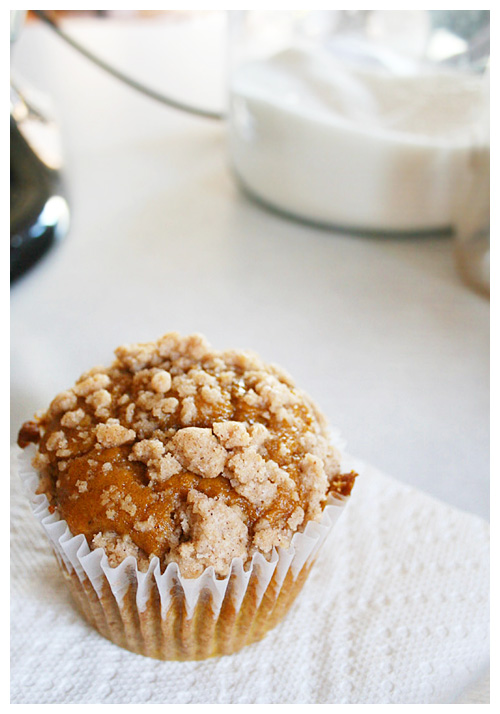
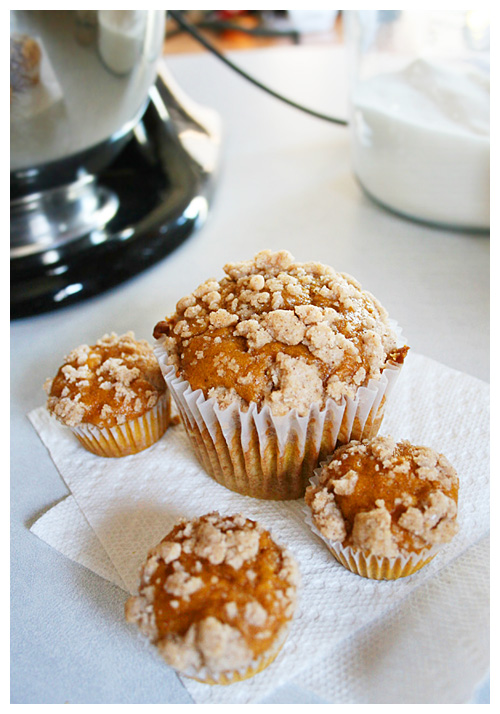
I had a pumpkin Costco muffin a few weeks ago and it was bliss. But Costco muffins are kind of amazing, aren’t they. I’ve been wanting pumpkin muffins ever since. This recipe popped up on a few other blogs and with their ringing endorsement, I was eager to try too. The original recipe didn’t have a crumb topping like Costco’s muffin and to be honest, that’s one of my favorite parts. So I found a separate crumb topping recipe (for blueberry muffins), added a little cinnamon to it and voila! Pumpkin muffins with crumb topping.

Oh and one other thing: the blog I found the recipe on accidentally put a whole can of pumpkin in the batter when it calls for only 8 ounces (the can is 15 ounces, so, almost double). She raved that it was still good and moist so I thought, what the Hell, man; I’m craving the pumpkin and more can only make it better! They came out really delicious and moist! I did have to add some baking time (around 35-38 minutes) but still.

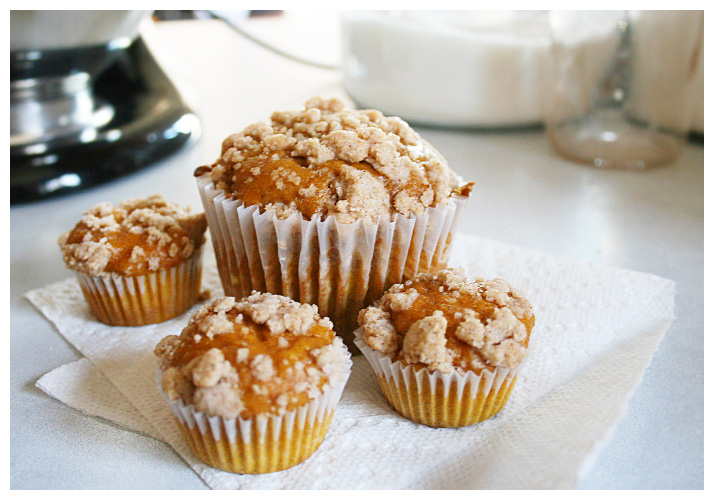
This made 6 large muffin cups then had a little left over that perfectly I filled a mini muffin pan. I love having little two-bite pieces of muffin around. This is definitely something I’d make again!


PUMPKIN MUFFINS WITH CRUMB TOPPING
Adapted from Gourmet/The American Club

Makes 6 large muffins / 1 dozen small muffins

1 1/2 cups all-purpose flour
1 tsp baking powder
1 can solid-pack pumpkin (15 ounces)
1/3 cup vegetable oil
2 large eggs
1 tsp pumpkin pie spice
1 1/4 cups plus 1 Tbsp sugar
1/2 tsp baking soda
1/2 tsp salt
1 tsp cinnamon

CRUMB TOPPING

1 cup all-purpose flour
3 Tbsp light brown sugar
2 Tbsp granulated sugar
1 tsp baking powder
1 tsp cinnamon
Pinch of salt
6 tablespoons unsalted butter, melted


Put oven rack in middle position and preheat oven to 350F. Put liners in muffin cups.

Whisk together flour and baking powder in a small bowl.

Whisk together pumpkin, oil, eggs, pumpkin pie spice, 1 1/4 cups sugar, baking soda, and salt in a large bowl until smooth, then whisk in flour mixture until just combined.

For crumb topping, in a medium bowl, combine the flour with the brown sugar, granulated sugar, baking powder, cinnamon and salt. Stir in the melted butter, then pinch the mixture until it forms pea-size clumps.

Divide batter among muffin cups (each should be about 3/4 full), then sprinkle tops with crumb topping mixture. Bake until puffed and golden brown and a wooden pick or skewer inserted into center of a muffin comes out clean, 30 to 35 minutes.

Cool in pan on a rack 5 minutes, then transfer muffins from pan to rack and cool to warm or room temperature.