Tuesday, May 27, 2008

You scream, I scream.

I'm still here! I haven't disappeared! I'm in the middle of moving to a new house so you'll have to excuse my bouts of absence. It's kind of hard to cook when you can't find measuring cups... But I finally got an ice cream maker for my birthday and I couldn't be more excited. So many recipes to try! I can make my own ice cream?! SCORE. This is my very first and it was a total success! A little explanation first, though:

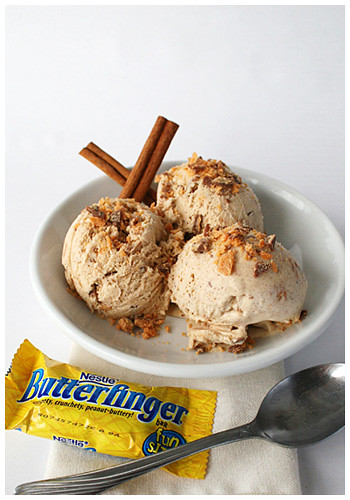
You all know those ice cream chains that mix up toppings and stuff into the ice cream in front of you. Cold Stone is probably the most widespread but in Houston, Marble Slab came first. They have many amazing flavors but my favorite is the Vanilla Cinnamon. One day, my mom decided to mix in a never-fails ingredient: Butterfinger. And the rest is history. Or, you know; my favorite ice cream flavor of all time. Since I'm no longer in Houston and have no access to Marble Slab, I knew I would have to attempt cinnamon ice cream with Butterfinger mixed in.

Now, ice cream making is intense; this entire process took 3 DAYS. It'll take two next time but this time I had to freeze the bowl overnight, make the ice cream and chill the liquid form in the fridge overnight then brew it up in the machine the next morning then freeze it AGAIN overnight. When it first comes out of the machine, it's like soft serve and that's just not real ice cream to me. But when I took it out today? Perfect!

I found a few cinnamon recipes but tried one that was highly rated at All Recipes first. It doesn't look like Marble Slab's but it sure is cinnamony!
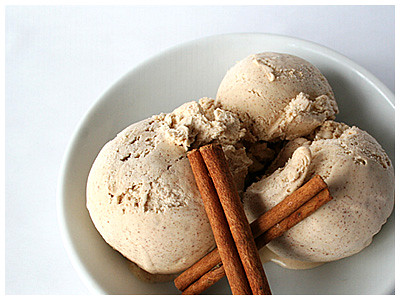
It came out smooth and creamy and so so good. I split the batch and kept half plain then I went ahead and mixed my Butterfinger in the rest!!
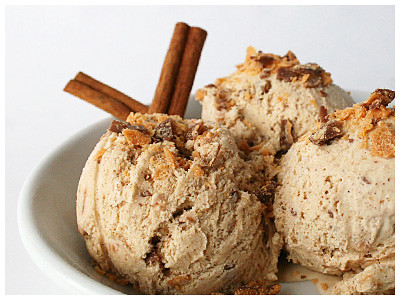
oh good God. It's SO good. I don't know what it is (cinnamon and Butterfinger??) but it goes so well together. VERY sweet but so yummy. I still can't believe I made ice cream! It looks and tastes so real!! I'm going to include my modified recipe but just cut out the crushed Butterfinger if you want straight cinnamon ice cream (which is delicious on it's own). It would go wonderfully with a dense chocolate cake...


CINNAMON ICE CREAM WITH BUTTERFINGER
Adapted from Elizabeth's Cinnamon Ice Cream

  • 1 cup white sugar
  • 1 1/2 cups half-and-half cream
  • 2 eggs, beaten
  • 1 cup heavy cream
  • 1 teaspoon vanilla extract
  • 2 teaspoons ground cinnamon
  • 1/2 cup crushed Butterfinger (or to your liking)

1. In a saucepan over medium-low heat, stir together the sugar and half-and-half. When the mixture begins to simmer, remove from heat, and whisk half of the mixture into the eggs. Whisk quickly so that the eggs do not scramble. Pour the egg mixture back into the saucepan, and stir in the heavy cream. Continue cooking over medium-low heat, stirring constantly, until the mixture is thick enough to coat the back of a metal spoon. Remove from heat, and whisk in vanilla and cinnamon. Cool in refrigerator overnight.


2. Pour cooled mixture into an ice cream maker, and freeze according to the manufacturer's instructions.


3. At end of mixing process, add crushed Butterfinger and let stir until fully combined. Remove from ice cream maker and store in air tight container in freezer overnight (to allow ice cream to fully refreeze).

Sunday, April 27, 2008

Birthday de Moi!

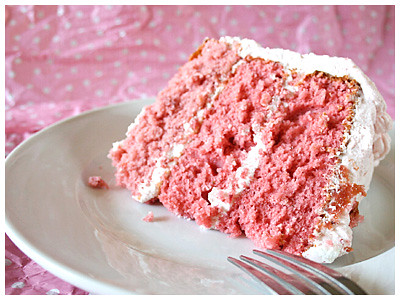
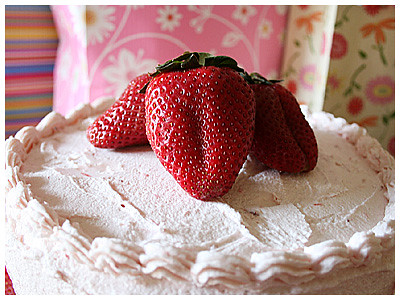
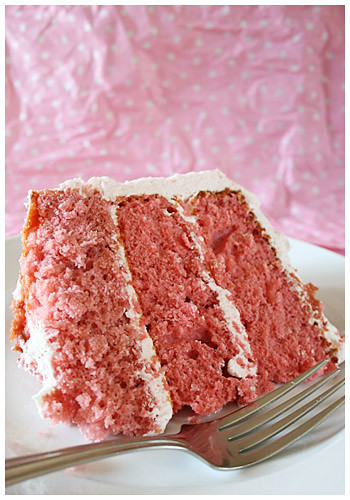
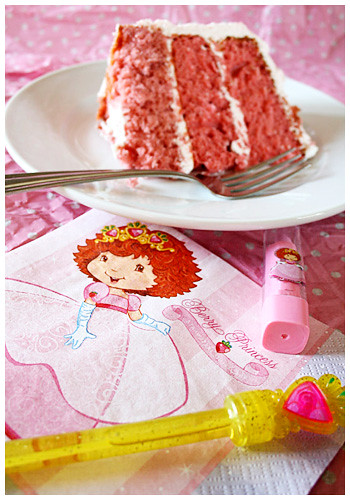
I have an obsession with strawberries, it would seem, since they make me unreasonably happy. I'm sure it stems from childhood stuff (see user pic of Strawberry Shortcake birthday) but I don't care. I asked my mom for a strawberry cake for my birthday last week and this beautiful creation is what she produced. I didn't make it myself so I could exclude it from my food blog but I can't keep the pretty away. PINK!


STRAWBERRY CAKE
  • 1 package white cake mix
  • 1 package (3 ounces) strawberry-flavored gelatin powder
  • 3/4 cup vegetable oil
  • 4 eggs, lightly beaten
  • 1/4 cup water
  • 3/4 cup mashed strawberries or sweetened frozen strawberries

Combine cake mix and gelatin powder in a large bowl. Beat in oil, eggs, water, and strawberries. Pour into 2 9-inch round greased and floured cake pans. Bake in a 350 degree oven for 30 minutes, until a toothpick inserted in center comes out clean.

Cool completely before icing.


STRAWBERRY FROSTING

  • 1/4 cup butter
  • dash of salt
  • 1/4 cup shortening
  • 1 pound confectioners' sugar
  • 1/4 cup mashed strawberries or remaining sweetened frozen strawberries (drain juice)

Beat the butter/shortening and confectioners' sugar together until smooth and fluffy. Add strawberries. Spread between cake layers, then frost top and sides.

Saturday, March 22, 2008

Easter goodness

I've been neglectful of the blog, it's true, but I have decent excuses that are too boring to go into. Suffice it to say, there were reasons. I return with cutesyness I dare you to refute!

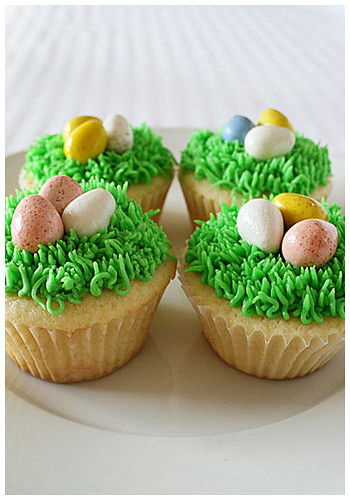
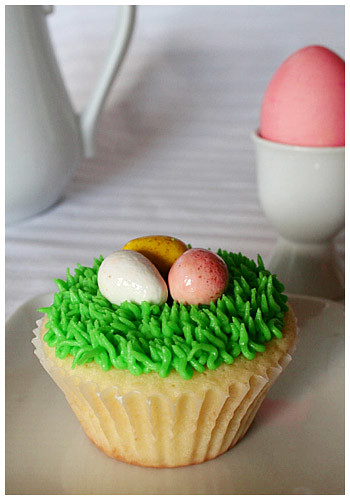
I saw this eggs-in-the-grass-frosting decoration and knew I had to try it, if for nothing else than to just line them all up and see a field of greenery. I can't help it; I'm a Taurus and we're irrationally drawn to Earthy tones and, oddly, pastels.

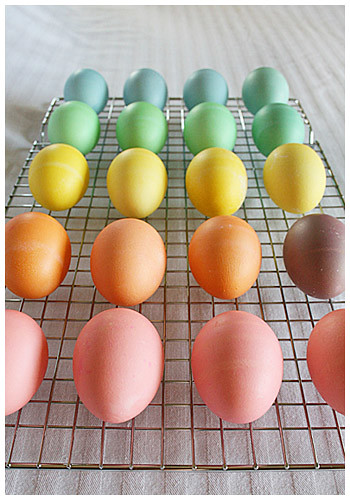
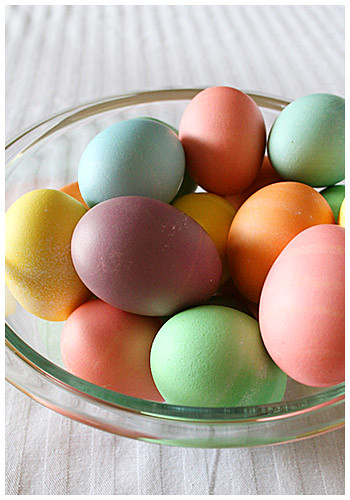
I also dyed eggs for the first time in YEARS and while exact colors were an exercise in futility (see the lone "purple" atrocity), I like how they came out because they're PASTELS. I have so much love for Easter simply because it's so damn pretty.

But back to the cupcakes. I tried a new recipe, Billy's Vanilla Vanilla Cupcakes from Billy's Bakery in NYC. They're definitely very vanilla-y and they're good but I'm not sure I'd make it a staple. The cake is tender and, overall, a great little cake but I'm a traditionalist; you're kind of hit over the head with vanilla in these little things. They taste like sugar cookies: sweet and vanilla.

The frosting is also extremely sweet but with this nice, trim grass, it's not a sweet-overload problem for me. I used Wilton's Leaf Green color, the #233 tip for the grass and Cadbury Mini Eggs for the decoration. Et voila! Happy Easter to all!
BILLY'S VANILLA, VANILLA CUPCAKES
Source: Billy's Bakery in New York City via Martha Stewart

Makes about 30 cupcakes

  • 1 3/4 cups cake flour, not self-rising
  • 1 1/4 cups unbleached all-purpose flour
  • 2 cups sugar
  • 1 tablespoon baking powder
  • 3/4 teaspoon salt
  • 1 cup (2 sticks) unsalted butter, cut into 1-inch cubes and softened
  • 4 large eggs, room temperature
  • 1 cup whole milk, room temperature
  • 1 teaspoon pure vanilla extract

1. Preheat oven to 325 degrees. Line cupcake pans with paper liners; set aside. In the bowl of an electric mixer fitted with the paddle attachment, combine flours, sugar, baking powder, and salt; mix on low speed until combined. Add butter, mixing until just coated with flour.

2. In a large glass measuring cup, whisk together eggs, milk, and vanilla. With mixer on medium speed, add wet ingredients in 3 parts, scraping down sides of bowl before each addition; beat until ingredients are incorporated but do not overbeat.

3. Divide batter evenly among liners, filling about 2/3 full. Bake, rotating pan halfway through, until a cake tester inserted in the center comes out clean, 17 to 20 minutes.

4. Transfer to a wire rack to cool completely. Repeat process with remaining batter. Once cupcakes have cooled, use a small offset spatula to frost tops of each cupcake. Decorate with sprinkles, if desired. Serve at room temperature.


BILLY'S VANILLA BUTTERCREAM
Makes enough for 30 cupcakes

  • 1 cup (2 sticks) unsalted butter, room temperature
  • 6 to 8 cups confectioners' sugar
  • 1/2 cup milk
  • 1 teaspoon pure vanilla extract

1. In the bowl of an electric mixer fitted with the paddle attachment, cream butter until smooth and creamy, 2 to 3 minutes. With mixer on low speed, add 6 cups sugar, milk, and vanilla; mix until light and fluffy. If necessary, gradually add remaining 2 cups sugar to reach desired consistency.

Thursday, February 14, 2008

Double Double Valentine's Love

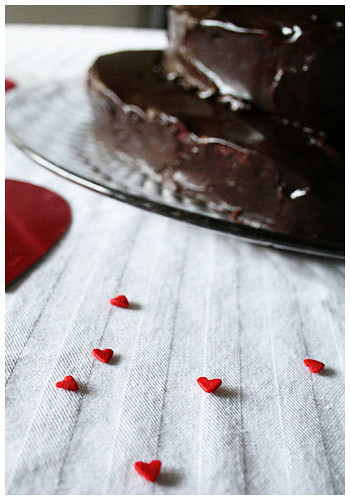
It's kind of impossible to think of Valentine's Day and not think of chocolate. Even The Food Network gets in on the action and makes a week of it. So I wanted some chocolatey goodness and boy did I find it.

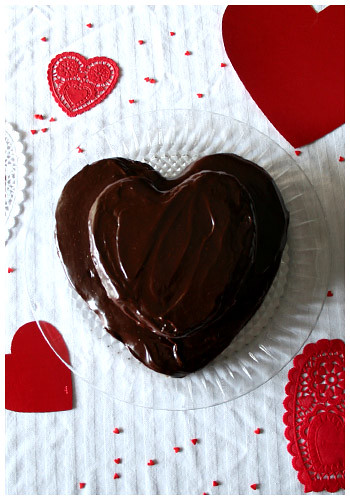
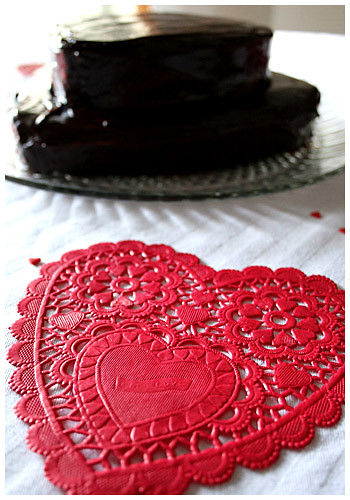
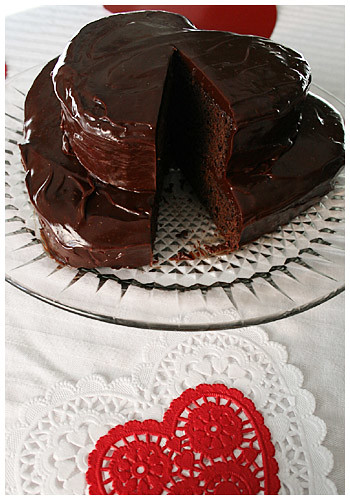
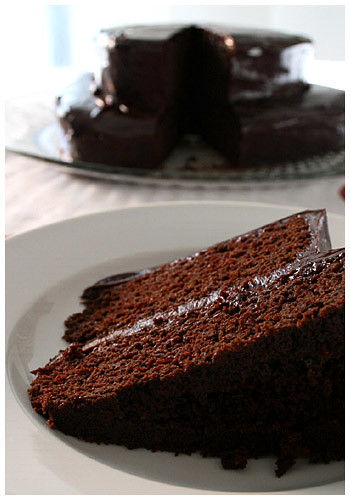
I got the recipe for this Double Chocolate Cake from Epicurious and was immediately intrigued by the loads of positive feedback and comments. It is, in fact, very rich and moist and worthy of the praise. I used different pans for the holiday, of course, so the only thing I would say if you diverge from the 10-inch pans the recipe recommends is,
the batter expands. It's a wet batter so do not overfill the pan (1/2 to 3/4 if you're feeling lucky). TRUST ME.

But it came out very good and oohh so in need of a big, cold glass of milk right along with it, it's so chocolatey! Happy Valentine's Day, everyone!


DOUBLE CHOCOLATE LAYER CAKE
Source: Gourmet Magazine, March 1999


For cake layers
  • 3 ounces fine-quality semisweet chocolate such as Callebaut
  • 1 1/2 cups hot brewed coffee
  • 3 cups sugar
  • 2 1/2 cups all-purpose flour
  • 1 1/2 cups unsweetened cocoa powder (not Dutch process)
  • 2 teaspoons baking soda
  • 3/4 teaspoon baking powder
  • 1 1/4 teaspoons salt
  • 3 large eggs
  • 3/4 cup vegetable oil
  • 1 1/2 cups well-shaken buttermilk
  • 3/4 teaspoon vanilla

For ganache frosting
  • 1 pound fine-quality semisweet chocolate such as Callebaut
  • 1 cup heavy cream
  • 2 tablespoons sugar
  • 2 tablespoons light corn syrup
  • 1/2 stick (1/4 cup) unsalted butter

Special equipment
two 10- by 2-inch round cake pans


Make cake layers:
Preheat oven to 300°F. and grease pans. Line bottoms with rounds of wax paper and grease paper.

Finely chop chocolate and in a bowl combine with hot coffee. Let mixture stand, stirring occasionally, until chocolate is completely melted and mixture is smooth.

Into a large bowl sift together sugar, flour, cocoa powder, baking soda, baking powder, and salt. In another large bowl with an electric mixer beat eggs until thickened slightly and lemon colored (about 3 minutes with a standing mixer or 5 minutes with a hand-held mixer). Slowly add oil, buttermilk, vanilla, and melted chocolate mixture to eggs, beating until combined well. Add sugar mixture and beat on medium speed until just combined well. Divide batter between pans and bake in middle of oven until a tester inserted in center comes out clean, 1 hour to 1 hour and 10 minutes.

Cool layers completely in pans on racks. Run a thin knife around edges of pans and invert layers onto racks. Carefully remove wax paper and cool layers completely. Cake layers may be made 1 day ahead and kept, wrapped well in plastic wrap, at room temperature.


Make frosting:
Finely chop chocolate. In a 1 1/2- to 2-quart saucepan bring cream, sugar, and corn syrup to a boil over moderately low heat, whisking until sugar is dissolved. Remove pan from heat and add chocolate, whisking until chocolate is melted. Cut butter into pieces and add to frosting, whisking until smooth.

Transfer frosting to a bowl and cool, stirring occasionally, until spreadable (depending on chocolate used, it may be necessary to chill frosting to spreadable consistency).

Spread frosting between cake layers and over top and sides. Cake keeps, covered and chilled, 3 days. Bring cake to room temperature before serving.

Wednesday, January 30, 2008

Everyone likes Brownies

A woman at my work, who I'm confident in saying is hardly more than a casual acquaintance, loaned me an entire TV series on DVD this past month. Now, I take my DVDs very seriously and when you loan them to someone - even family and friends - sometimes you don't see them again for many many months (brother! oh, wait, I still have his Transformers DVDs...)

ANYWAY.
I was terribly grateful she put that trust in me and I rushed through about 65 hours of TV in three weeks flat. I wanted to make her a little thank you goodie and figured brownies were pretty universally liked, yes?


I, foolishly, tried the top brownie recipe from All Recipes.com first.
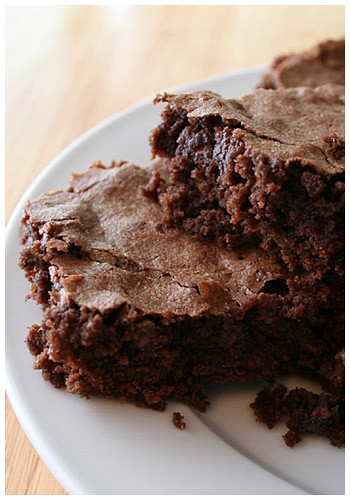
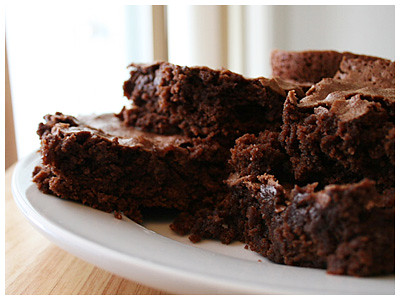
And it was all right but nothing to write home about and certainly not something I'd give as a gift. It used cocoa as opposed to melted chocolate. Then I tried the Best Recipe's Basic Brownie and, once again, they came through. Their brownie was moist and rich, fluffy but not airy. It falls apart with softness but isn't gooey (although I love gooey but that's a personal preference; these were supposed to be universal).

If I were making them again for myself, I'd add some walnuts and maybe even caramel (mmm, extra gooey!) but otherwise, they were perfect. A definite keeper!

BASIC BROWNIES
Source: The Best Recipe

To melt the chocolate and butter in a microwave oven, microwave chocolate alone at 50 percent power for 2 minutes. Stir chocolate, add butter, and continue microwaving at 50 percent for another 2 minutes, stopping to stir the mixture after 1 minute. If chocolate is not entirely melted, microwave an additional 30 seconds at 50 percent power. Make sure to cool the melted chocolate and butter for about 10 minutes - it can be warm to the touch but not hot. Batter can be doubled and divided evenly between two 8-inch pans or poured into one 13 x 9-inch pan. If using one large pan, bake for about 26 minutes.
  • 8 tablespoons (1 stick) unsalted butter
  • 2 ounces unsweetened chocolate
  • 2/3 cup cake flour
  • 1/2 teaspoon baking powder
  • 1/4 teaspoon salt
  • 1 cup sugar
  • 2 large eggs
  • 1 teaspoon vanilla extract
  • (optional) 1/2 cup chopped nuts
1. Adjust oven rack to middle position and heat oven to 350 degrees. In medium, heatproof bowl set over a pan of almost simmering water, melt chocolate and butter, stirring occasionally until mixture is smooth. (Alternatively, melt chocolate and butter in microwave oven. See instructions above.) Set mixture aside to cool.

2. Whisk flour, baking powder, and salt together in small bowl; set aside.

3. Whisk sugar into cooled chocolate mixture. Whisk in eggs and vanilla, then fold in flour mixture (and nuts if using) until just combined.

4. Pour batter into greased 8-inch-square baking dish; bake until toothpick inserted halfway between center and edge of pan comes out with a few fudgy crumbs, about 20 minutes. If batter coats toothpick, return pan to oven and bake 2 to 4 minutes more. Cool brownies completely in pan set on wire rack. Cut into squares and serve. (Pan can be wrapped in plastic, then foil, for up to 2 days. To preserve moistness, cut and remove brownies only as needed.)

Monday, January 28, 2008

Flan, the Finicky

In my search for that perfectly textured vanilla-y, cake-y-but-not-cake dessert, I've kind of wandered into custard-y territory. When all's said and done, I think I really craved a light bread pudding (is that possible?) but time's run out and I will soon succumb to Chocolate February in all it's Valentine's glory.

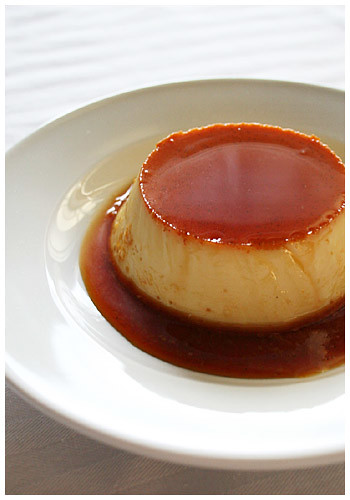
With one last vanilla hurrah, however, I tried a flan for the first time. Now, my mom's been making this for years during the holidays and she's perfected it however I hit a few bumps on the way but that's why I'm here: to warn you of where you might go wrong.

First, the sugar you melt to pour into the bottom of the custard cups for that pretty syrup that runs down everywhere when upturned. It has to be done on medium and SLOWLY. The moment it's liquefied, take it off the heat and pour away. Do not let it burn! I hesitated to make sure it got that one bubbling all over and it was too long. Side note, DO NOT try to taste it to SEE if it's burnt. This lesson is brought to you by Retarded Niki 101: liquid, scalding sugar = bad on finger and tongue. It tastes like BURNING.

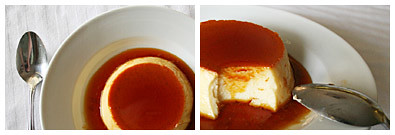
Second, the texture of flan is very important. That's what makes good flan great. It should be completely smooth. If you overcook, it comes out a little chunky and not great. Keep a very close eye on it after 30 minutes (for 6 oz custard cups) and test with a knife often. If you think it's rather close to being done, know that it's going to continue cooking a little in the hot water bath after you take it out.

So. Better to take sugar and custard out of or off the heat than to overcook because they'll ruin if they go over.


FLAN
  • 1 cup sugar
  • 3 eggs plus 3 egg yolks
  • 2 teaspoons vanilla extract
  • 1 can (14-ounce) sweetened condensed milk
  • 1 1/4 cups milk
  • 2 ounces cream cheese, softened to room temperature

Place sugar in small skillet over medium heat and stir while it liquefies. Watch carefully so that it does not burn. Pour the caramel into the bottom of 6 oz custard cups (or 9-inch flan pan or soufflé dish) and, working very quickly, spread it evenly.

Preheat oven to 350 degrees. Place eggs, yolks, vanilla, milks and cream cheese in a blender or food processor and process AT LEAST 5 minutes. Blend to death!

Pour mixture into the cups and place in larger baking pan in the center of the oven. Pour boiling water halfway up the sides of thecups. Bake 30-35 minutes (or 1 hour and 10 minutes for 9-inch pan) or until knife inserted in the center comes out clean. Watch carefully and cover the flan with foil if the top seems to be getting too brown. Remove from oven, cool to room temperature, then cut around the edges and invert onto serving plate.

Serve each piece with some of the caramel syrup.


Monday, January 21, 2008

January for new!

I've been having a hard time deciding on what I was in the mood for in January, the month of new, fresh starts (read: light and healthier) but still, you know. Dead of winter. And I live in Alaska. It looks like this:

I started concocting this elaborate, perfect dessert for the season that I attempted but dare not speak its existence for fear of being smited, it was so awful. Let's just say, the syrup soaked dough balls came out looking like mini jellyfish (that wanted to eat ME).

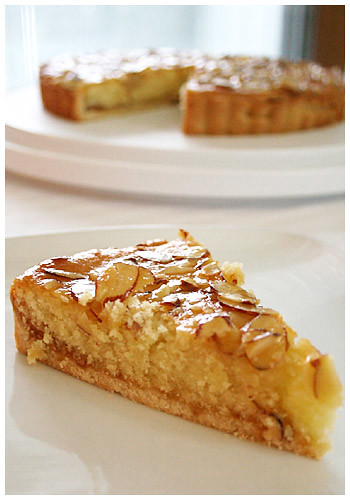
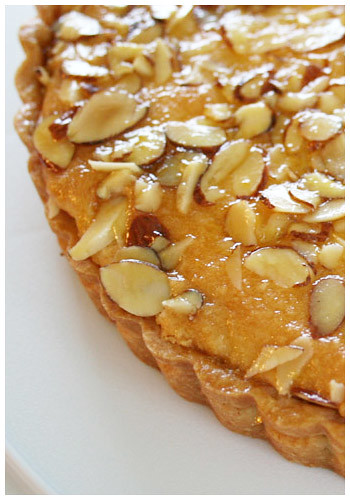
Luckily, I had a backup plan to ALSO try my first tart ever this weekend after I got a food processor for Christmas. I could finally make dough without the debilitating terror of having to touch it (and screw the whole thing up with my lava-fire hands that would melt the butter, then stretch it too much and omg!) It was time consuming (refrigerating the dough a couple times) but I've got a new appreciation for pans that shape stuff prettily (look at the little crinkles! They're perfect!).

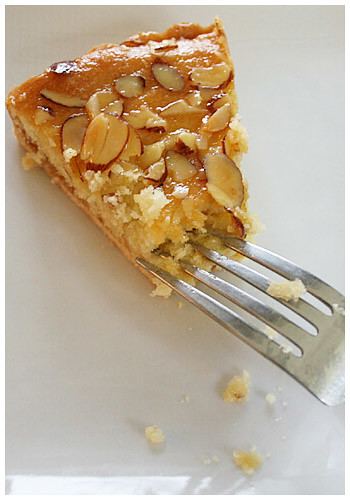
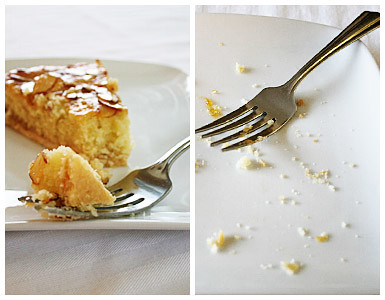
It came out surprisingly good! My confidence in my tart-making abilities is through the roof. w00t!


ITALIAN ALMOND TART
Adapted from Williams-Sonoma Collection Series, Pie & Tart, by Carolyn Beth Weil

TART DOUGH

1 egg yolk
2 Tbs. very cold water
1 tsp. vanilla extract
1 1/4 cups unbleached all-purpose flour
1/3 cup sugar
1/4 tsp. salt
8 Tbs. (1 stick) cold unsalted butter, cut into
1/4-inch cubes


TART FILLING

8 Tbs. (1 stick) unsalted butter, at room
temperature
1/2 lb. almond paste, cut into 1-inch cubes
1/4 cup sugar
2 eggs
1/3 cup unbleached all-purpose flour
1/3 cup apricot jam (or raspberry, plum or cherry)
1/3 cup sliced almonds


GLAZE
1/3 cup apricot jam (or peach)
2 Tbs water
1 tsp. of Almond Extract (or 1 tablespoon Disaronno Amaretto)


In a small bowl, stir together the egg yolk, water and vanilla; set aside.

Stir together the flour, sugar and salt in the medium bowl and put in food processor. Add the butter and pulse processor until the texture resembles coarse cornmeal, with butter pieces no larger than small peas. Add the egg mixture and pulse just until the dough pulls together.

Transfer the dough to a work surface, pat into a ball and flatten into a disk. Wrap in plastic wrap and refrigerate until well chilled, about 30 minutes.

On a lightly floured board, flatten the disk with 6 to 8 gentle taps of the rolling pin. Lift the dough and give it a quarter turn. Lightly dust the top of the dough or the rolling pin with flour as needed, then roll out from center until the dough is about 1⁄8 inch thick. Fold the dough round in half and carefully transfer to a 9 1⁄2-inch tart pan, preferably with a removable bottom. Unfold and ease the round into the pan, without stretching it, and pat it firmly into the bottom and up the sides of the pan. Trim off any excess dough by gently running a rolling pin across the top of the pan. Press the dough into the sides to extend it slightly above the rim to offset any shrinkage during baking.

Refrigerate or freeze the tart shell until firm, about 30 minutes. Meanwhile, position a rack in the lower third of an oven and preheat to 375°F.

Line the pastry shell with lightly buttered aluminum foil or parchment paper and fill with pie weights or raw short-grain rice or beans. Bake for 20 minutes, then lift an edge of the foil. If the dough looks wet, continue to bake, checking every 5 minutes, until the dough is pale gold, for a total baking time of 25 to 30 minutes. Transfer to a wire rack.

Position a rack in the middle of the oven and reduce the heat to 350°F.

In a bowl, using an electric mixer on medium speed or a whisk, beat the butter until smooth. Add the almond paste, one piece at a time, beating until smooth after each addition. While continuing to beat, sprinkle in the sugar. Add the eggs one at a time, beating well after each addition. Stir in the flour.

Spread the jam evenly over the bottom of the partially baked tart shell. Spoon in the almond paste mixture and spread evenly over the jam. Sprinkle the surface evenly with the sliced almonds.

Bake the tart until the filling is golden and the middle is firm to the touch, 35 to 45 minutes.

Heat glaze preserves and water in a 1-quart saucepan over moderately high heat, stirring, until preserves are melted. Remove from heat and force through a fine-mesh sieve into a small bowl, discarding solids. Stir in almond extract.

Brush top of hot tart generously with glaze and cool in pan on rack 15 minutes. Remove side of pan and cool tart completely, about 2 hours.

Serve at room temperature. Makes one 9 1/2-inch tart; serves 8.


Wednesday, December 26, 2007

More Peppermint??

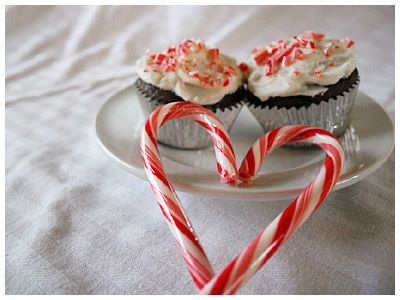
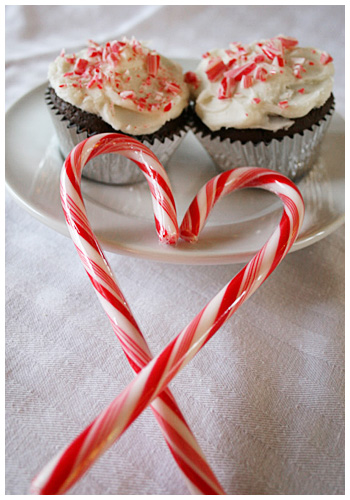
You guys know me; I'm always going to try to find a way to work cupcakes into any season. Christmas was no exception. I found only a few peppermint cake recipes, however, and feared it was because it just plain didn't taste good. Twas not the case!

I tried two different things: one batch with bits of the Peppermint Bark I made earlier sprinkled on the top of the cakes and another without. One thing I've learned is that white chocolate does NOT bake well. It gets all gunky and brown and it's not real chocolate so I don't know what's going on with it. They tasted fine; there was a crunchy-but-not texture to the top. But I'm a traditionalist and I ended up enjoying the plain cake-with-peppermint-icing ones better. It was important to leave the cake unflavored as I used peppermint oil again and it was very crisp and sharp. The icing is flavored and the cake wonderfully takes the edge off so the whole thing goes together well.

Also to note? The peppermint pieces sprinkled on top go all melty and watery the next day so frost and sprinkle at the last minute if possible (OR frost and sprinkle and then freeze). In case you're wondering, I just threw some candy canes in a double bagged baggie and went to smashing with the edge of a can.

CHOCOLATE CUPCAKES
(Adapted from Barefoot Contessa at Home)
  • 12 tablespoons (1 1/2 sticks) unsalted butter, at room temperature
  • 2/3 cup granulated sugar
  • 2/3 cup light brown sugar, packed
  • 2 extra-large eggs, at room temperature
  • 2 teaspoons pure vanilla extract
  • 1 cup buttermilk, shaken, at room temperature
  • 1/2 cup sour cream, at room temperature
  • 2 tablespoons brewed coffee
  • 1 3/4 cups all-purpose flour
  • 1 cup good cocoa powder
  • 1 1/2 teaspoons baking soda
  • 1/2 teaspoon kosher salt

Preheat the oven to 350 degrees F. Line cupcake pans with paper liners.

In the bowl of an electric mixer fitted with a paddle attachment, cream the butter and 2 sugars on high speed until light and fluffy, approximately 5 minutes. Lower the speed to medium, add the eggs 1 at a time, then add the vanilla and mix well. In a separate bowl, whisk together the buttermilk, sour cream, and coffee. In another bowl, sift together the flour, cocoa, baking soda, and salt. On low speed, add the buttermilk mixture and the flour mixture alternately in thirds to the mixer bowl, beginning with the buttermilk mixture and ending with the flour mixture. Mix only until blended. Fold the batter with a rubber spatula to be sure it’s completely blended.

Divide the batter among the cupcake pans (1 rounded standard ice cream scoop per cup is the right amount). Bake in the middle of the oven for 20 to 25 minutes, until a toothpick comes out clean. Cool for 10 minutes, remove from the pans, and allow to cool completely before frosting.


PEPPERMINT ICING
Adapted from Ooh You Tasty Little Things

  • 1 cup (2 sticks) butter, softened
  • 6 to 8 cups confectioners' sugar
  • 1/4 cup heavy cream
  • 1/2 teaspoon peppermint oil (less if desired; use to taste)

Mix butter in a large mixing bowl with 4 cups of sugar. Add cream and peppermint oil. On medium speed of electric mixer, beat until smooth and creamy, about 3 to 5 minutes. Gradually add the remaining sugar, 1 cup at a time, beating well after each addition (about 2 minutes), until the icing is thick enough to be of good spreading consistency. You may not need to add all of the sugar. Chill for about 15 minutes in the refrigerator before using, and only use to ice cold cupcakes.


Monday, December 24, 2007

Cookies Part Deux


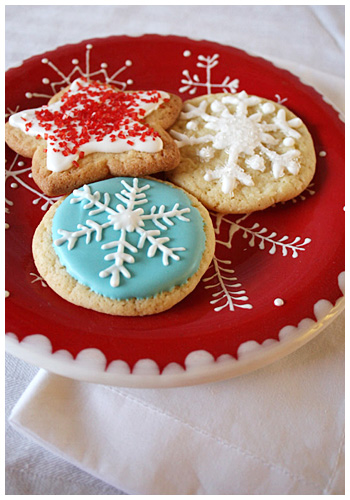
When I saw this blog post on Ooh You Tasty Little Things, I was instantly bowled over and inspired. I wanted to make them OMGRIGHTNOW because they're so adorable!

I ended up finding a recipe on AllRecipes.com that was rated highest for sugar cookies. Now, here's the thing with All Recipes (or any recipe site that has feedback and comments): there's ALWAYS suggestions on bettering the recipe. Some people are convincing. I rarely use the original recipe as is; there is always someone yelling about there being too much flour, not enough flavor, etc. So, as usual, I went with some suggestions and they didn't come out as I expect they would have had I used the original recipe. I'm going to include the modifications I used but link you to the original. If you do make it, I'd suggest the more sugar (2 3/4 cups should do), the lemon zest (so yummy), and extra 1 tsp vanilla. Keep the flour. These didn't have enough and the added sugar made them spread out, not hold any shape (thus the circles after my stars came out all bloated) and they never cooked fully before browning.

I remember the author of the blog musing how she loved decorating cookies, bless her. As I got to my second snowflake, I thought, 'I really don't love this. I'm a cake kind of girl...' It was so much work. But the end pretty is worth it, I suppose. :)


THE BEST ROLLED SUGAR COOKIES

Source: AllRecipes.com, Submitted by: Jill Saunders


1 1/2 cups butter, softened
3 cups white sugar
4 eggs
2 teaspoon vanilla extract
1 teaspoon lemon zest

4 3/4 cups all-purpose flour
2 teaspoons baking powder
1 teaspoon salt

In a large bowl, cream together butter and sugar until smooth. Beat in eggs and vanilla. Stir in the flour, baking powder, and salt. Cover, and chill dough for at least one hour (or overnight).

Preheat oven to 400 degrees F (200 degrees C). Roll out dough on floured surface 1/4 to 1/2 inch thick. Cut into shapes with any cookie cutter. Place cookies 1 inch apart on ungreased cookie sheets.

Bake 8-10 minutes in preheated oven. Cool completely.


ROYAL ICING
Source: Joy of Baking.com

2 large egg whites
2 teaspoons fresh lemon juice
1/2 teaspoon vanilla extract
3 cups powdered sugar, sifted
In the bowl of your electric mixer (or with a hand mixer), beat the egg whites with the lemon juice. Add the sifted powdered sugar and vanilla and beat on low speed until combined and smooth. The icing needs to be used immediately or transferred to an airtight container as royal icing hardens when exposed to air. Cover with plastic wrap when not in use.
Red and blue Christmas 2007 FTW!

Peppermint Mania

Ever since Williams-Sonoma came out with their Peppermint Bark, we've gotten it one way or another at Christmas time. This year, I waffled on ordering it online ($30 for chocolate?? But I'm poor!) I procrastinated and then it wasn't an option. So I attempted to make it myself. I should have known from the word go that this wasn't the same.

First, the chocolate layer has a cream in it which is automatically going to keep it from forming solid. It's more of a very thick ganache. It's not easy to cut but it's bark and it's supposed to be roughly broken up so that's okay.

Second, I realized as I reached into my cabinet for the peppermint flavoring - oh God, it's not extract. I had peppermint OIL. Did a little research online quickly and found a guessimate that to substitute oil for extract, you should use around 1/4 of what is called for. I was very conservative with the flavoring (you can always add more but once it's in there and too much, it's ruined). If you're using oil as well, it will make a strange looking consistency (you know, oily) but it tastes fine. Just taste as you go along. Peppermint oil has a stronger, cooler, more crisp taste to it so use carefully.

Once it was finished, I took a step back to evaluate and I was kind of disappointed. I let everyone try it and they liked it a lot and it tastes fine but it's just not Williams-Sonoma's peppermint bark. Still, it was well liked so I'm chalking it up to a moderate success for that alone. :)


LAYERED PEPPERMINT CRUNCH BARK
Source: Bon Appétit

  • 17 ounces good-quality white chocolate (such as Lindt or Baker's), finely chopped
  • 30 red-and-white-striped hard peppermint candies, coarsely crushed (about 6 ounces)
  • 7 ounces bittersweet (not unsweetened) or semisweet chocolate, chopped
  • 6 tablespoons whipping cream
  • 1/8 teaspoon peppermint oil (add more to taste)


Turn large baking sheet bottom side up. Cover securely with foil. Mark 12 x 9-inch rectangle on foil. Stir white chocolate in metal bowl set over saucepan of barely simmering water (do not allow bottom of bowl to touch water) until chocolate is melted and smooth and candy thermometer registers 110°F. (chocolate will feel warm to touch). Remove from over water. Pour 2/3 cup melted white chocolate onto rectangle on foil. Using icing spatula, spread chocolate to fill rectangle. Sprinkle with 1/4 cup crushed peppermints. Chill until set, about 15 minutes.

Stir bittersweet chocolate, cream and peppermint extract in heavy medium saucepan over medium-low heat until just melted and smooth. Cool to barely lukewarm, about 5 minutes. Pour bittersweet chocolate mixture in long lines over white chocolate rectangle. Using icing spatula, spread bittersweet chocolate in even layer. Refrigerate until very cold and firm, about 25 minutes.

Rewarm remaining white chocolate in bowl set over barely simmering water to 110°F. Working quickly, pour white chocolate over firm bittersweet chocolate layer; spread to cover. Immediately sprinkle with remaining crushed peppermints. Chill just until firm, about 20 minutes.

Lift foil with bark onto work surface; trim edges. Cut bark crosswise into 2-inch-wide strips. Using metal spatula, slide bark off foil and onto work surface. Cut each strip crosswise into 3 sections and each section diagonally into 2 triangles. (Can be made 2 weeks ahead. Chill in airtight container.) Let stand 15 minutes at room temperature before serving.