Monday, December 24, 2007

Cookies Part Deux


When I saw this blog post on Ooh You Tasty Little Things, I was instantly bowled over and inspired. I wanted to make them OMGRIGHTNOW because they're so adorable!

I ended up finding a recipe on AllRecipes.com that was rated highest for sugar cookies. Now, here's the thing with All Recipes (or any recipe site that has feedback and comments): there's ALWAYS suggestions on bettering the recipe. Some people are convincing. I rarely use the original recipe as is; there is always someone yelling about there being too much flour, not enough flavor, etc. So, as usual, I went with some suggestions and they didn't come out as I expect they would have had I used the original recipe. I'm going to include the modifications I used but link you to the original. If you do make it, I'd suggest the more sugar (2 3/4 cups should do), the lemon zest (so yummy), and extra 1 tsp vanilla. Keep the flour. These didn't have enough and the added sugar made them spread out, not hold any shape (thus the circles after my stars came out all bloated) and they never cooked fully before browning.

I remember the author of the blog musing how she loved decorating cookies, bless her. As I got to my second snowflake, I thought, 'I really don't love this. I'm a cake kind of girl...' It was so much work. But the end pretty is worth it, I suppose. :)


THE BEST ROLLED SUGAR COOKIES

Source: AllRecipes.com, Submitted by: Jill Saunders


1 1/2 cups butter, softened
3 cups white sugar
4 eggs
2 teaspoon vanilla extract
1 teaspoon lemon zest

4 3/4 cups all-purpose flour
2 teaspoons baking powder
1 teaspoon salt

In a large bowl, cream together butter and sugar until smooth. Beat in eggs and vanilla. Stir in the flour, baking powder, and salt. Cover, and chill dough for at least one hour (or overnight).

Preheat oven to 400 degrees F (200 degrees C). Roll out dough on floured surface 1/4 to 1/2 inch thick. Cut into shapes with any cookie cutter. Place cookies 1 inch apart on ungreased cookie sheets.

Bake 8-10 minutes in preheated oven. Cool completely.


ROYAL ICING
Source: Joy of Baking.com

2 large egg whites
2 teaspoons fresh lemon juice
1/2 teaspoon vanilla extract
3 cups powdered sugar, sifted
In the bowl of your electric mixer (or with a hand mixer), beat the egg whites with the lemon juice. Add the sifted powdered sugar and vanilla and beat on low speed until combined and smooth. The icing needs to be used immediately or transferred to an airtight container as royal icing hardens when exposed to air. Cover with plastic wrap when not in use.
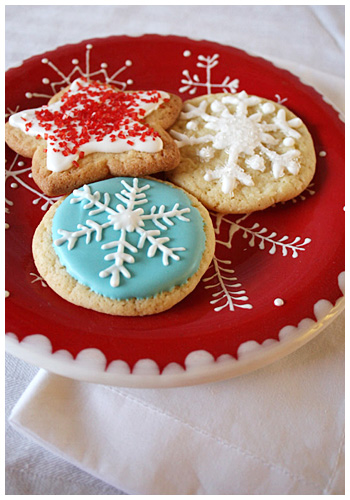
Red and blue Christmas 2007 FTW!

Peppermint Mania

Ever since Williams-Sonoma came out with their Peppermint Bark, we've gotten it one way or another at Christmas time. This year, I waffled on ordering it online ($30 for chocolate?? But I'm poor!) I procrastinated and then it wasn't an option. So I attempted to make it myself. I should have known from the word go that this wasn't the same.

First, the chocolate layer has a cream in it which is automatically going to keep it from forming solid. It's more of a very thick ganache. It's not easy to cut but it's bark and it's supposed to be roughly broken up so that's okay.

Second, I realized as I reached into my cabinet for the peppermint flavoring - oh God, it's not extract. I had peppermint OIL. Did a little research online quickly and found a guessimate that to substitute oil for extract, you should use around 1/4 of what is called for. I was very conservative with the flavoring (you can always add more but once it's in there and too much, it's ruined). If you're using oil as well, it will make a strange looking consistency (you know, oily) but it tastes fine. Just taste as you go along. Peppermint oil has a stronger, cooler, more crisp taste to it so use carefully.

Once it was finished, I took a step back to evaluate and I was kind of disappointed. I let everyone try it and they liked it a lot and it tastes fine but it's just not Williams-Sonoma's peppermint bark. Still, it was well liked so I'm chalking it up to a moderate success for that alone. :)


LAYERED PEPPERMINT CRUNCH BARK
Source: Bon Appétit

  • 17 ounces good-quality white chocolate (such as Lindt or Baker's), finely chopped
  • 30 red-and-white-striped hard peppermint candies, coarsely crushed (about 6 ounces)
  • 7 ounces bittersweet (not unsweetened) or semisweet chocolate, chopped
  • 6 tablespoons whipping cream
  • 1/8 teaspoon peppermint oil (add more to taste)


Turn large baking sheet bottom side up. Cover securely with foil. Mark 12 x 9-inch rectangle on foil. Stir white chocolate in metal bowl set over saucepan of barely simmering water (do not allow bottom of bowl to touch water) until chocolate is melted and smooth and candy thermometer registers 110°F. (chocolate will feel warm to touch). Remove from over water. Pour 2/3 cup melted white chocolate onto rectangle on foil. Using icing spatula, spread chocolate to fill rectangle. Sprinkle with 1/4 cup crushed peppermints. Chill until set, about 15 minutes.

Stir bittersweet chocolate, cream and peppermint extract in heavy medium saucepan over medium-low heat until just melted and smooth. Cool to barely lukewarm, about 5 minutes. Pour bittersweet chocolate mixture in long lines over white chocolate rectangle. Using icing spatula, spread bittersweet chocolate in even layer. Refrigerate until very cold and firm, about 25 minutes.

Rewarm remaining white chocolate in bowl set over barely simmering water to 110°F. Working quickly, pour white chocolate over firm bittersweet chocolate layer; spread to cover. Immediately sprinkle with remaining crushed peppermints. Chill just until firm, about 20 minutes.

Lift foil with bark onto work surface; trim edges. Cut bark crosswise into 2-inch-wide strips. Using metal spatula, slide bark off foil and onto work surface. Cut each strip crosswise into 3 sections and each section diagonally into 2 triangles. (Can be made 2 weeks ahead. Chill in airtight container.) Let stand 15 minutes at room temperature before serving.

Wednesday, December 19, 2007

CookiesCookiesCookies

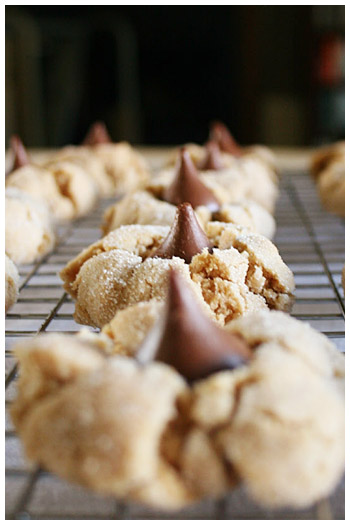
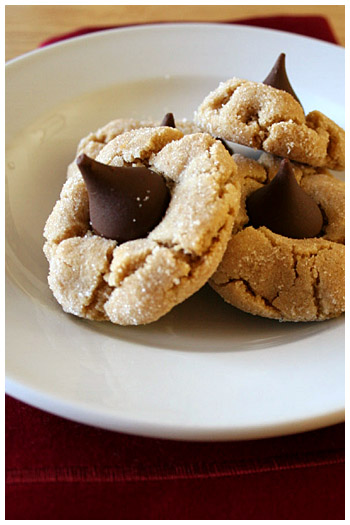
Being a stickler for tradition, I can only make the classic Peanut Butter Blossoms at Christmas although there's nothing really inherently Christmasy about them. It's chocolate and peanut butter, you know? Alas, it's a Christmas Cookie in our family so when the month of December rolls around, it's one of the first things I look forward to. The light peanut butter cookie, the melty chocolate Kiss... Heaven.

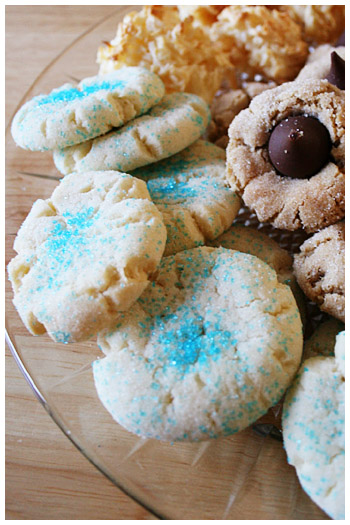
I got kind of ambitious with the many things on my list of Christmas Foods this year so I started early. The first week I made four batches of cookies alone. (This week I'm on the more intense cakes and candies but I'll get to that later.) I made two batches of the blossoms then wanted something that would travel well and wasn't chocolate. I settled on Coconut Macaroons which turned out really good but, as my mom says, what with Eagle Brand isn't good?

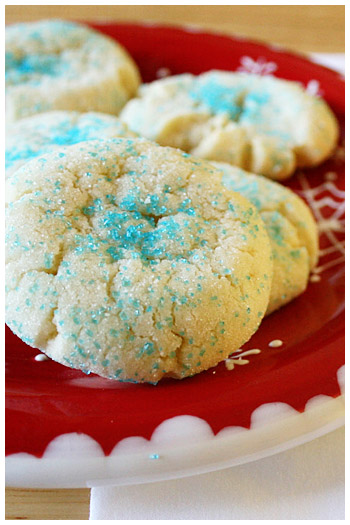
Last, I knew I was going to make cut-out sugar cookies later but still craved a sugary cookie without all the work. I found a Soft Sugar Cookie on All Recipes that took a few tries with the shaping but finally came out quite nice. Simple but with a good taste. My Christmas color theme this year is red and light blue (like the former Houston Oilers! Holla!) so I rolled one set of the sugar cookies in blue and sprinkled a little more in the center just for pop.


PEANUT BUTTER BLOSSOMS

Cream together:

1/2 cup shortening
1/2 cup peanut butter
1/2 cup sugar
1/2 cup packed brown sugar (light)

Mix in:

1 egg slightly beaten
1 tsp vanilla
1 level tsp baking soda
1/2 tsp salt

Stir in:

1 1/4 cups of flour (watch for consistency; should look shiny but hold together. Add less if needed)

Roll into balls, coat w/sugar, bake 375 degrees for 10 min. Remove from oven, press chocolate kisses into each center spreading ball so edges crack. Bake additional 1-2 minutes until chocolate melts.


COCONUT MACAROONS
Source: Ina Garten

14 ounces sweetened shredded coconut
14 ounces sweetened condensed milk
1 teaspoon pure vanilla extract
2 extra-large egg whites, at room temperature
1/4 teaspoon kosher salt

Preheat the oven to 325 degrees F.

Combine the coconut, condensed milk, and vanilla in a large bowl. Whip the egg whites and salt on high speed in the bowl of an electric mixer fitted with the whisk attachment until they make medium-firm peaks. Carefully fold the egg whites into the coconut mixture.

Drop the batter onto sheet pans lined with parchment paper using either a 1 3/4-inch diameter ice cream scoop, or two teaspoons. Bake for 25 to 30 minutes, until golden brown. Cool and serve.


SOFT SUGAR COOKIES IV
From AllRecipes.com, Submitted by Laura Stearns


2/3 cup shortening
2/3 cup butter
1 1/2 cups white sugar
2 eggs
2 teaspoons vanilla extract
3 1/2 cups all-purpose flour
2 teaspoons baking powder
1 teaspoon salt
1/3 cup granulated sugar for decoration

Preheat oven to 350 degrees F (175 degrees C).

In a medium bowl, cream together the butter, shortening and sugar. Stir in the eggs and vanilla. Combine the flour, baking powder and salt, stir into the creamed mixture until dough comes together. Roll dough into walnut sized balls and roll the balls in sugar. Place them on an unprepared cookie sheet about 2 inches apart. Press gently with bottom of a glass to make into evenly thick discs.

Bake cookies 10 to 12 minutes in the preheated oven, until bottom is light brown. Remove from baking sheets to cool on wire racks.

Saturday, November 10, 2007

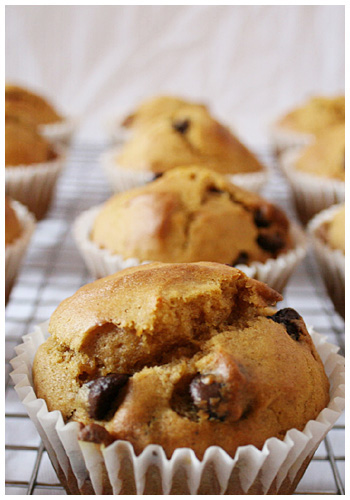
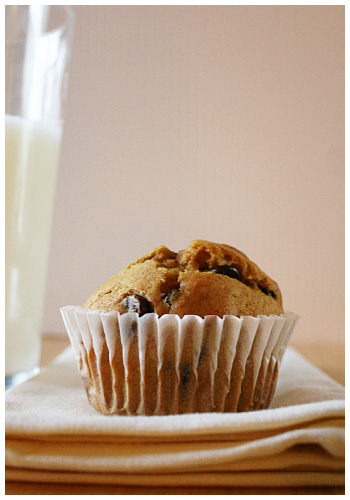
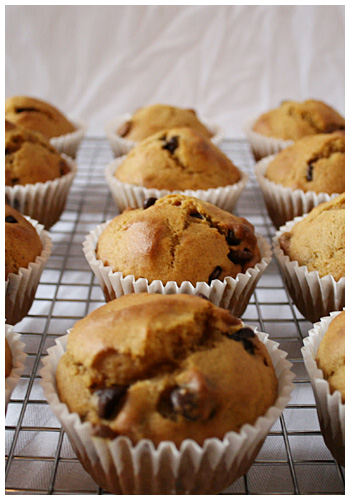
Pumpkin Chocolate Chip Muffins


A few weeks ago, fall started to happen. And pumpkin products, drinks at Starbucks (holy beJesus, best everrr) started popping up. I jumped on that pumpkin wagon like crazy and bought cans of the stuff, ready to make magic. Then I lost steam. Staring at my cupboards this past week, I realized fall past me by and we're now well into winter (Starbucks is now serving they're frooffy eggnog lattes and peppermint mochas! [shakes fist]). The problem remains: I still have my cans of pumpkin. So I'm PUMPKIN SUITING UP. It's time to use this mushy fruit until I can'ts use it no mo.


First on the pumpkin parade is muffins. I got this recipe from All Recipes.com and it was disturbingly simple. Disturbing because I don't trust things that are TOO easy. But they came out perfectly fine. I'm more of a cupcake gal myself so muffins are always a hit or miss with me. These were not as sweet as I expected but the chocolate chips make up for the lack of sugar in the batter itself. The original recipe calls for all the traditional pumpkin spices separately but I didn't have ground cloves - I only had pumpkin pie spice which is a combination of all the biggies: cinnamon, cloves, nutmeg and ginger. I substituted that and added about double the amount of chocolate originally called for. What? I like chocolate.

They came out quite yummy but were especially good warm (melty chocolate!).


PUMPKIN CHOCOLATE CHIP MUFFINS

Adapted from AllRecipes.com, Submitted by: Donna

3/4 cup white sugar
1/4 cup vegetable oil
2 eggs
3/4 cup canned pumpkin
1/4 cup water
1 1/2 cups all-purpose flour
3/4 teaspoon baking powder
1/2 teaspoon baking soda
1 teaspoon pumpkin spice
1/4 teaspoon cinnamon
1 cup semisweet chocolate chips

Preheat the oven to 400 degrees F (200 degrees C). Grease and flour muffin pan or use paper liners.

Mix sugar, oil, eggs. Add pumpkin and water. In separate bowl mix together the baking flour, baking soda, baking powder, spices and salt. Add wet mixture and stir in chocolate chips.

Fill muffin cups 2/3 full with batter. Bake in preheated oven for 20 to 25 minutes.

Sunday, October 28, 2007

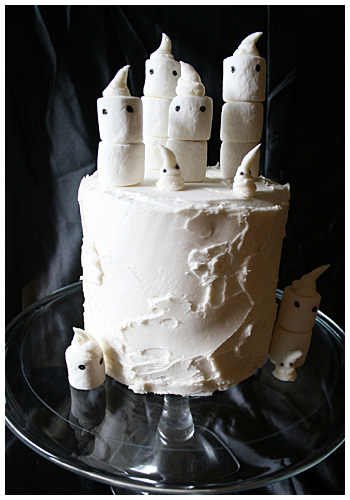
Chocolate Ghost Cake


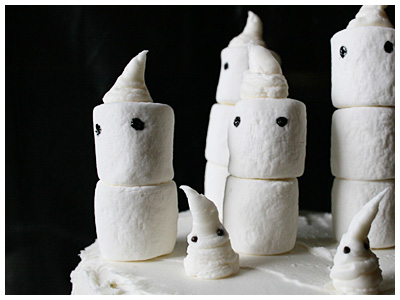
Look! I baked! I know, it's been a while. I wasn't properly inspired lately. But now Halloween is days away and I was dying to try this cake, seen originally at
Martha Stewart's site. I didn't follow either recipe for her cake or icing and was mildly annoyed there was no further instruction on even how to make the cake decorations. So I winged it.

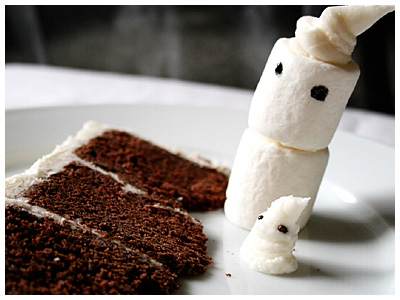
I had to buy the 6-inch round pans which were smaller than I anticipated. Think top tier of a wedding cake. They also took longer to bake because they were taller than normal when I split the batter into thirds for three layers. There was much testing; many toothpicks were used but it turned out around 30-35 minutes and, thanks to Ina Garten's lovely recipe, they came out still moist.

The little ghosts perched atop the cake were relatively easy but they're pretty delicate on the whole. Icing isn't strong enough to hold the marshmallows together; toothpicks work much better. I forgot I didn't have little marshmallows to make the mini-ghosts so I had to simply pipe them on, like the bigger ghost's tops. The eyes were drawn on with just a toothpick dipped in black coloring except for the little guys; those are chocolate jimmies (because the coloring just won't stick as well to buttercream icing).

The thing is kind of a nuisance to store. It's so tall! After the marshmallows, it's nearly a foot tall. Too big for a cake stand cover, too delicate decorative top to cover with foil. Maybe syran wrap. I've since frozen it but I recommend if you're going to serve it, to do so directly after assembly. It will not travel easy... But Ina's chocolate cake is delish and even if you don't end up making this cake specifically, give the regular cake a try. Mmm. Chocolate...


CHOCOLATE CAKE
Adapted from The Barefoot Contessa

2 1/2 cups all-purpose flour
1 1/2 cups good cocoa powder
2 1/4 teaspoons baking soda
1/2 teaspoon kosher salt
1/2 pound (2 sticks) unsalted butter, at room temperature
1 cup granulated sugar
1 cup light brown sugar, packed
3 extra-large eggs, at room temperature
3 teaspoons pure vanilla extract
1 1/2 cups buttermilk, at room temperature
3/4 cup sour cream, at room temperature
3 tablespoons brewed coffee


Preheat the oven to 350 degrees F. Butter and flour three 6-inch round pans.

In a medium bowl, sift together the flour, cocoa, baking soda, and salt.

In the bowl of an electric mixer fitted with a paddle attachment, cream the butter and sugars on high speed until light, approximately 5 minutes. Add the eggs and vanilla and mix well. Combine the buttermilk, sour cream, and coffee. On low speed, add the flour mixture and the buttermilk mixture alternately in thirds, beginning with the buttermilk mixture and ending with the flour mixture. Mix the batter only until blended.

Pour the batter into the prepared pans, smooth the tops with a spatula, and bake in the center of the oven for 30 to 35 minutes, or until a toothpick comes out clean. Cool to room temperature.


VANILLA BUTTERCREAM ICING

1 cup Crisco Shortening
1/2 stick butter, room temperature
2 tbsps heavy whipping cream
1 tsp vanilla
4 cups powdered sugar, sifted (measure then sift)

In your mixer bowl, beat the shortening until it's smooth, add the butter and beat together until smooth and light and fluffy. Add smaller amount of the heavy cream indicated in the recipe and the vanilla and mix well.

Add half the powdered sugar and mix for 5 minutes on low-med speed. Add remaining sugar and mix well. Add more cream or powdered sugar if necessary to adjust the consistency

Cut rounded tops off to make even layers of cake. Cover each of two layers with icing; turn third layer upside down using flat, smooth bottom as the top of the cake. Spread thin layer of icing over entire cake to act as "crumb coat". Freeze cake to allow icing to set completely (2-3 hours). Spread remaining icing over set coat, generously (but save a little for tops of ghosts).

Assemble marshmallow ghosts with toothpicks onto top of cake.


Sunday, September 23, 2007

Snickerdoodles are my FAVORITE


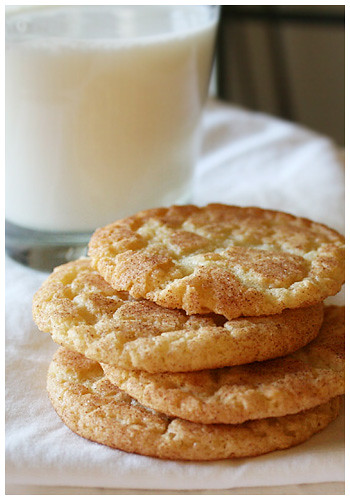
Out of all the cookies there are, snickerdoodles are my absolute favorite. That's why I decided on them the other day when I wanted a quick, familiar treat. Maybe I shouldn't have; I sat down and ate half the batch without blinking an eye. ack. So good.

One thing I will note that I adjusted during the recipe was the size of the cookies themselves. The recipe calls for 2 tablespoons of dough to be rolled into a ball but once baked, they spread way too much into thin discs. Now, they tasted fine (and chewy so, yay!) but if you want something a little more presentable and traditional-sized, I'd cut the cookie size in about half and watch the baking time (unless you like crunchy cookies which snickerdoodles traditionally are not). (BTW, pictured above are the smaller, normal-sized ones.)

I've had better snickerdoodles but in a pinch, these are pretty good.


SNICKERDOODLES
Source: The Best Recipe by Cook's Illustrated
  • 2 1/4 cups all-purpose flour
  • 2 teaspoons cream of tartar
  • 1 teaspoon baking soda
  • 1/2 teaspoon salt
  • 12 tablespoons (1 1/2 sticks) unsalted butter, softened
  • 1/4 cup vegetable shortening
  • 1 1/2 cups granulated sugar, plus 3 tablespoons for rolling cookies
  • 2 large eggs
  • 1 tablespoon ground cinnamon for rolling cookies

1. Adjust oven racks to upper- and lower-middle positions and heat oven to 400 degrees. Grease cookie sheets or line with parchment paper.


2. Whisk flour, cream of tartar, baking soda, and salt together in a medium bowl; set aside.

3. Either by hand or electric mixer, cream butter, shortening, and 1 1/2 cups sugar until combined, 1 to 1 1/2 minutes with electric mixer set at medium speed. Scrape down sides of bowl with rubber spatula. Add eggs. Beat until combined, about 30 seconds.

4. Add dry ingredients and beat at low speed until just combined, about 20 seconds.

5. Mix remaining 3 tablespoons sugar with cinnamon in shallow bowl. Working with scant 2 tablespoons of dough each time, roll dough into 1 1/2-inch balls. Roll balls in cinnamon sugar and place on cookie sheet, spacing them 2 to 2 1/2 inches apart.

6. Bake, reversing position in oven halfway through baking time (from top rack to bottom and front to back), until edges of cookies are beginning to set and centers are soft and puffy, 9 to 11 minutes. Let cookies cool on cookie sheet 2 to 3 minutes before transferring them to cooling rack with wide spatula.

Saturday, September 15, 2007

Bread Pudding for Fall


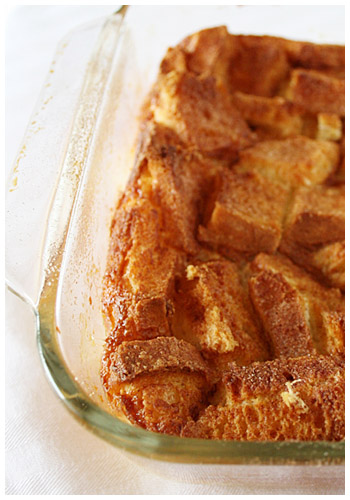
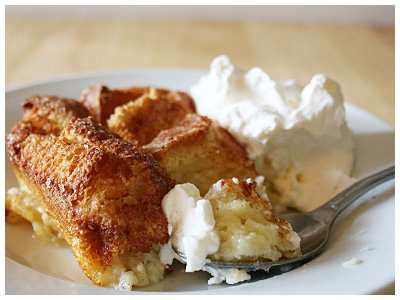
Okay, so I proclaimed it fall about a month ago when it got chilly one day mostly as wishful thinking. Autumn is my favorite season. Not only for the holidays (yay Halloween!) but the comfy, warm foods it inspires. Bread pudding has always been one of those enigmas I'd hear about but never tried. With this new baking thing I got going, I took the plunge and made it.


Now, here's the problem: I've never had bread pudding before so I don't know if this tastes like "typical" bread pudding. I only know it was pretty-really-quite good. It was the perfect combination of a pudding bottom with a lightly toasted top of cinnamon sugar. The whipped cream is a must and the fresh dollop by it's side was the perfect compliment.


I used an 8x8 pan (and halved the recipe) so I had to adjust the baking time to a little longer (15 minutes) since it was deeper than the 13x9 would have been. But everything else I did by the book, complete with the bit of bourbon. Again, I don't know how this compares with other bread puddings but it was definitely a success. I'm eager to try a chocolate bread pudding now (but it's going to be hard-to-damn-near-impossible to beat the one from Pappasito's).


RICH BREAD PUDDING WITH CRISP CINNAMON-SUGAR TOPPING

Source: The Best Recipe by Cook's Illustrated

A firm, white American-style bakery loaf gives the best texture to this pudding. In a pinch, however, use Pepperidge Farm Hearty White Bread. Avoid chewy, crusty European-style breads because they do not soften properly in the custard. If desired, serve this pudding with softly whipped cream.

CINNAMON SUGAR

2 tablespoons sugar
1/2 teaspoon ground cinnamon


BREAD PUDDING

4 large eggs, plus 1 large yolk
3/4 cup sugar
2 1/2 cups whole milk
2 1/2 cups heavy cream
3 tablespoons bourbon
1 tablespoon vanilla extract
3/4 teaspoon fresh ground nutmeg
1/4 teaspoon salt
12 ounces (about 1/2 loaf) good quality American-style white bread, sliced 3/8 inch thick and cut into 1 1/2-inch-square pieces (about 8 cups)
1 1/2 tablespoons unsalted butter, melted, plus extra for greasing pan


1. FOR THE CINNAMON SUGAR: Mix sugar and cinnamon in small bowl; set aside.

2. FOR THE PUDDING: Adjust oven rack to lower-middle position and heat oven to 325 degrees. Butter 13 x 9-inch baking dish.

3. Whisk eggs, yolk, and sugar in large bowl to blend well. Whisk in milk, cream, bourbon, vanilla extract, nutmeg, and salt. Stir in 6 cups bread cubes; mix thoroughly to moisten. Let stand 20 minutes.

4. Pour mixture into prepared baking dish. Scatter remaining 2 cups bread pieces on top, pushing down gently to partially submerge. Brush exposed bread with melted butter and sprinkle with cinnamon sugar. Bake until pudding is deep golden brown, is beginning to rise up sides of baking dish, and jiggles very slightly at the center when shaken, about 45 to 50 minutes. Let cool until set but still warm, about 45 minutes. Serve.

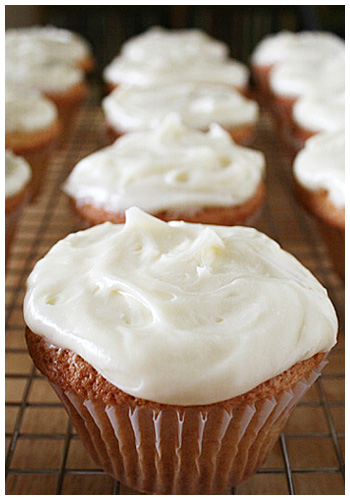
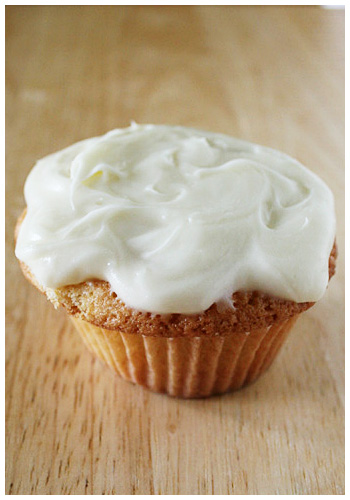
Vanilla Cupcakes cure EVERYTHING

I've been having a weird couple of weeks where I didn't want to do anything, including baking. Felt a little burned out. Got some good news this week and was off and running again. And what best to start back on than good ol' cupcakes?


VANILLA CUPCAKES WITH CREAM CHEESE ICING
Source: Ina Garten


18 tablespoons (2 1/4 sticks) unsalted butter, at room temperature
3 cups sugar
6 extra-large eggs, at room temperature
1 cup sour cream, at room temperature
1 1/2 teaspoons pure vanilla extract
3 cups all-purpose flour
1/3 cup cornstarch
1 teaspoon kosher salt
1 teaspoon baking soda


For the icing:

3/4 pound (3 sticks) unsalted butter, at room temperature
1 pound cream cheese, at room temperature
3/4 pound confectioners' sugar, sifted
1 1/4 teaspoons pure vanilla extract

Heat the oven to 350 degrees F. Line muffin pans with paper liners.

Cream the butter and sugar in the bowl of an electric mixer fitted with the paddle attachment on high speed, until light and fluffy. On medium speed, add the eggs, 2 at a time, then add the sour cream and vanilla. Scrape down the sides and stir until smooth.

Sift together the flour, cornstarch, salt, and baking soda in a bowl. With the mixer on low speed, add the flour mixture to the butter mixture until just combined. Fill the cupcake liners to the top with batter. Bake in the center of the oven for 20 to 30 minutes, until a toothpick comes out clean. Cool to room temperature.

For the icing, mix the butter, cream cheese, sugar, and vanilla in the bowl of an electric mixer fitted with the paddle attachment, on low speed, mixing just until smooth. Spread the frosting generously on top of each cupcake.

Sunday, September 2, 2007

Chocolate like volcanoes!

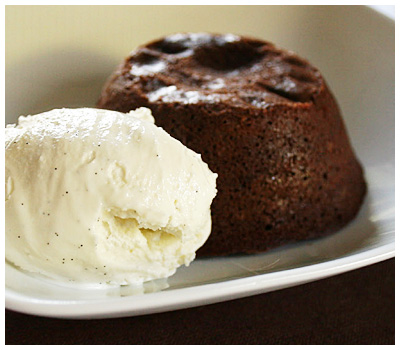
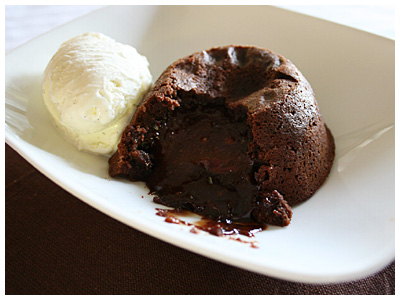
A recipe came along that perplexed me. A "cake" with gooey center that is supposedly as rich as it is messy. So... just unbaked batter, then? Well, kind of. More of a flourless chocolate cake/pudding, this dessert works because, let's face it: it's mostly just chocolate.

My first attempt was from a terribly misguided recipe that tried to make a cross between a pudding and a soufflé. There were beaten egg whites folded in and bubbles and it was just wrong wrong wrong. Spongy and airy, it wasn't what I wanted at all (and, to top it off, I must've cooked too long because it was done all the way through!) This, of course, was the one I made to test out on my friend. She said it was good but c'mon; I have taste buds too. She's a very very good friend.

SO. Cut my losses and tried a different recipe. I went out on a limb and made the one from Nigella Lawson's baking cookbook which was, to be fair, my inspiration to make them in the first place. I was a little gun shy the first go after that last one done all the way through (defeating the very name of the dish) so I undercooked this one. Recognized my mistake but it didn't matter; they TASTED completely different. Rich, SO chocolatey and Mmmm. Tried one last time just to get it right and voila! Used full cooking time (do not be afraid to let these babies go the entire 12 or 13 minutes; they're so thick, they're not going to cook too quickly like some airy concoction. They came out absolutely perfect: gooey and so full of flavor! I served with a scoop of vanilla ice cream but the recipe suggests anything from a crème fraîche to whipped cream. It certainly needs it. VERY very chocolatey. But it's definitely on my keeper list. Woo!


MOLTEN CHOCOLATE BABYCAKES

From How To Be A Domestic Goddess, Nigella Lawson


1/4 cup soft unsalted butter, plus more for greasing
12 ounces best bittersweet chocolate (OR semisweet which I used)
1/2 cup sugar
4 large eggs, beaten with a pinch of salt
1 teaspoon vanilla extract
1/3 cup all-purpose flour

6 individual 6-ounce custard cups, buttered
baking parchment


1. Unless you are making these up in advance, preheat the oven to 400 degrees, putting in a baking sheet at the same time. Lay 3 of the custard cups on a sheet of doubled baking parchment. Draw round them, remove, and then cut out the discs as marked. Press them all into the base of the cups.

2. Melt the chocolate and let it cool slightly. Cream together the butter and sugar, and gradually beat in the eggs and salt then the vanilla. (Don't mind if it looks curdled at this point; it'll smooth out later.) Now add the flour, and when all is smoothly combined scrape in the cooled chocolate, blending it to a smooth batter.

3. Divide the batter between the 6 custard cups, quickly whip the baking sheet out of the oven, arrange the cups on it and replace in the oven. Cook for 10-12 minutes (the extra 2 minutes will be needed if the puddings are refrigerator-cold when you start) and as soon as you take them out of the oven, tip out these luscious babycakes onto small plates or shallow bowls. Serve these with whipped cream, the same unwhipped in a pitcher, crème fraîche, custard or ice cream.

Serves 6.


Saturday, September 1, 2007

Double Double Your Chocolate


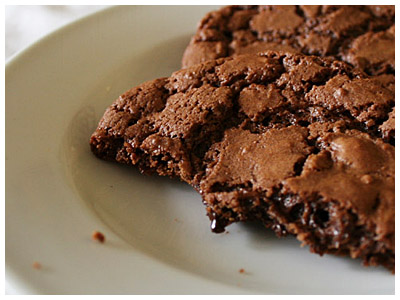
I've had these chocolate cravings for about a week now and, specifically, chocolate cookies were on my mind. I found this recipe in Martha Stewart's Living as one of the Cookies of the Month. As a rule, I generally don't like milk chocolate too much (which the original recipe called for) so I simply replaced it with semi-sweet for a darker flavor. They came out a tad crunchier than I'd like (I'm a chewy cookie person) so I'd take a minute or two off of the cooking time if you are as well.


The batter was also a little warm for my liking (what with the melted chocolate and all), so I threw it in the refrigerator for 2-3 minutes to let it firm up so it was easier to scoop. If the batter is too warm, the cookies will spread too much (which they already do so watch how close you put them).

All in all, a pretty good, easy chocolate fix!


DOUBLE CHOCOLATE CHUNK COOKIES
Adapted from Martha Stewart's Living

These rich cookies should seem a bit soft when you take them out of the oven. They firm up as they cool, so be careful not to overbake them.


1 cup all-purpose flour
1/2 cup unsweetened cocoa powder
1/2 teaspoon baking soda
1/2 teaspoon salt
8 ounces good-quality semi-sweet chocolate (4 ounces coarsely chopped, 4 ounces cut into 1/4-inch chunks)
1 stick (8 tablespoons) unsalted butter
1 1/2 cups sugar
2 large eggs
1 teaspoon pure vanilla extract

1. Preheat oven to 325. Whisk together flour, cocoa powder, baking soda and salt in a medium bowl; set aside. Melt coarsely chopped chocolate with the butter in heatproof bowl in microwave, watching closely and stirring every 30 or so seconds until smooth (or melt in double boiler, in a bowl set over a pan of simmering water).

2. Transfer chocolate mixture to bowl of an electric mixer fitted with paddle attachment. Add sugar, eggs, and vanilla; mix on medium speed until combined. Reduce speed to low; gradually mix in flour mixture. Fold in chocolate chunks.

3. Scoop batter using a 1 1/2-inch ice cream scoop; place 2 inches apart on parchment-lined baking sheets. Bake until cookies are flat and surfaces begin to crack, about 15 minutes. Transfer on parchment to wire racks. Let cool 5 minutes. Cookies can be stored in an airtight container at room temperature for up to 3 days.